ANY Process Demo: WMS Pick - Prerequisites
In this demo script, a released sales order is used as source document for a Warehouse Shipment and also for a Warehouse Pick. Create this released sales order before using the WMS Pick pre-configured processes.
To pick and ship inventory available to pick (including lots and serials) execute the demo scripts for the following pre-configured processes first:
▪ WMS Receipt
▪ WMS Put Away
Sales order and shipment
On the Warehouse Put-Away lines, the Qty. to Handle field is automatically filled by Business Central. These quantities must be filled in through the pre-configured process, so they need to be set to zero.
Go to the Sales Orders page.
Create a new sales order for customer 10000, The Cannon Group PLC.
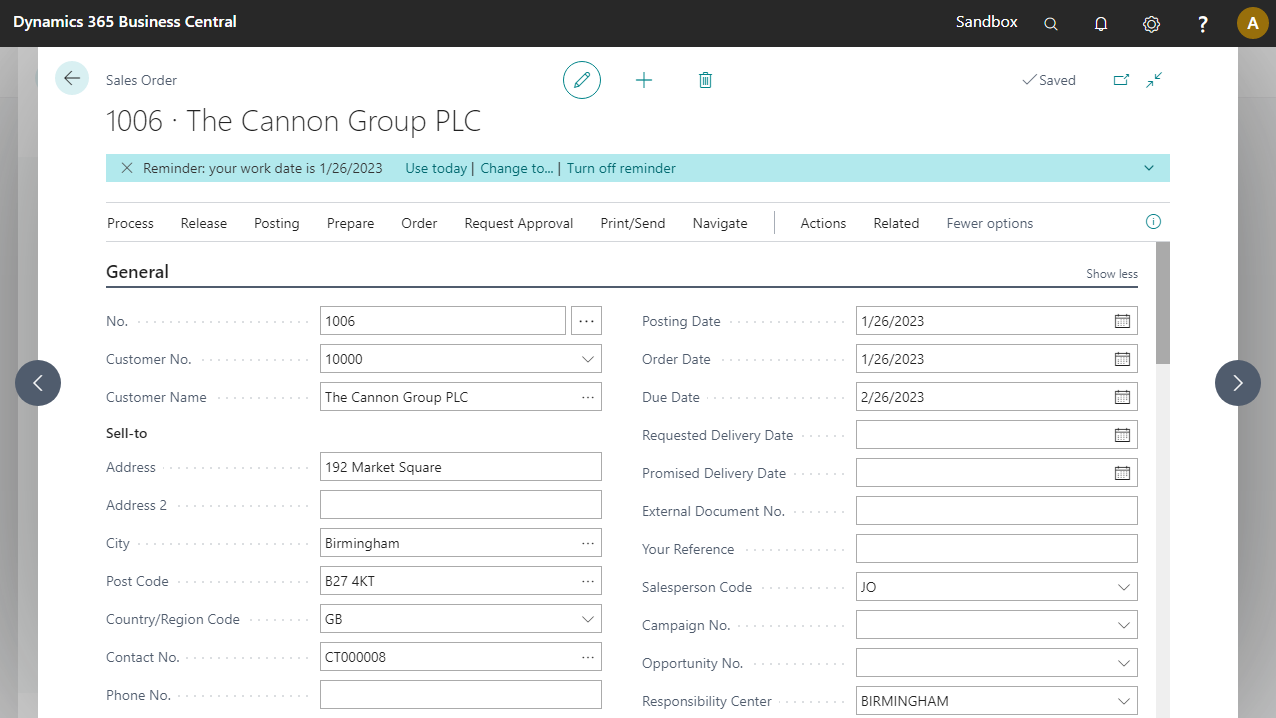
Under the Shipping & Billing fast tab, enter WHITE as location code and add a shipment date.

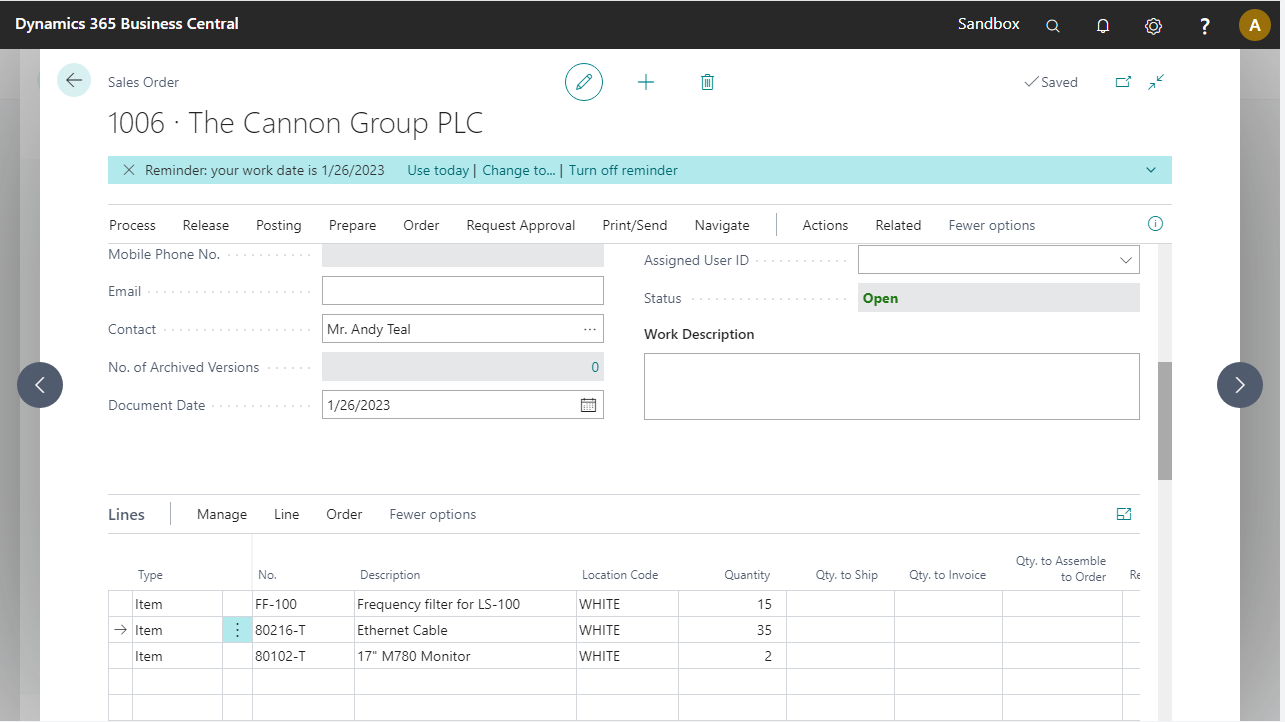
Enter the following items as order lines. Make sure the location code is WHITE.
| Item No. | Quantity |
|---|---|
| FF-100 | 15 |
| 80216-T (as lot controlled item) | 35 |
| 80102-T (as a serial-controller item) | 2 |
The assignment of specific lots to a lot-controlled item can be done in two ways in Business Central:
- During order entry after sales order creation
- During the pick process
This demo script describes option 2. To implement option 1, use the Ctrl+Shift+I action or Line > Related Information > Item Tracking Lines at the sales order line to assign one or more specific lots and serial numbers.
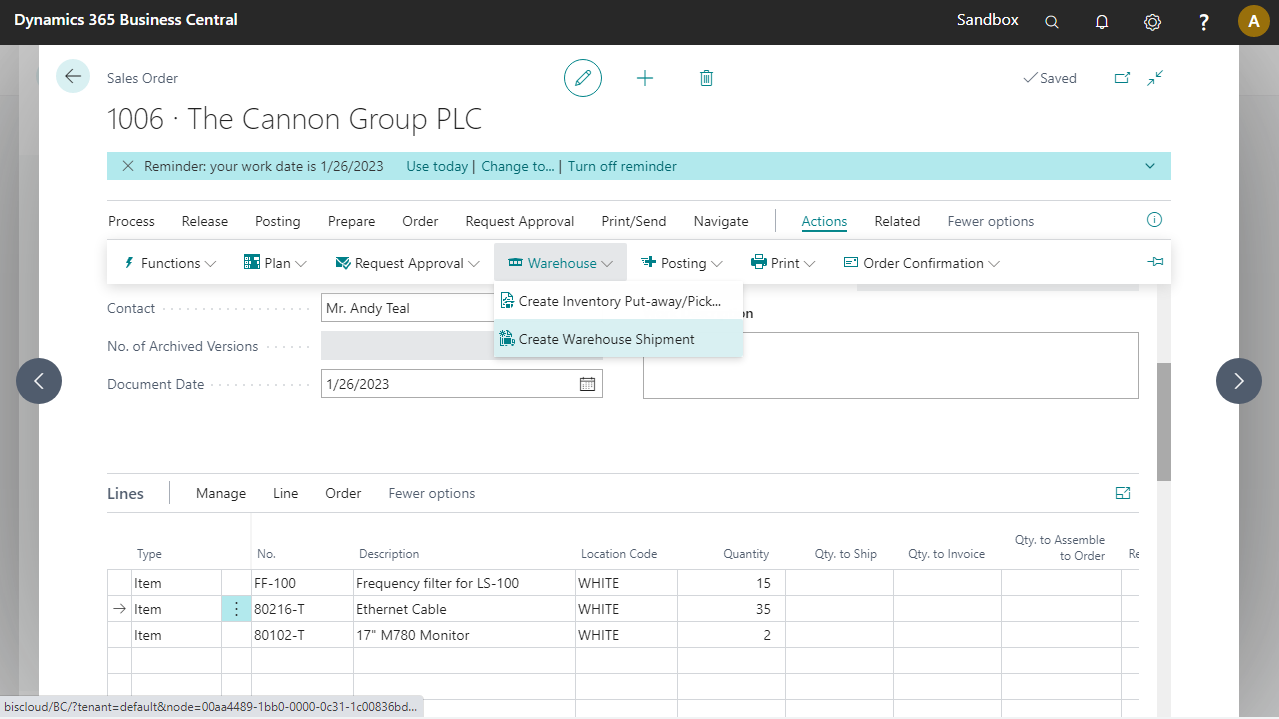
Release the sales order and create the warehouse shipment using Actions > Warehouse > Create Warehouse Shipment.
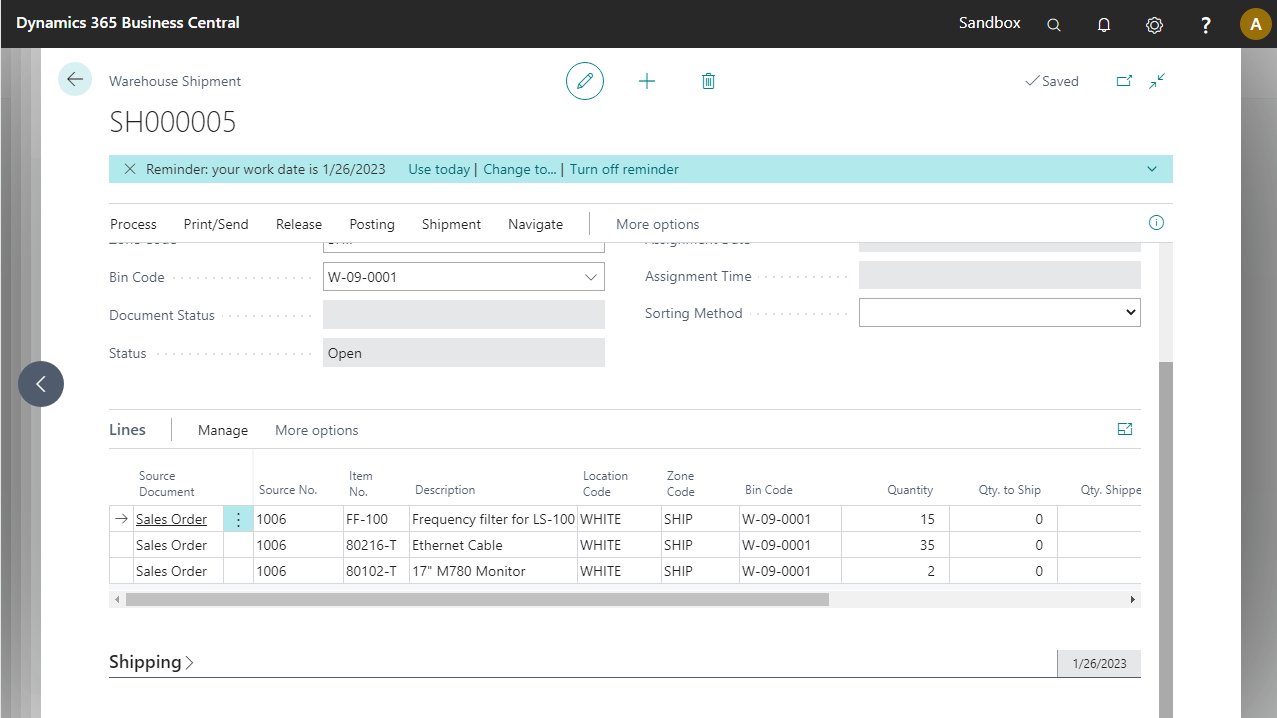
Open the newly created warehouse shipment document by going to the Warehouse Shipments page and opening the document created.
In the lines part, add the following fields after the Description field using personalization:
- Location Code
- Zone Code
- Bin Code
Move inventory
In the demo company Cronus International Ltd., the available inventory to pick is not enough to get the sales order shipped.
After executing the WMS Receipt and WMS Put-Away processes, there is still not enough available inventory to pick for the items entered at the sales order. Check and if needed move some inventory or make a stock correction.
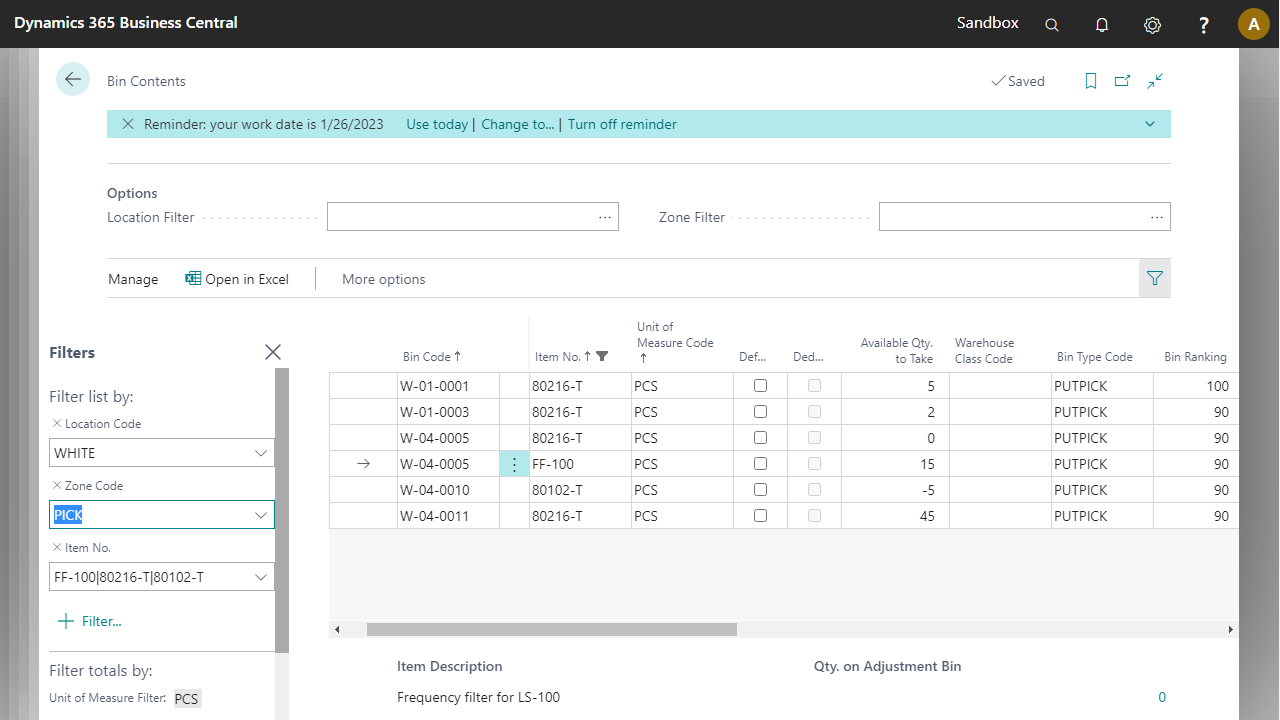
Go to the Bin Contents page.
Add the following filters:
| Field | Filter |
|---|---|
| Location Code | WHITE |
| Zone Code | PICK |
| Item No. | FF-100|80216-T|80102-T |
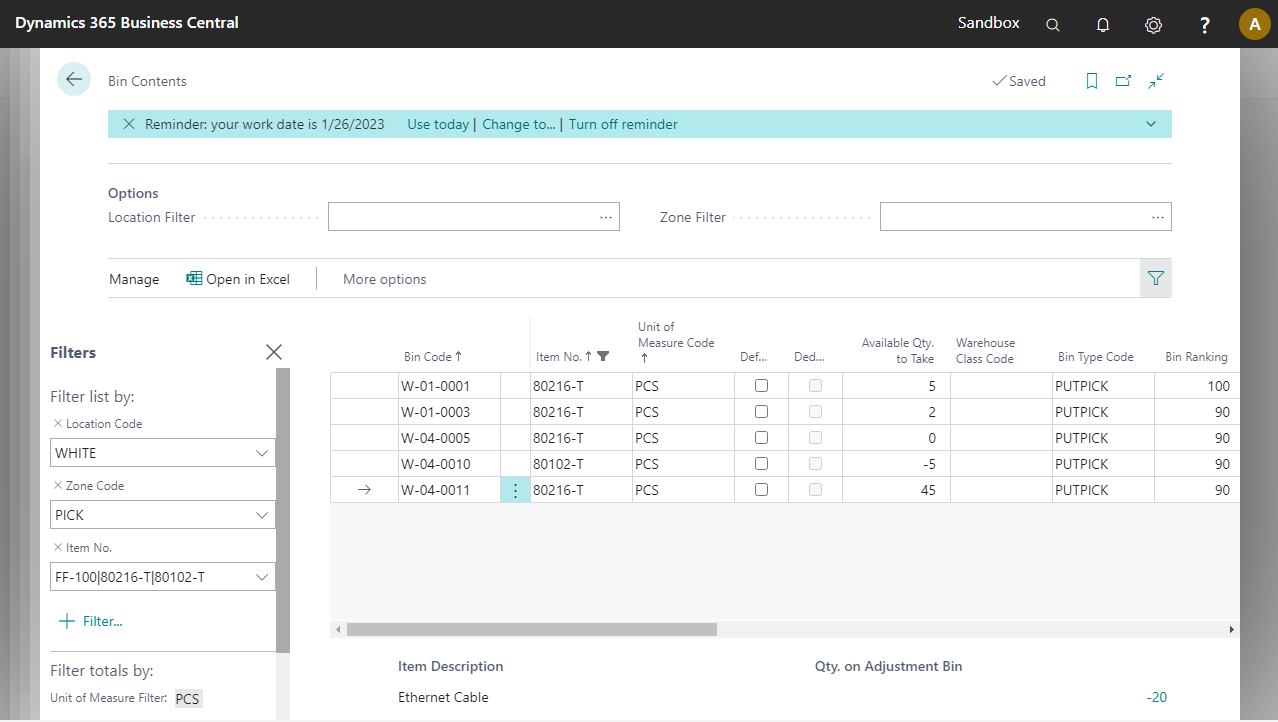
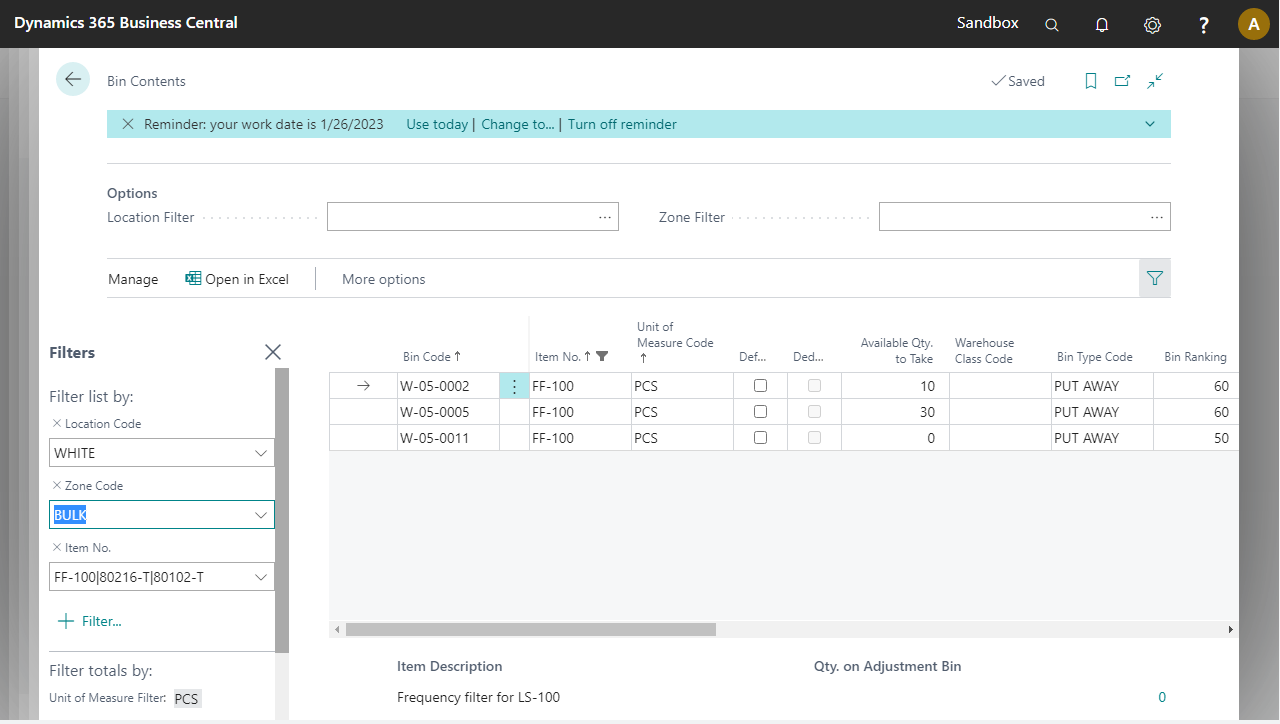
Confirm that there is enough inventory for all items by checking the Available Qty. to Take field. In this case, there are no FF-100 entries in this zone but they exist in the BULK zone. Check this by changing the Zone Code filter to BULK.
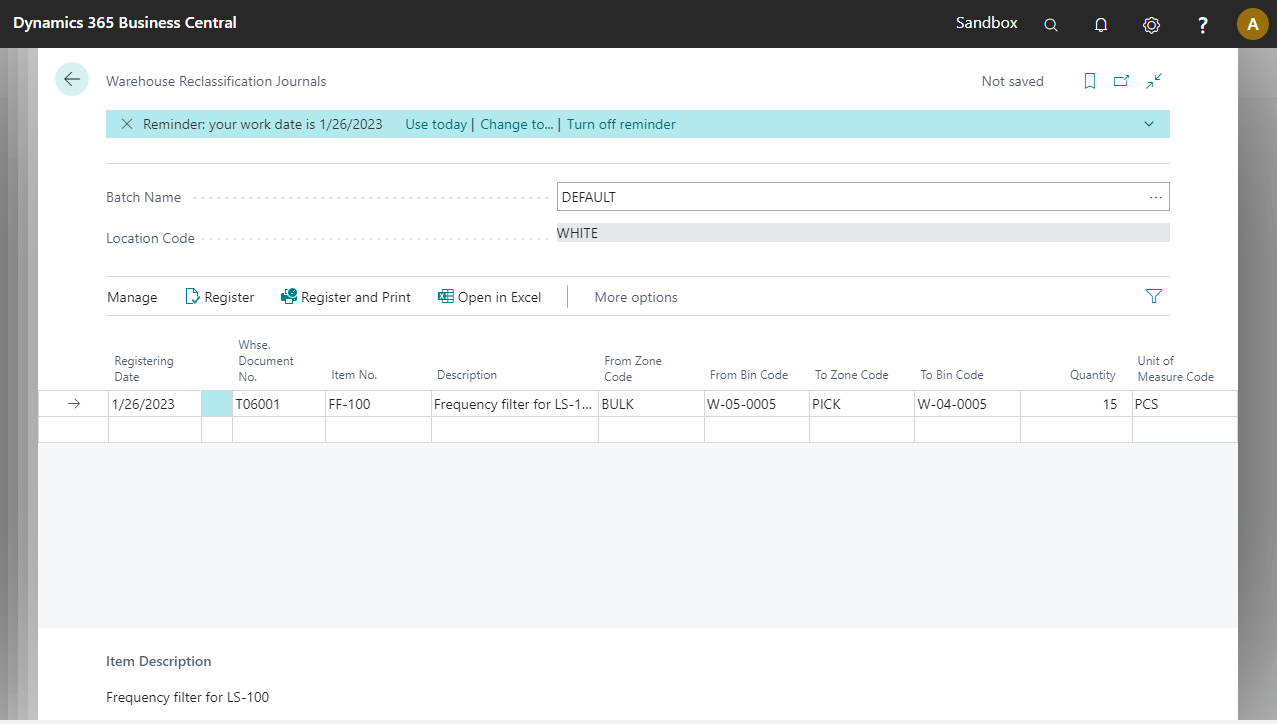
Move inventory to the PICK zone, either by executing the Move Inventory pre-configured process or by executing the following steps in Business Central.
Open the Warehouse Reclassification Journals page and enter a line for item FF-100 and move 15 PCS of inventory from BULK to PICK. Finally, register the journal.
Back in Bin Contents, the new inventory can be seen in the PICK zone.
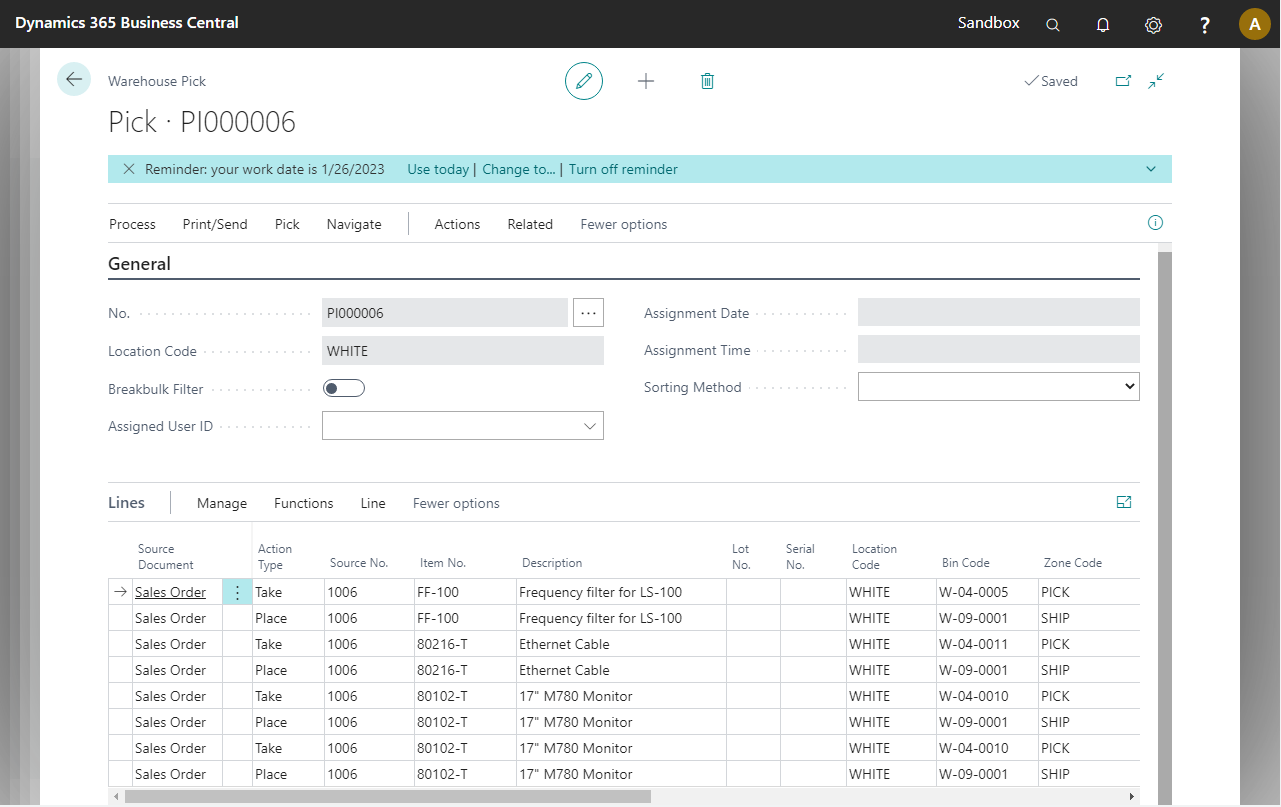
Create Warehouse Pick
In this demo script, a Warehouse Pick must be created before using the WMS Pick pre-configured process.
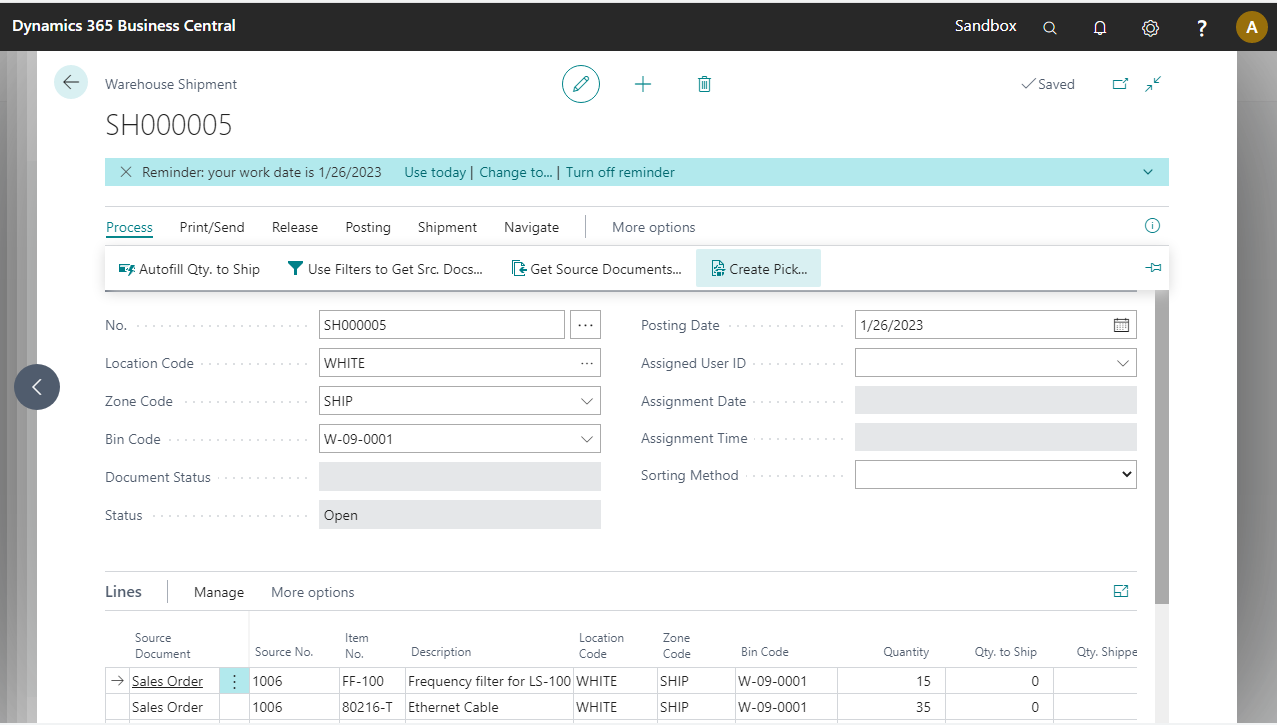
Go to the Warehouse Shipments page and open the warehouse shipment document again.
Select the action Process > Create Pick.
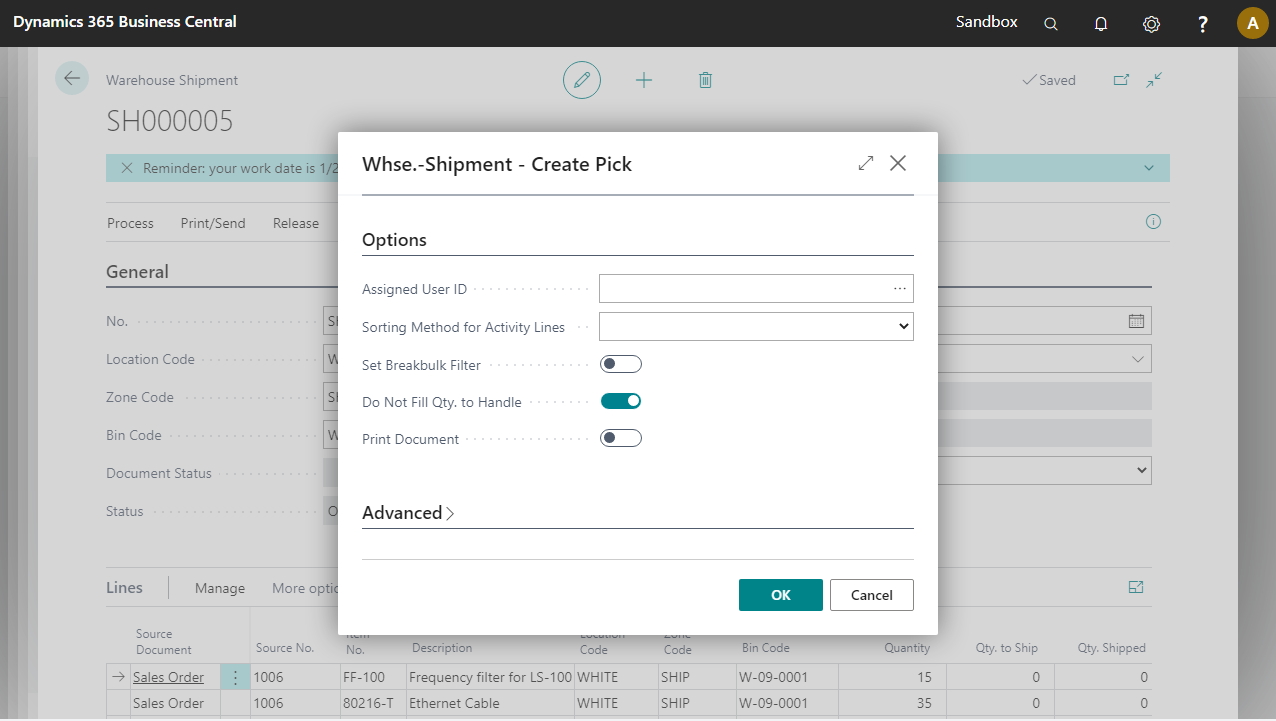
In the popup, make sure Do Not Fill Qty. to Handle is turned on. In the Warehouse Pick lines, the Qty. to Handle field is normally automatically filled. These quantities must be filled in through the pre-configured process, not by this pick creation process in Business Central. Select OK.
Go to the Warehouse Picks page and open the new pick document. Using personalization, add Lot No., Serial No., and Location Code after the description field in the lines section. Note that for every item there are two lines with action type Take and Place. For serial tracked items, every serial number has its own set of lines.