ANY Process Demo: WMS Put-Away
Overall process flow
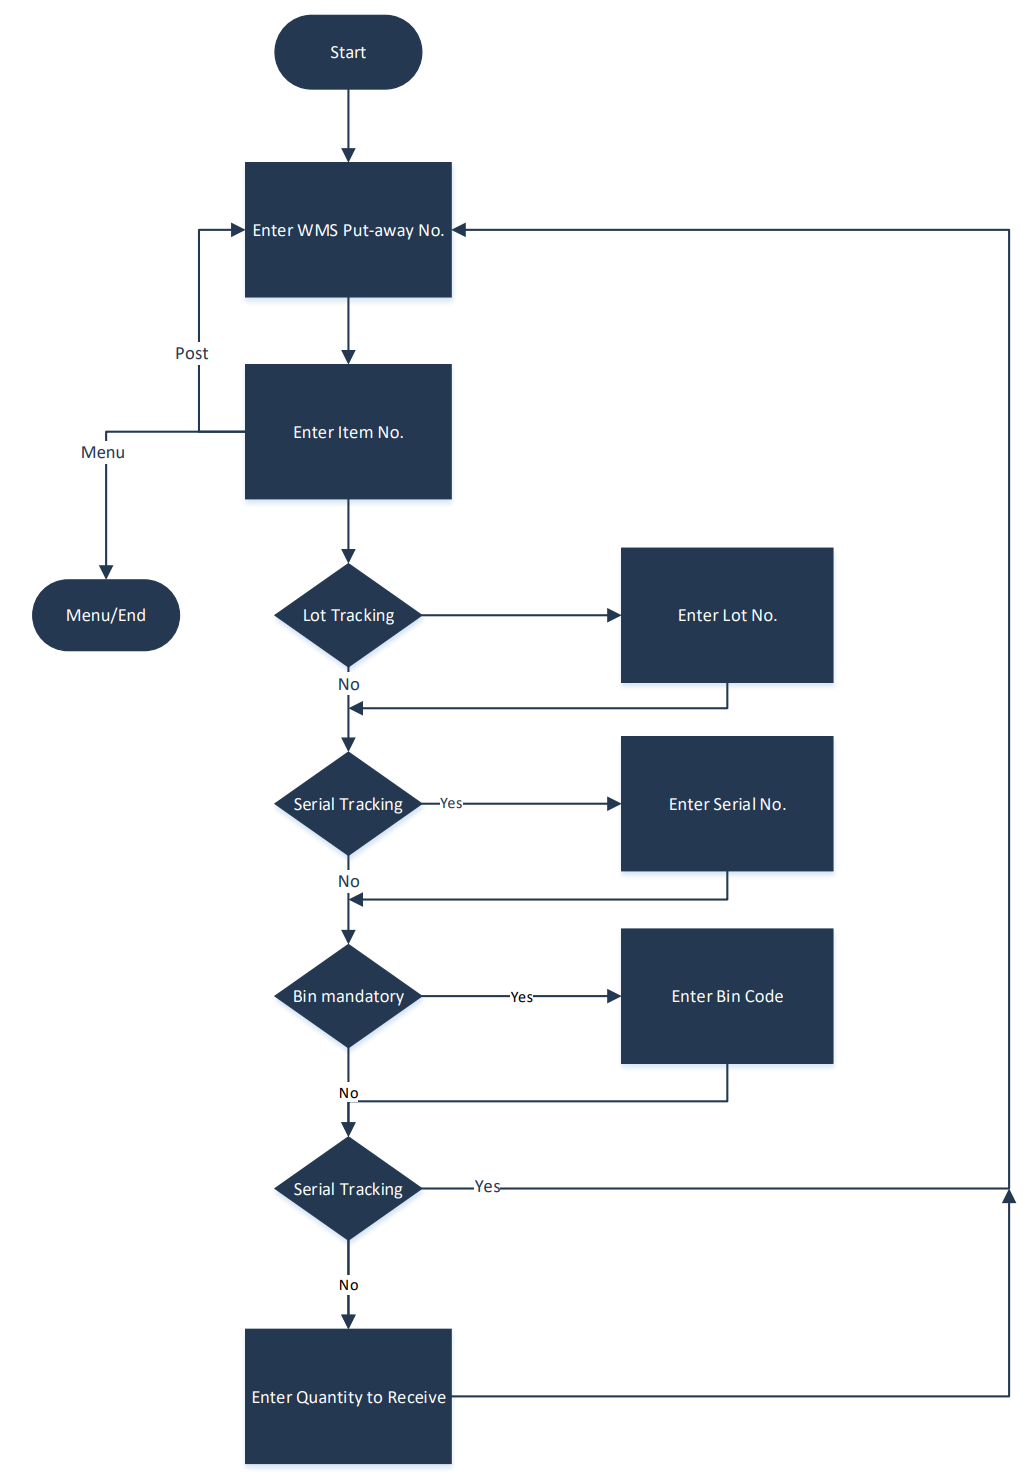
The WMS Put-Away process supports the put-away process in the warehouse based on a WMS Put-Away document generated in advance in Business Central from a Warehouse Receipt document.
After selecting a WMS Put-Away document, enter the item code for each item to receive. Optionally, depending on the location setup, enter a bin.
Next, enter the quantity to put away. This quantity is added to the already handled quantity and then compared with the ordered quantity. If the quantity to put away plus the handled quantity plus the outstanding quantity exceeds the ordered quantity, an error message appears.
After accepting the input quantity, the put-away document line is updated. When the quantity to put away plus the handled quantity is less than the outstanding quantity, the original put-away document line is split and an extra line is created with a quantity equal to the original outstanding quantity minus the quantity put away. Finally, the put-away document is registered.
When Warehouse Receipt lot numbers are registered, the lot number is processed all the way through the put-away process. So, processing put-aways with lot numbers is supported by this pre-configured process.
Steps
Make sure you have already set up the prerequisites for this process.
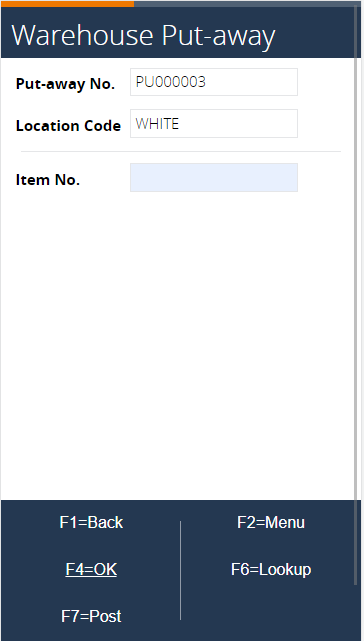
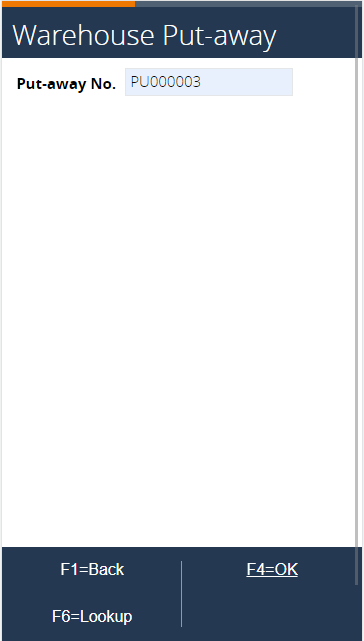
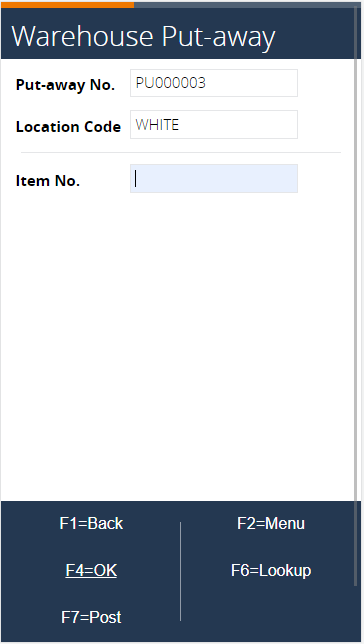
Select the Warehouse Management button in the menu, then select the WMS Put-Away button in the WMS Menu.
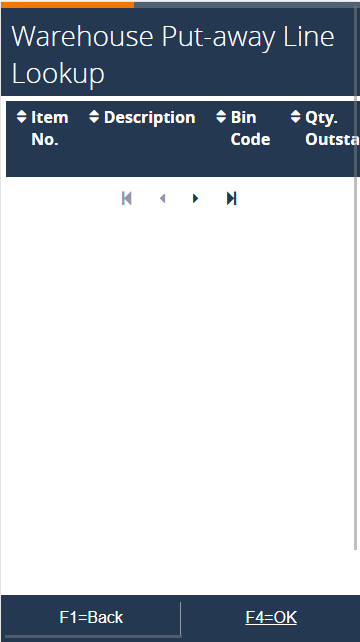
Scan or select the put-away document for the WHITE location from the list using the lookup.
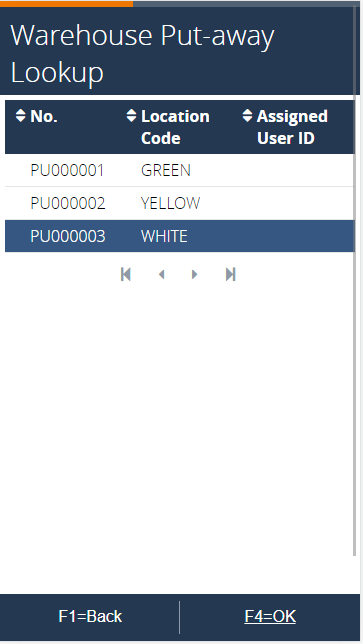
After pressing OK, the Assigned User ID is updated in the Warehouse Put-Away Header in Business Central.
 To see the result in BC, go to the warehouse put-away card.
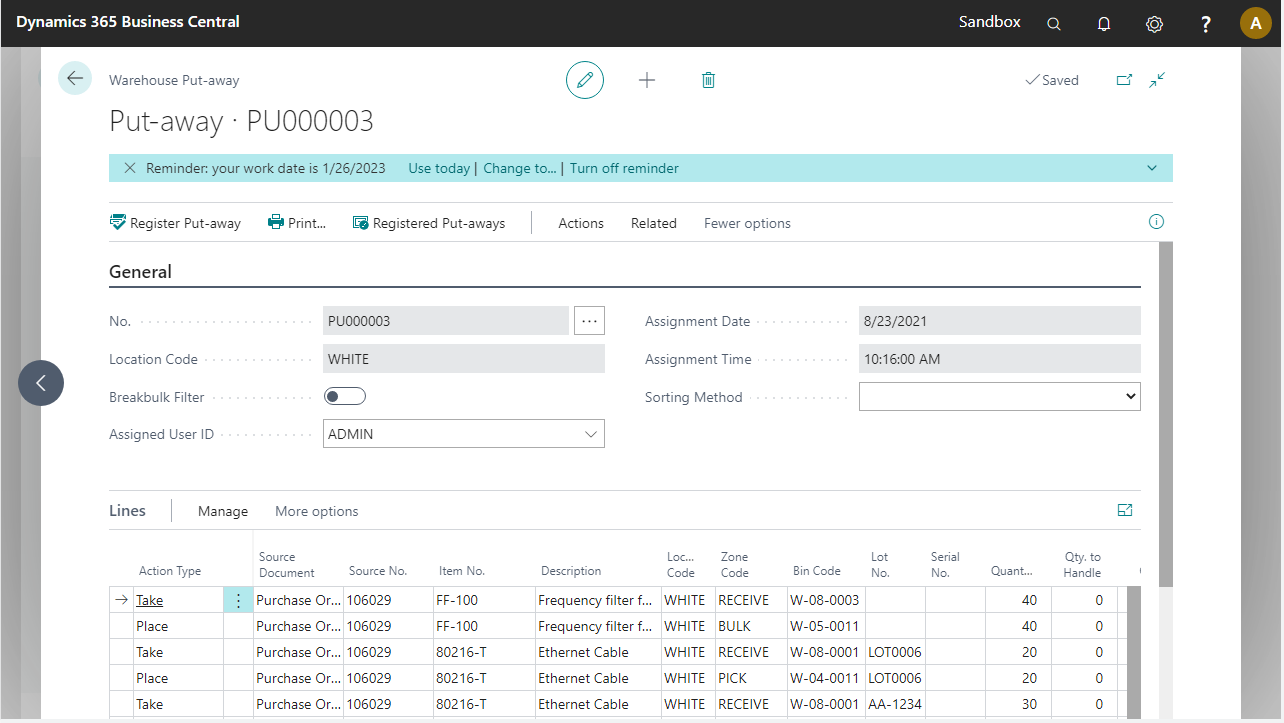
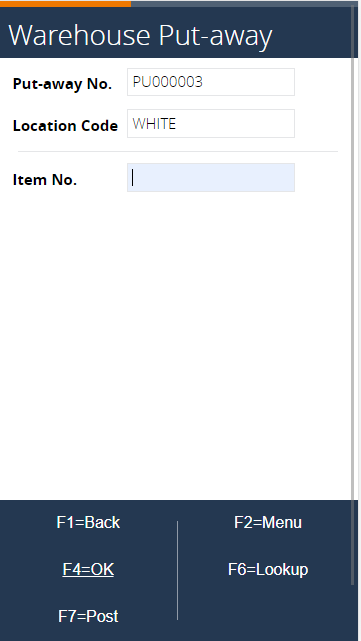
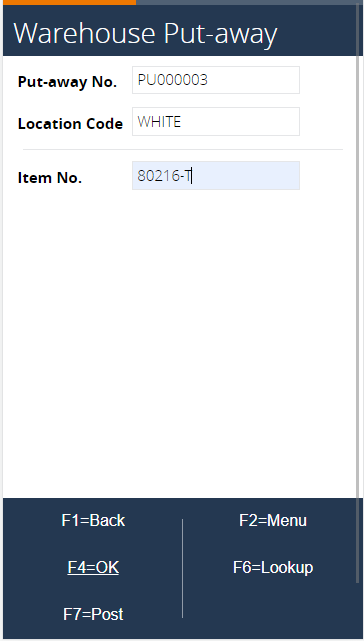
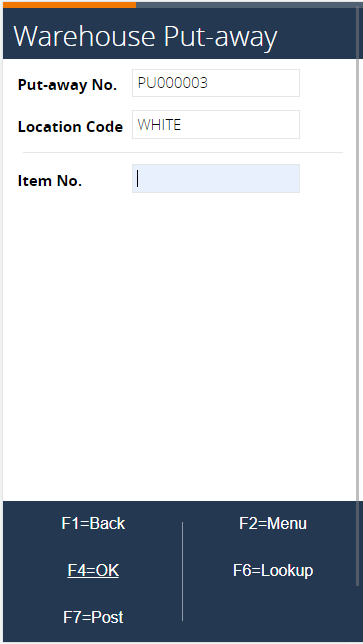
Enter the item code of the item to put away.
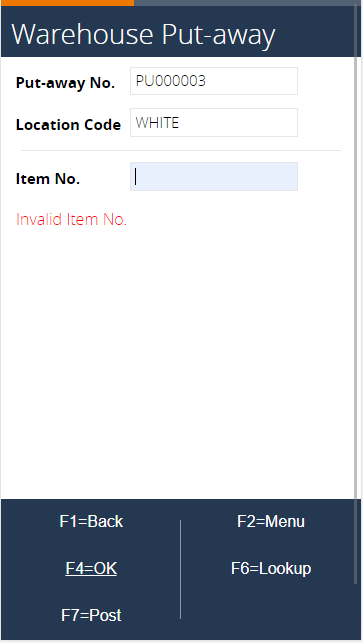
Entering an invalid item code (for example, LS-100) returns an error. Only items defined in the lines on the WMS Put-Away document are valid to enter.
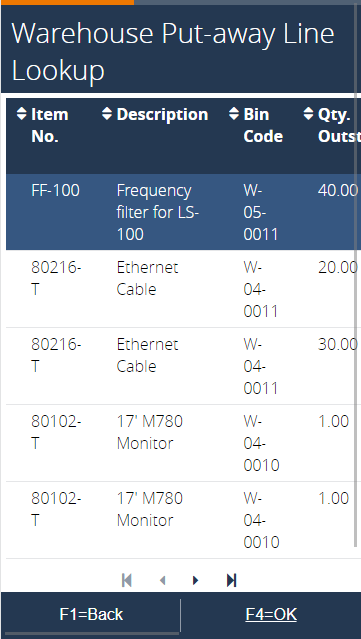
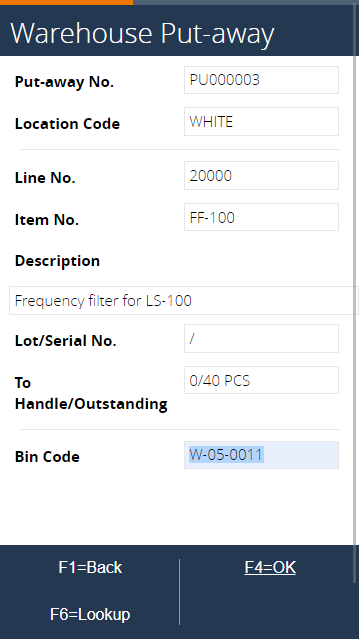
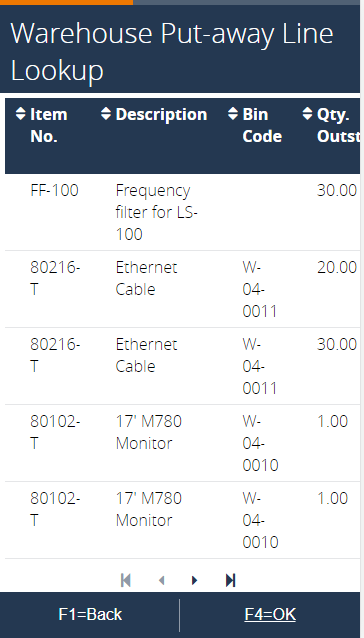
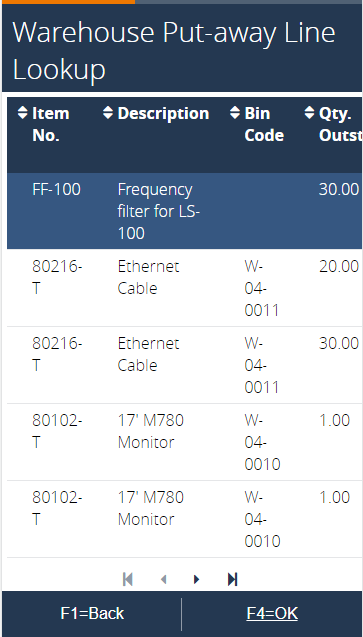
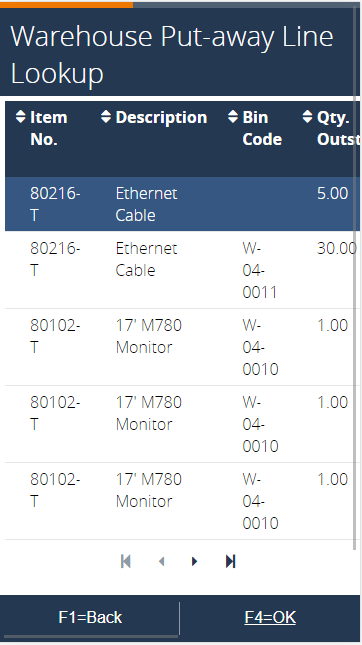
Use F6=Lookup to look up the put-away lines not yet completely processed. For each item to be put away, the system presents only the put-away lines of action type Place, showing the Qty. Outstanding and the Qty. to Handle for the lines. Select the first line, FF-100.
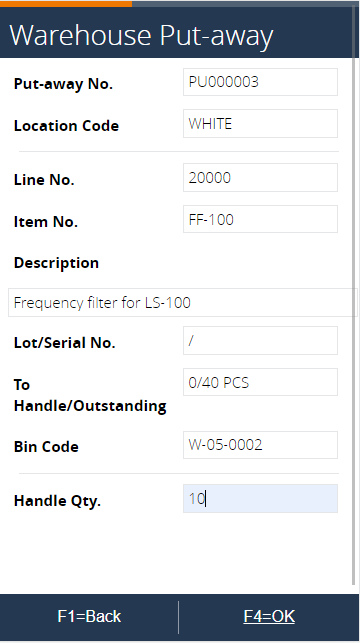
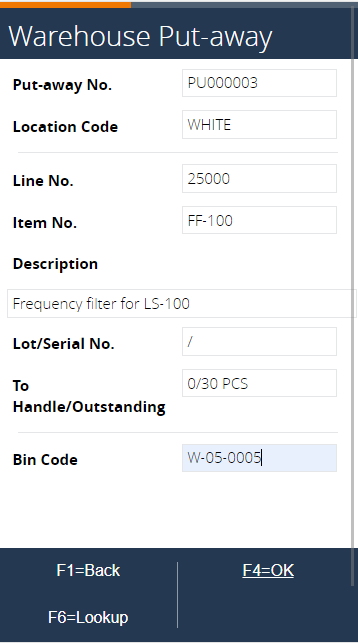
The Bin Code is defaulted from the Warehouse Put-Away document generated in Business Central. Enter a bin because it is mandatory for location WHITE.
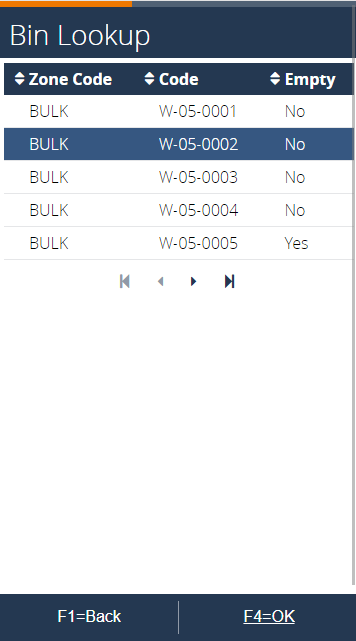
Use F6=Lookup to select a bin. Note that only bins of the Bulk zone are allowed, the zone of the put-away line. Select the second line (W-05-0002) and confirm by pressing OK.
After pressing OK, the data of the Warehouse Receipt document is updated in Business Central.
To see the result in BC, go to Warehouse Put-away. Check that the Bin Code of the first Place line is updated.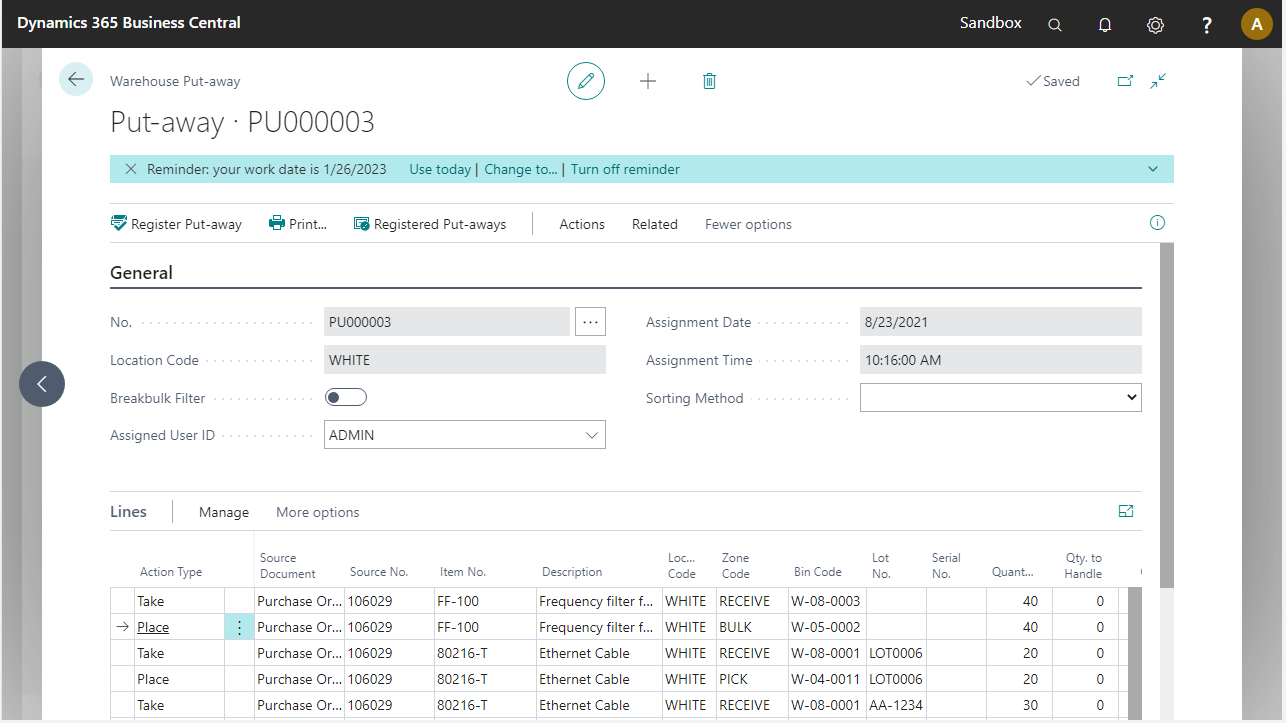
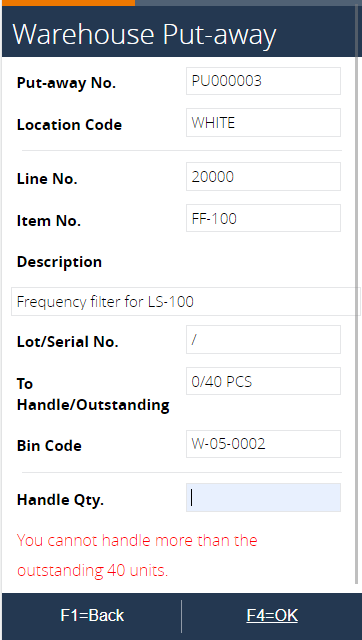
Enter the quantity of the item to handle (for example, 45) and press F4=OK. Observe the error message. This is the same error that appears in Business Central.
Enter a quantity to receive of 10 and press F4=OK.
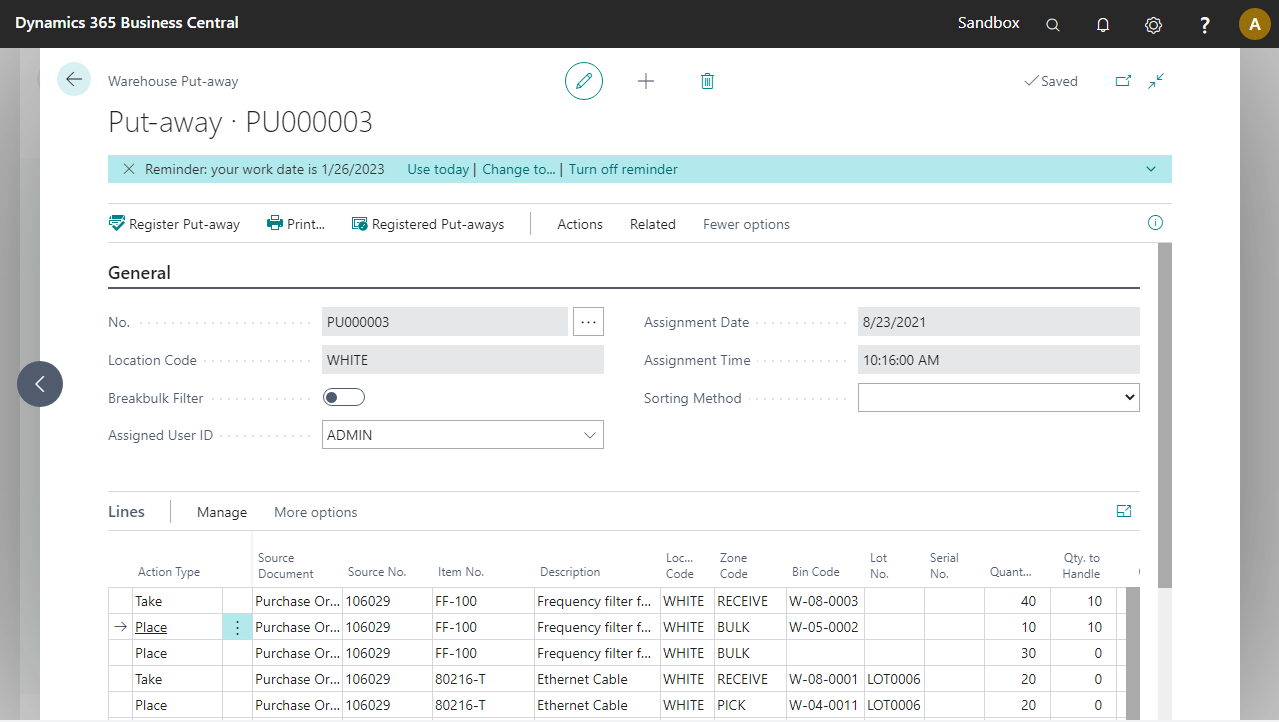
The Warehouse Put-Away line is updated in Business Central.
To see the result in BC, go to the PWarehouse Put-away. There are now two Place lines for item FF-100:- The first Place line has Bin Code and Qty. to Handle populated, with the Quantity changed from 40 to 10.
- The second Place line has all data copied from the first line, but Qty. To Handle is set to 0 and the Quantity is filled with the original quantity minus the Qty. to Handle of the first line.
The Qty. to Handle of the Take line is updated as well. What actually happens is the execution of the Split Line function in the mobile process while updating the Qty. to Handle of the Put-Away document line.
The process returns to the Item No. page.
Use F6=Lookup to show the Warehouse Put-Away lines. Notice that the system presents two lines for item FF-100 with an updated Bin Code, Qty. Outstanding, and Qty. to Handle.
Select the second line for item FF-100 and enter another Bin Code.
Enter another bin code.
Enter the Qty. to Handle of 30.
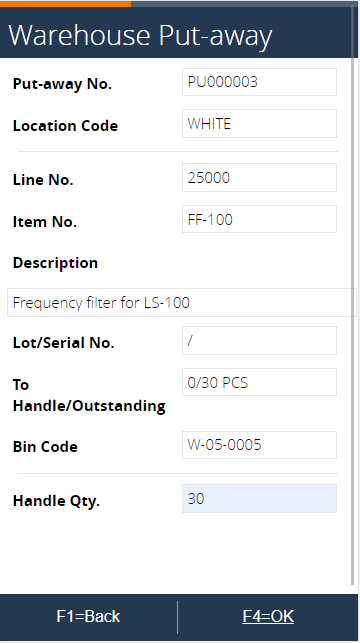
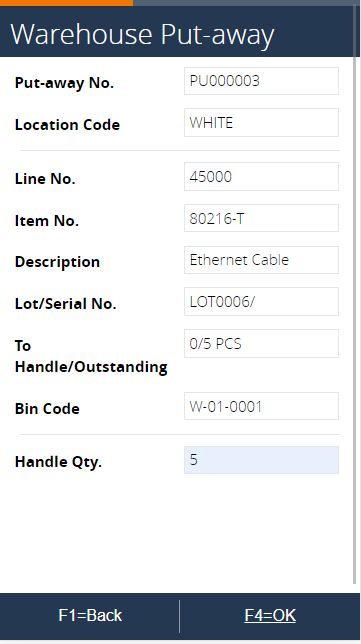
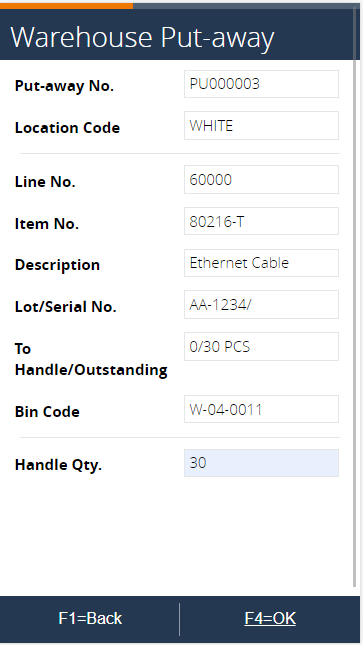
Pressing OK updates the Warehouse Put-Away line data and the process returns to the page for entering the item code. Enter item 80216-T.
Accept the Lot No. allocated to the Put-Away line, or select a different available lot number.
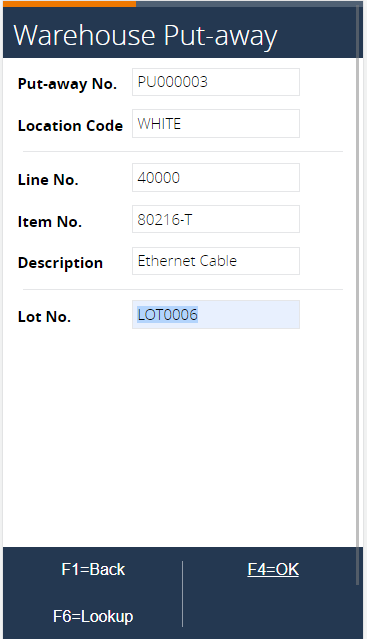
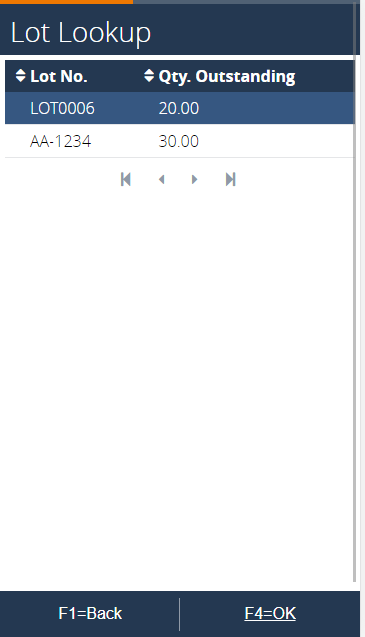
You can also use the lookup to display the available lots.
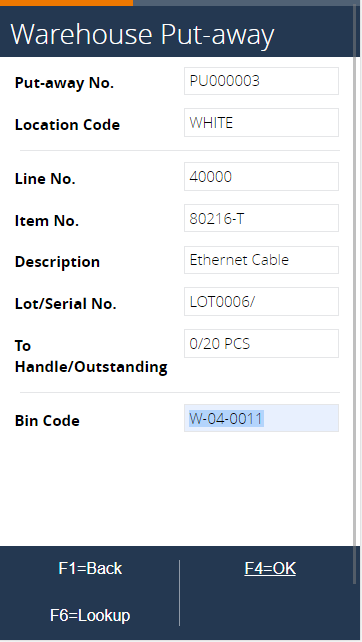
Enter or accept the bin code.
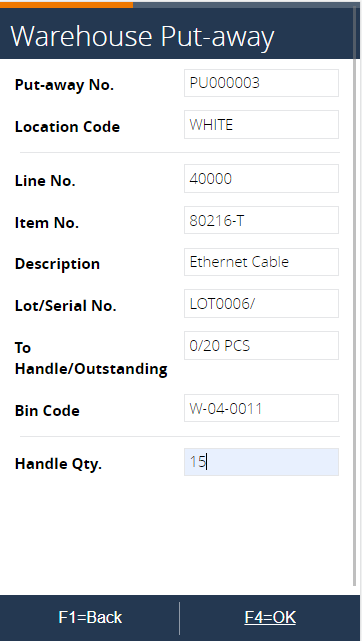
Enter 15 as Qty. to Handle.
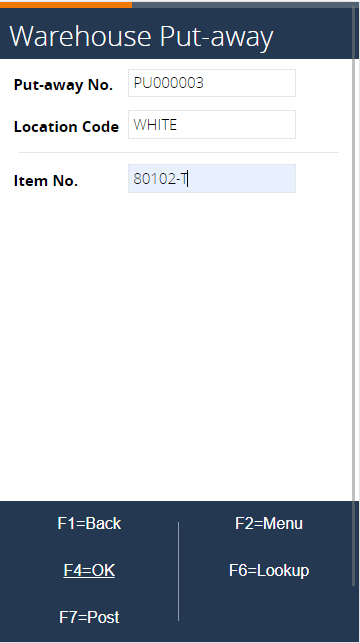
The process returns to the page for entering the item code. Enter 80102-T as item code.
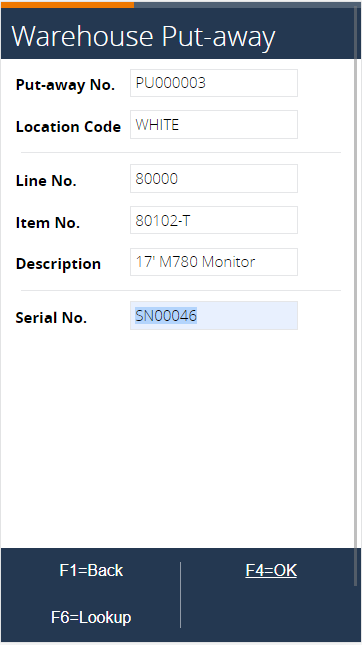
Accept the Serial No. allocated to the Put-Away line, or select a different available serial number.
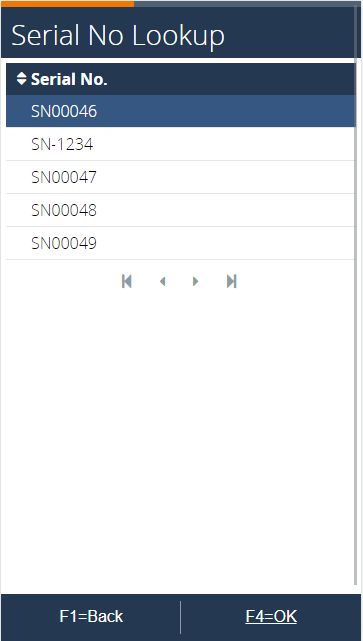
You can also use the lookup to display the available serial numbers.
Accept the selected Serial No.
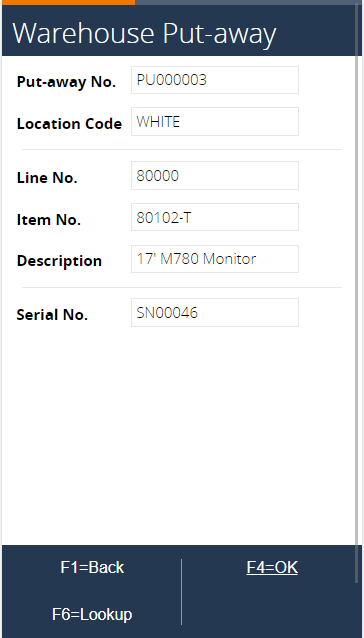
Enter or accept the Bin Code.
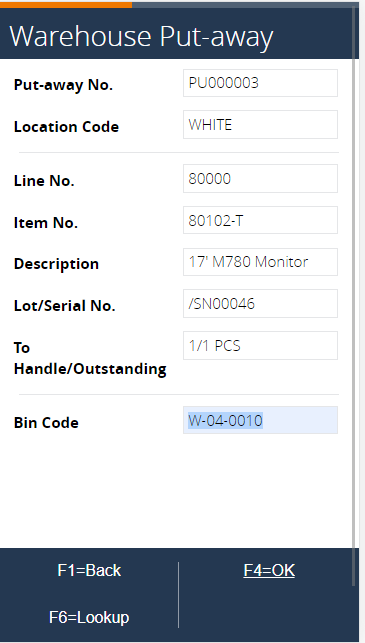
The process returns to the page for entering the item code. The system does not request the user to enter the quantity, because the serial number selection automatically applies a quantity of one.
Press F7=Post. This results in a partially registered Warehouse Put-Away document.
In BC, the Warehouse Put-Away lines are updated. The lines for item FF-100 are posted and deleted from the Warehouse Put-Away document. Four lines remain that are not fully processed yet.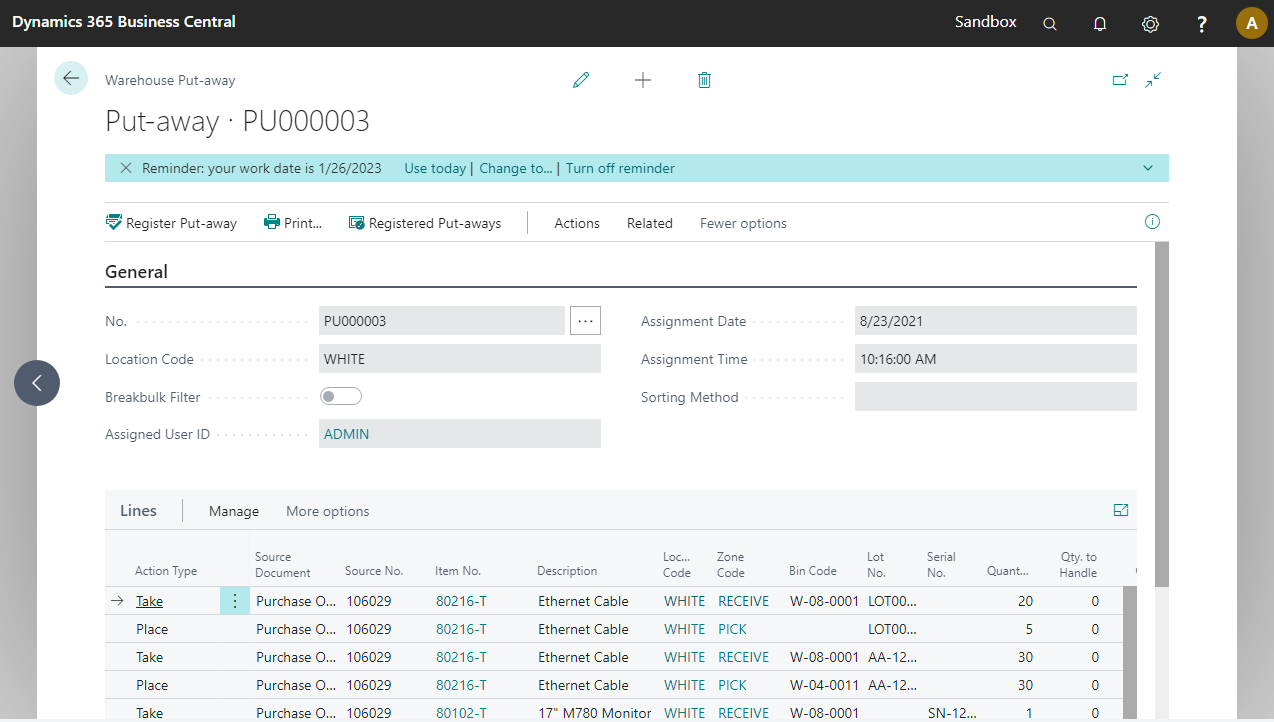
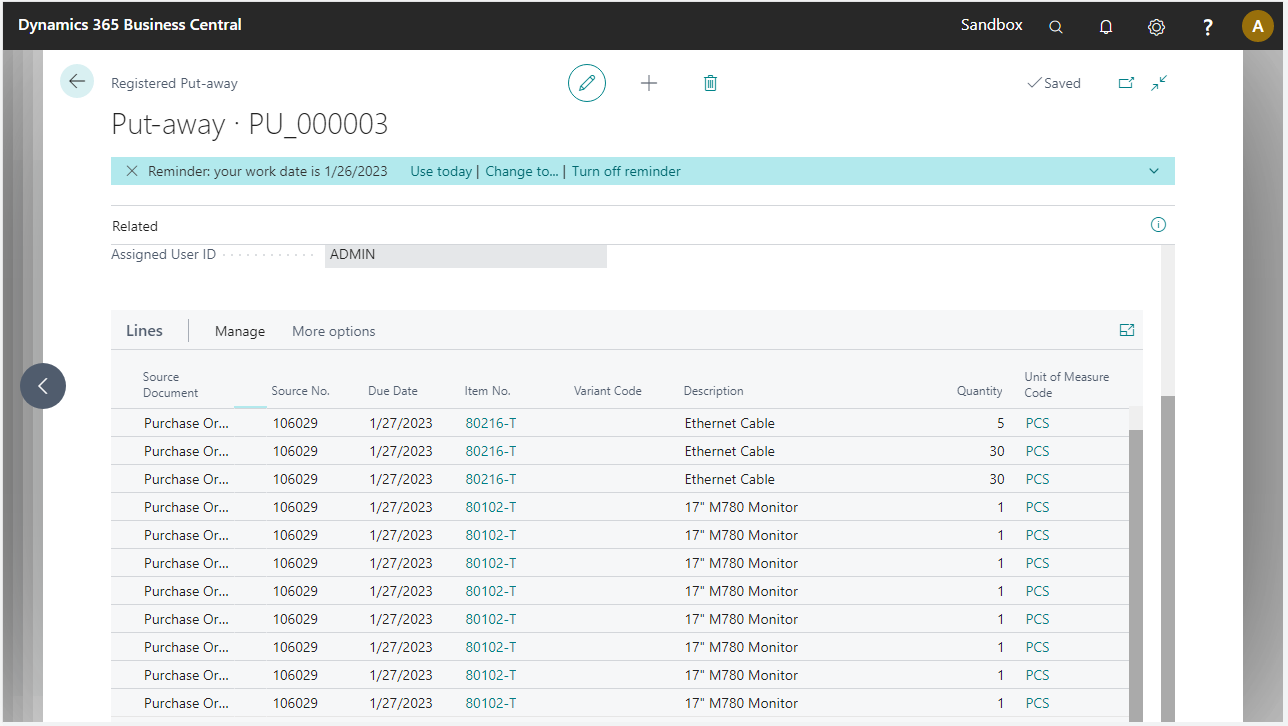
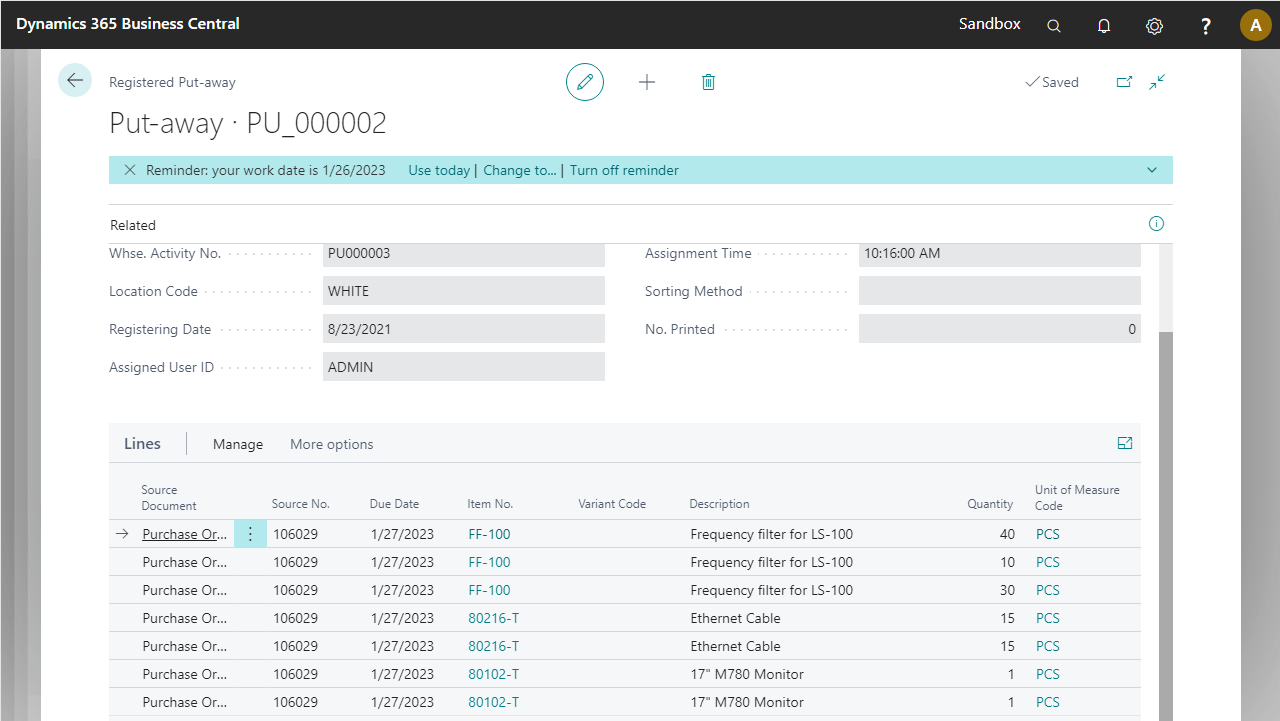
Press the Registered Put-Aways action in the document. Open the first line by going to Related > Line > Card.

Notice the populated lines with the data processed using the mobile process.
Back in the process, enter the same put-away number again.
Use the F6=Lookup button to show the put-away lines not yet completely processed. Select the first one.
In the next steps, enter the bin code and set the quantity to handle to five.
Do the same for the second line: enter the Bin Code and the Qty. to Handle of 30.
Process the remaining four items of type 80102-T as well, until nothing shows in the item lookup.
Leave the lookup page and press F7=POST to register the put-away.
In Business Central, the put-away document is deleted.
In BC, the put-away document does no lonnger exist in the list.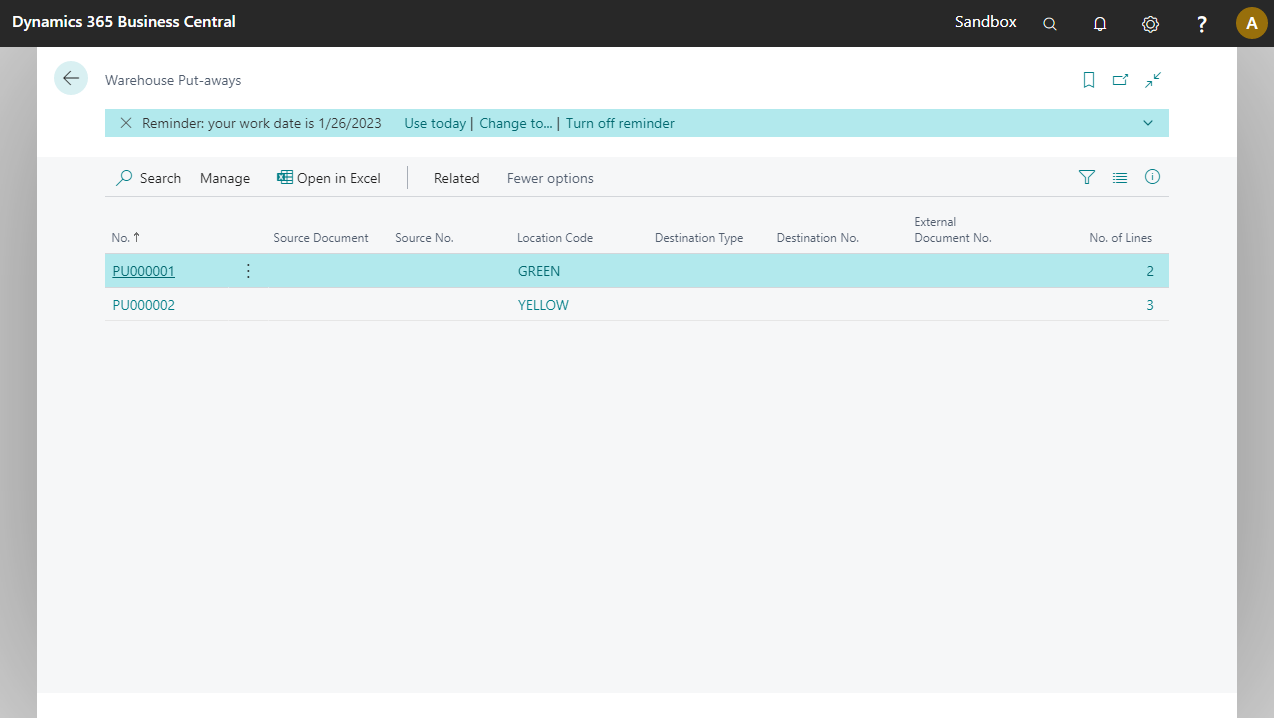
The newly registered put-away document can be found in the Registered Warehouse Put-Away list page.
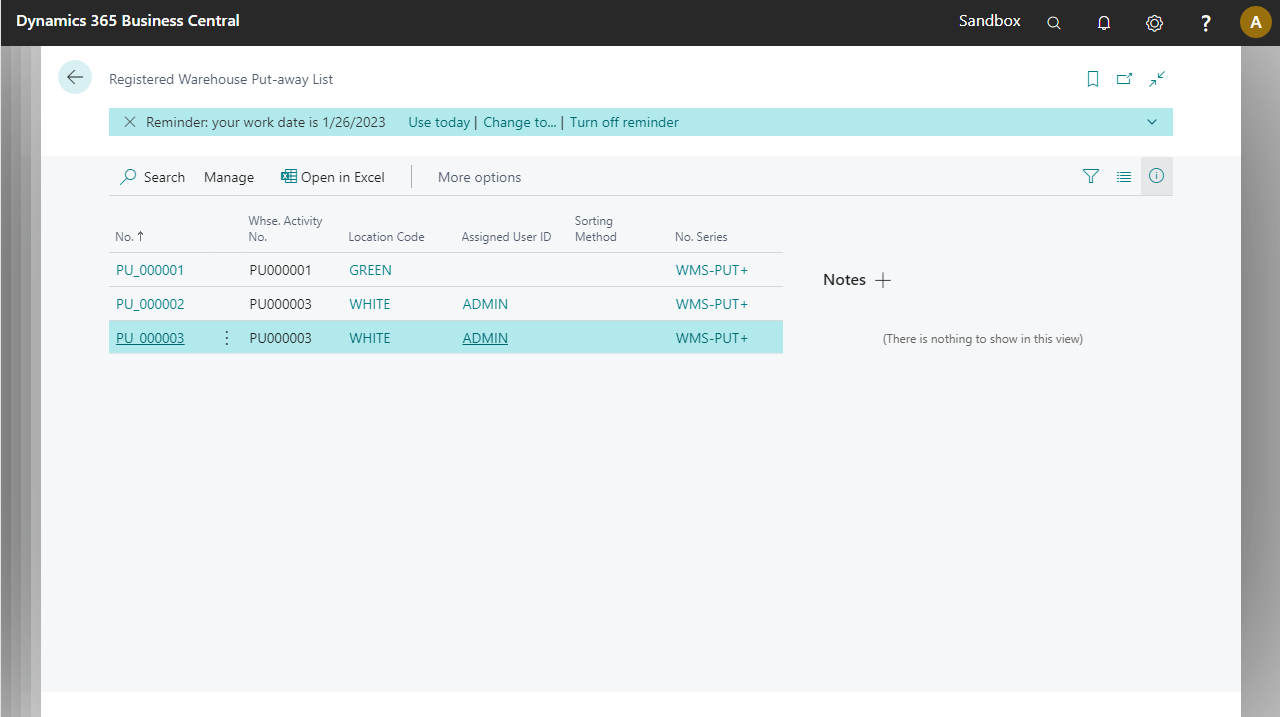
The details of the put-away can be found inside the registered put-away document card.