Anywhere Mobility Portal Documentation
Enable SSL on IIS
Enabling SSL enhances the security of your websites, including the Anywhere Portal.
 Running the Anywhere Portal with SSL is required when connecting to a cloud environment of Business Central.
Enabling SSL on a website requires a certificate, either self-signed or from a Certificate Authority (CA). After obtaining a certificate, bind it to the website. A certificate binds to a website, not to an application.
Self-signed certificates
There are several ways to create a certificate: from Azure Key Vault, IIS, third-party tools, or PowerShell. Self-created certificates are known as self-signed and enable SSL on a non-public website.
Some browsers show a security warning the first time they encounter a self-signed certificate. Users should trust and store the certificate at the client level.
To create a self-signed certificate:
- Open Internet Information Services (IIS) Manager.
- Select the workstation you are installing the certificate on under the Connections list.
- Open the Server Certificates tool.
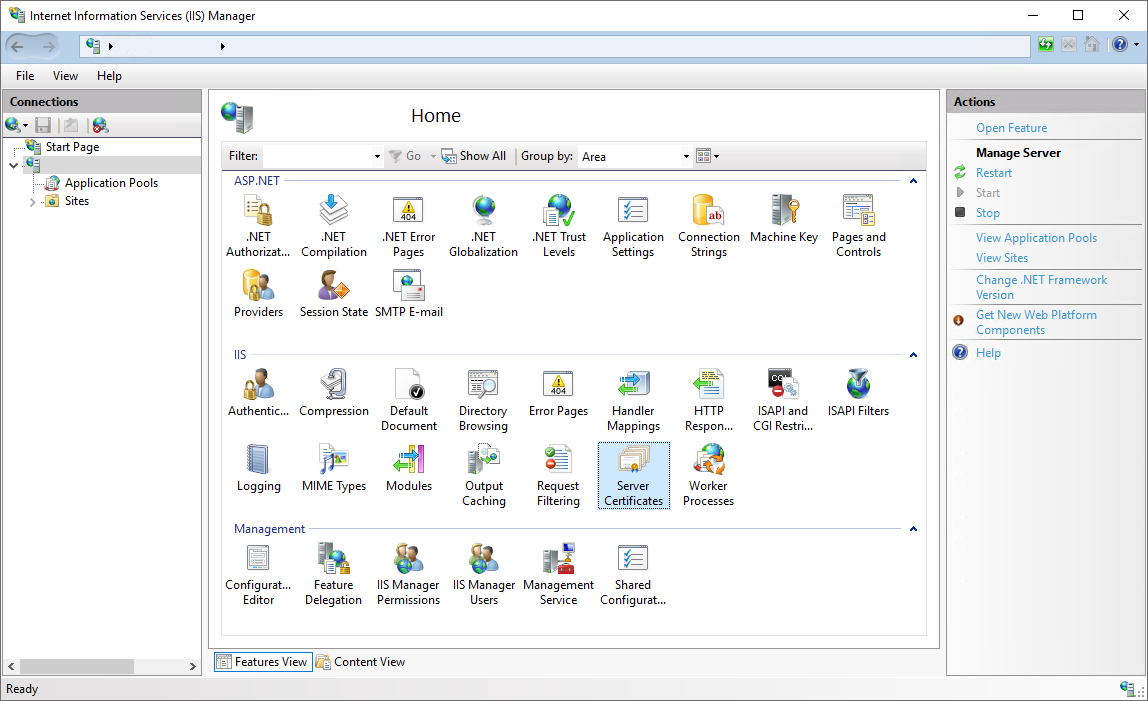
- Select the Create Self-Signed Certificate link in the upper-right corner, under the Actions list.
For more information on creating a self-signed certificate, see References.
Requesting certificates from a Certificate Authority
Certificates from a Certificate Authority (CA) are globally trusted. A popular, free option supported by many clients that automatically refreshes certificates nearing expiration is Let's Encrypt. For clients that manage Let's Encrypt certificates, see here.
To request a certificate from a CA, first create a Certificate Signing Request (CSR) on your server. This file contains your server and public key information and is required to generate the private key. To create a CSR in IIS:
- Open Internet Information Services (IIS) Manager.
- Select the workstation you are installing the certificate on under the Connections list.
- Open the Server Certificates tool.
- Select the Create Certificate Request link in the upper-right corner, under the Actions list.
- Fill in the information in the Request Certificate wizard. Enter your two-digit country code, state or province, city or town name, full company name, section name (for example, IT or Marketing), and the common name (typically the domain name).
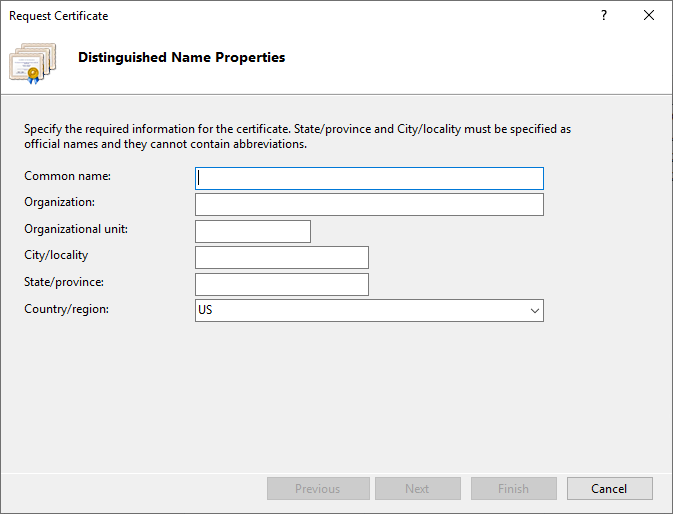
- Leave the Cryptographic service provider at the default value.
- Set Bit length to 2048.
- Name the certificate request file. The file name does not matter.
Send this file to the Certificate Authority so they can create trusted certificates for your server. After you receive the certificate files, complete the certificate signing request. Store the file on the server, you need it to complete the certificate installation.
Completing the certificate signing request
- Open Internet Information Services (IIS) Manager.
- Select the workstation you are installing the certificate on under the Connections list.
- Open the Server Certificates tool.
- Select the Complete Certificate Request link in the upper-right corner, under the Actions list.
- Enter the path to the received file or certificate from the CA.
- Enter a Friendly Name as an alias for your certificate so you can find it easily.
- Set the certificate store to your preference.
- Select OK to finish the installation. The new certificate appears in the list.
Installing and binding the certificate to your website
Open Internet Information Services (IIS) Manager.
Select the website on the left side (Default Website).
Select Bindings on the right side.
Select Add to create a new binding.
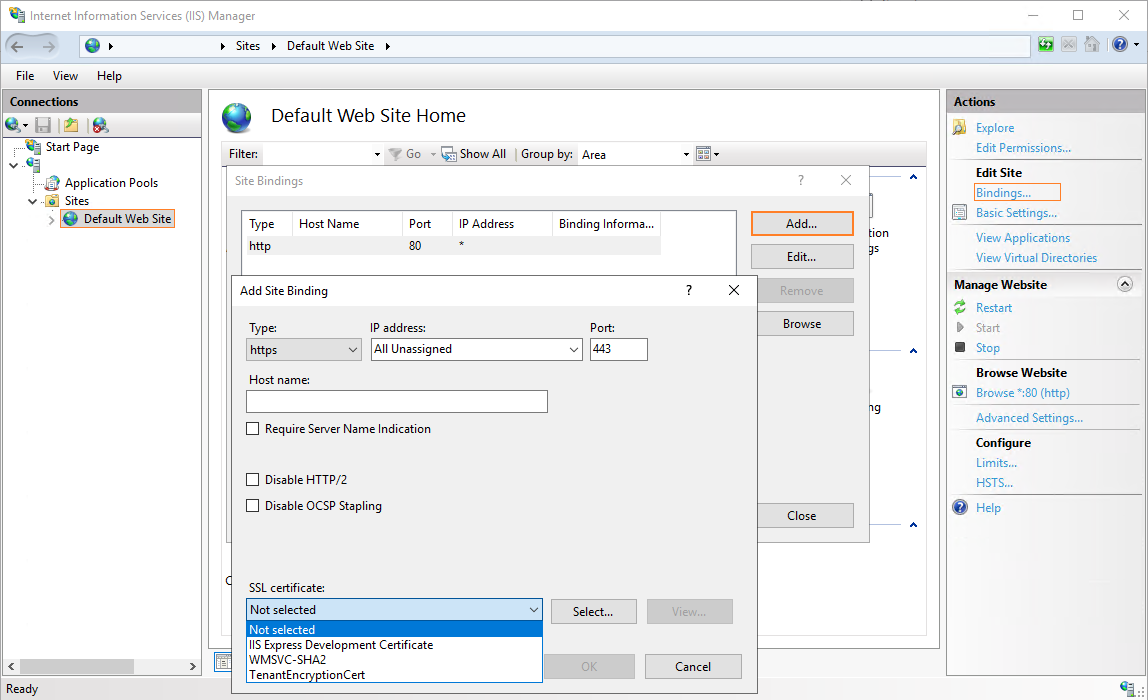
Select https as the type to create the entry for HTTPS (default port 443).
Enter the hostname to which the certificate is bound.
Select the installed certificate from the dropdown menu.
If you do not see the appropriate certificate in the list, confirm the certificate is installed.Select OK to create the new binding.
Navigate to the website via HTTPS to confirm.
Navigate from a different client (not the server) to confirm the bindings are correct.
References
| Topic | Link |
|---|---|
| SSL on IIS | DigiCert |
| Create a self-signed certificate | Microsoft Docs |
| Certificate authorities | Wikipedia |
| Let's Encrypt | Let's Encrypt |