Business Integration Solutions documentation
How to: Example label printing
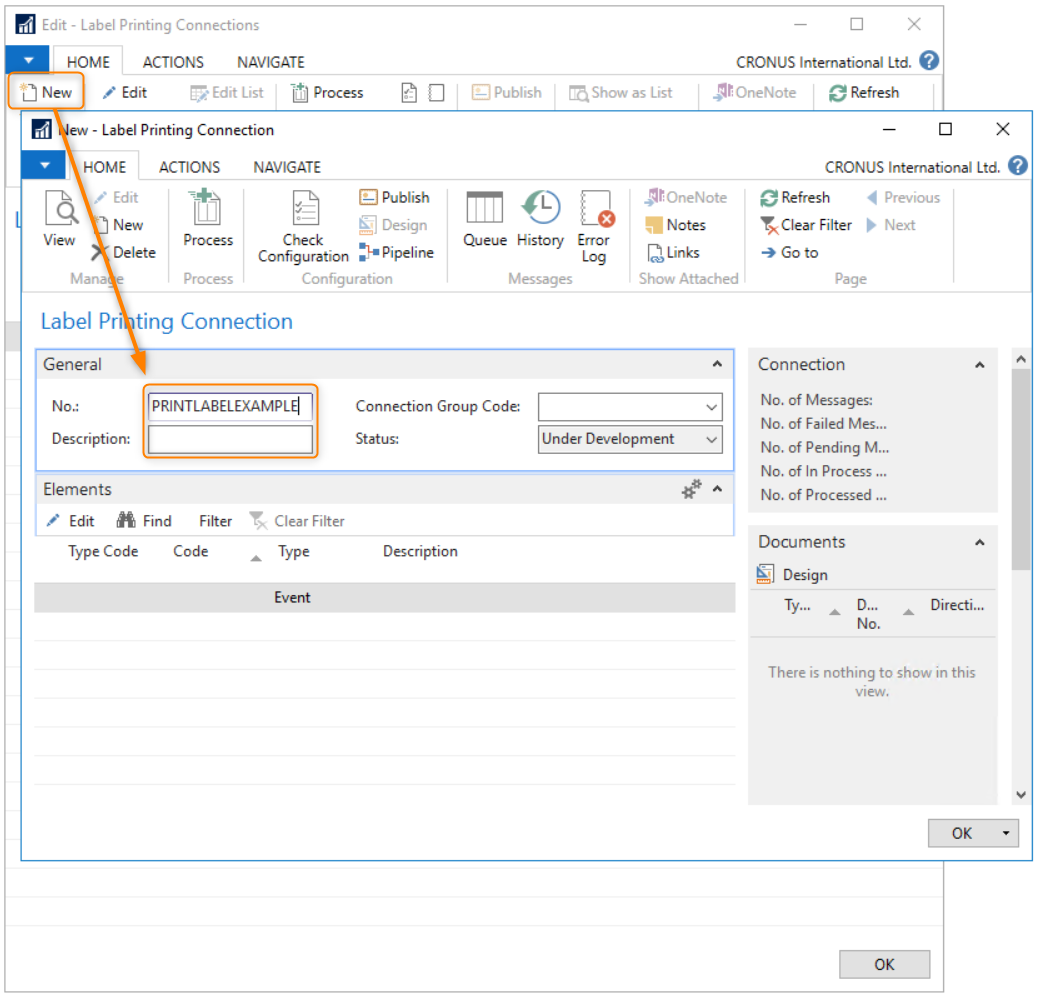
New connection
Start by providing a label connection number. In this example, use PRINTLABELEXAMPLE.
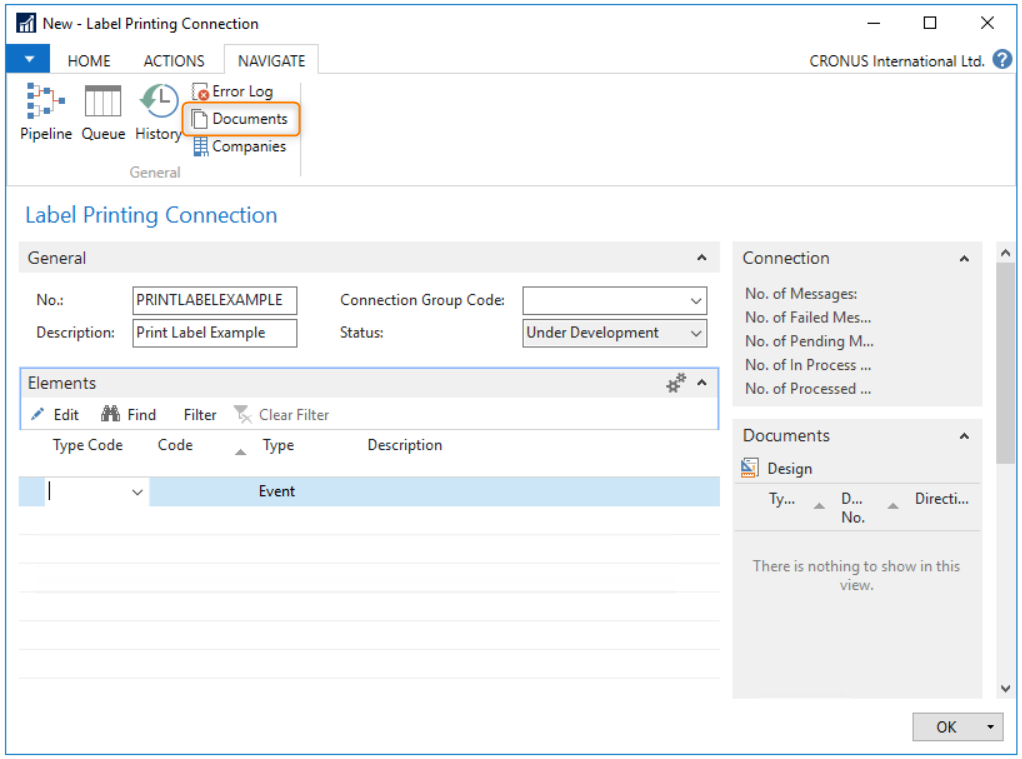
Create documents
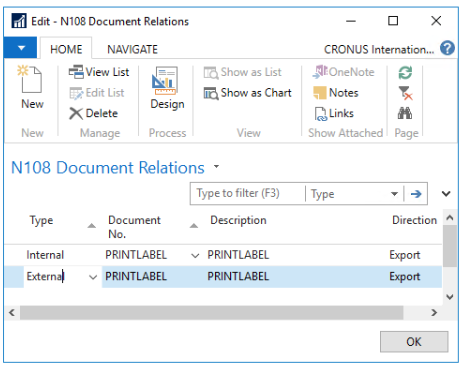
Create documents to get information from NAV (internal document) and for the label software (external document). Select Documents on the Navigate page.
In this example, use internal data from the Item table.

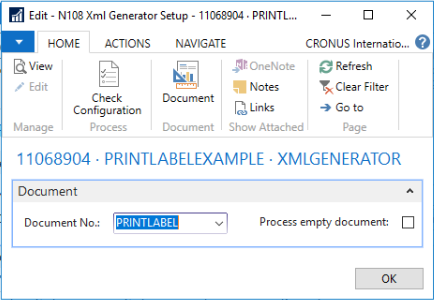
Select type Internal and enter document number PRINTLABEL.
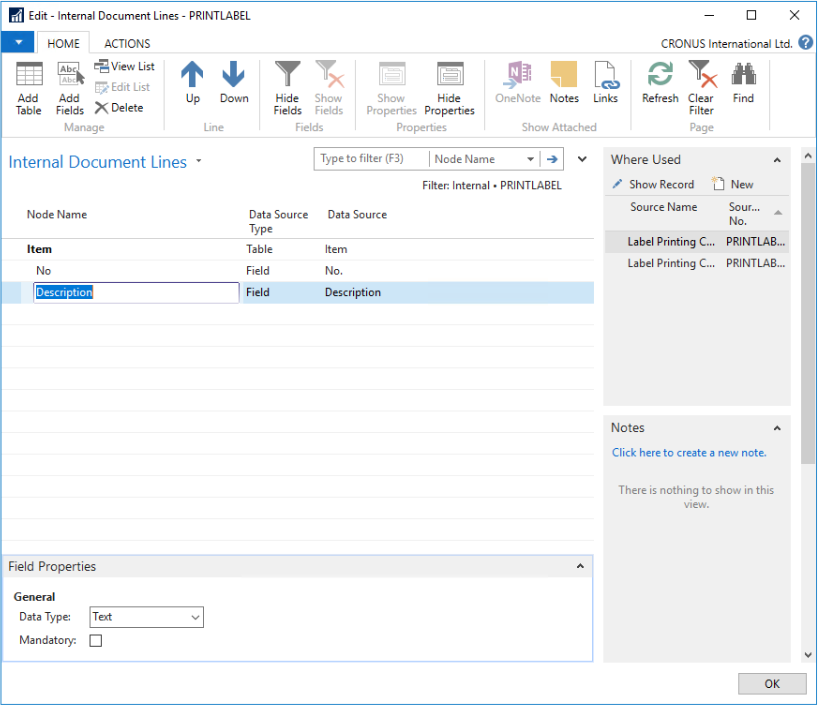
Select Add Table and select the Item table. Then select Add Fields and add the No. and Description fields.
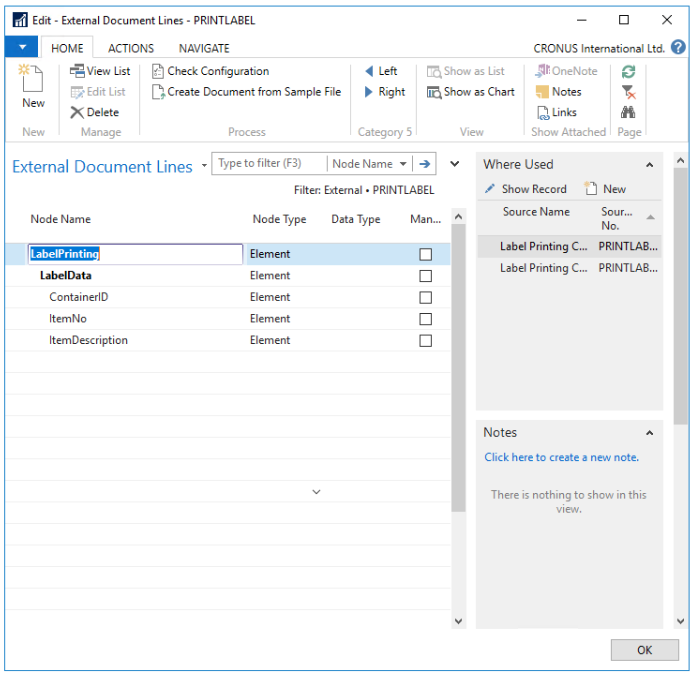
Next, create the external document. Set the type to External.
Consult the label template to determine which fields are required on the label. In this example, three fields are defined: ContainerID, ItemNo, and ItemDescription. These field names must match exactly to print the correct data on the label.
This example uses standard printer, template, and copy count settings. See How To: Setup Label Printing Element for options to include these values as input from the external document.
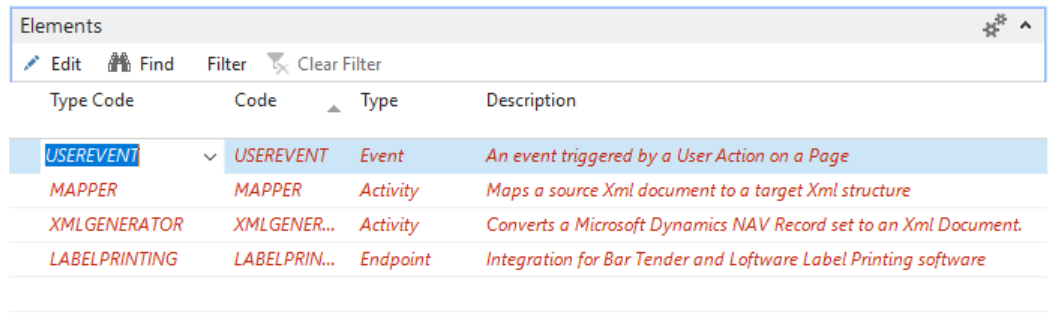
Elements
To print labels, determine where to print from. In this example, a button on a page triggers a User Event element, which starts the print action. Other elements can also trigger a label print. Use the following elements:
- UserEvent
- XMLGenerator
- Mapper
- LabelPrinting.
All four elements turn red after adding them to the label connection. Edit each element to configure the correct behavior.
Editing the UserEvent:
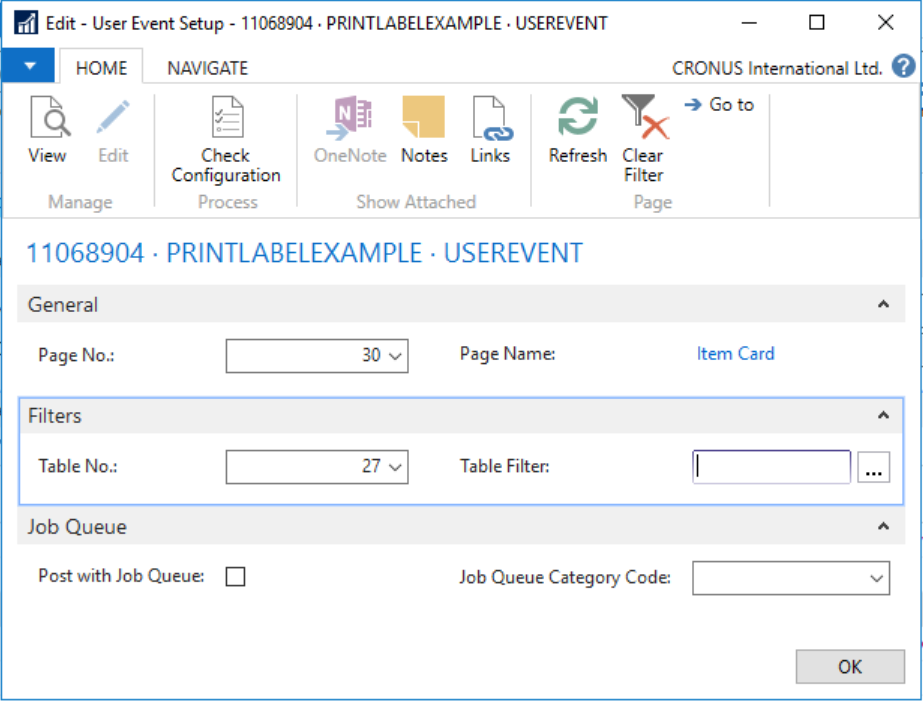
Enter the Item Card page number on the General tab to let the user print a label from there.
Editing the XMLGenerator:
Add the internal document number so the system builds the XML message according to the correct model.
Editing the Mapper:
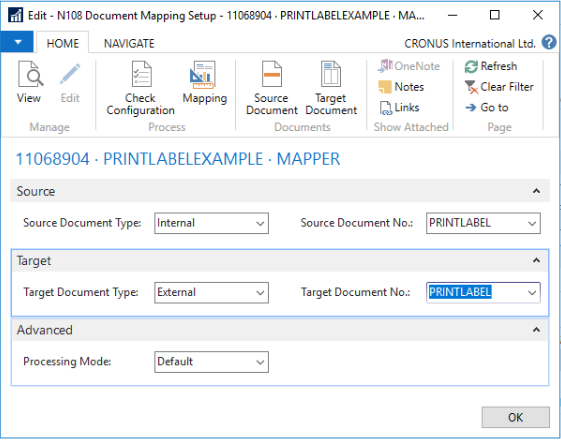
In this example, the source document is type Internal (the created document) and the target document is type External (the external label document). Now map the internal and external documents:
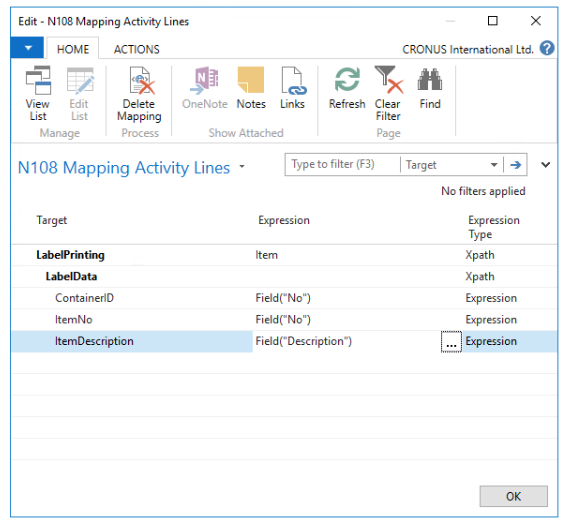
Start at the root level (top line) and match LabelPrinting with Item. Then map the fields using the assist-edit wizard.
Editing the LabelPrinting element:
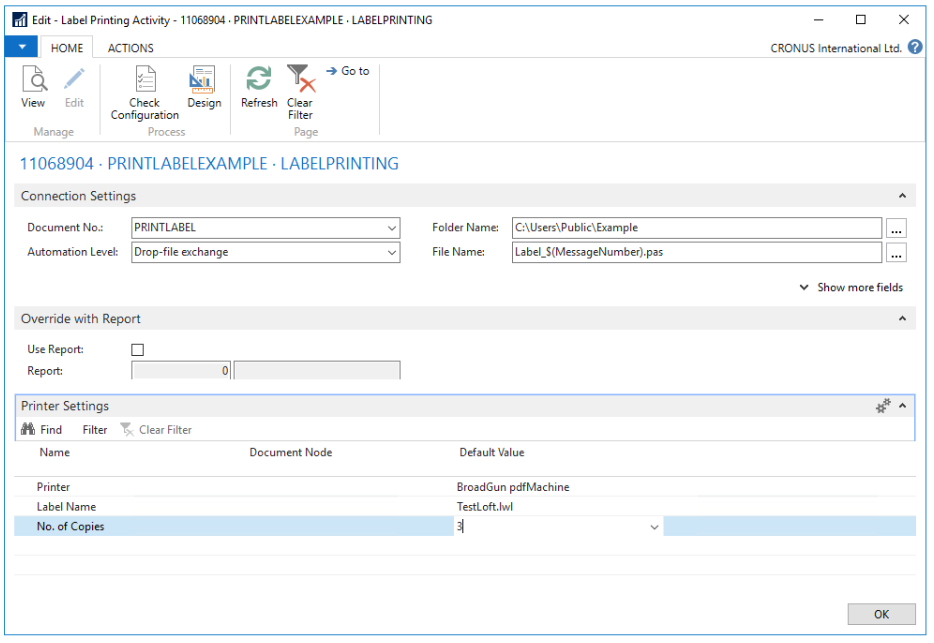
Enter the following for this example:
- Document No.: External document
- Automation Level: Drop-File Exchange
- Folder name: Folder location to place the file
- File Name: Compose a unique, compatible file name and extension
- Printer: Default value, select an available printer
- Label Name: Default value, select the label that matches the external document fields
- No. of Copies: Default value, enter the number of copies to print
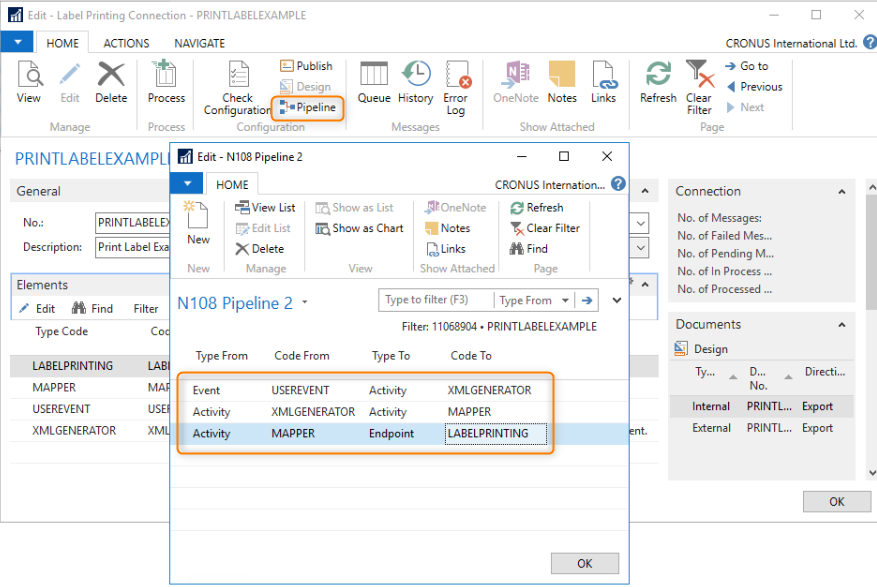
Pipeline
Set the individual elements in the correct order using the pipeline.
Item Card page modification
To print the label, modify the Item Card page. The sample files folder contains Item label example.fob and the connection package Label-connection.zip for import.
Print the label
The Item Card page shows the Print Label button, letting a user print the label from there.
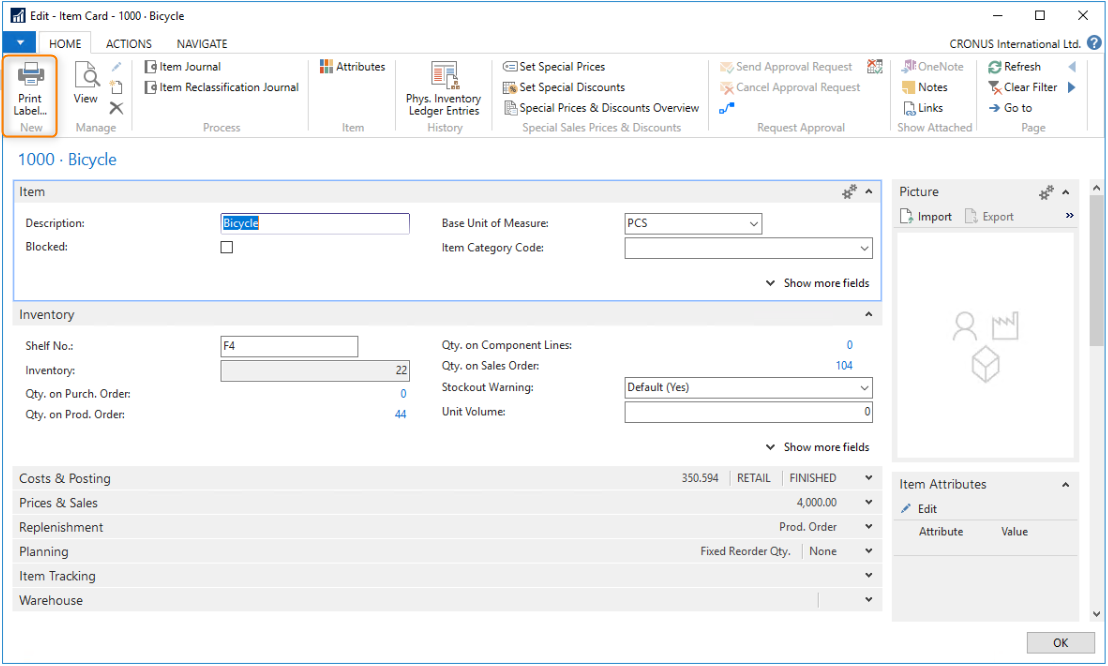
Select the button and check the folder for the created file.
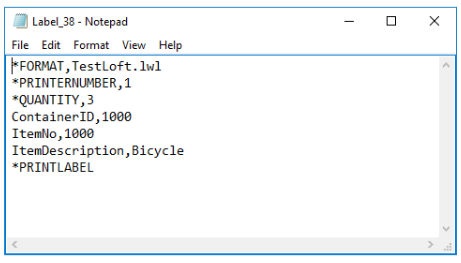
Opening the file in Notepad shows the content with specific data from Item No. 1000 and default data from the label connection setup.
History
For every label printed, an entry stores in the history of the connection that processed the data. In this example, the PRINTLABELEXAMPLE connection processed the item print action on the page.
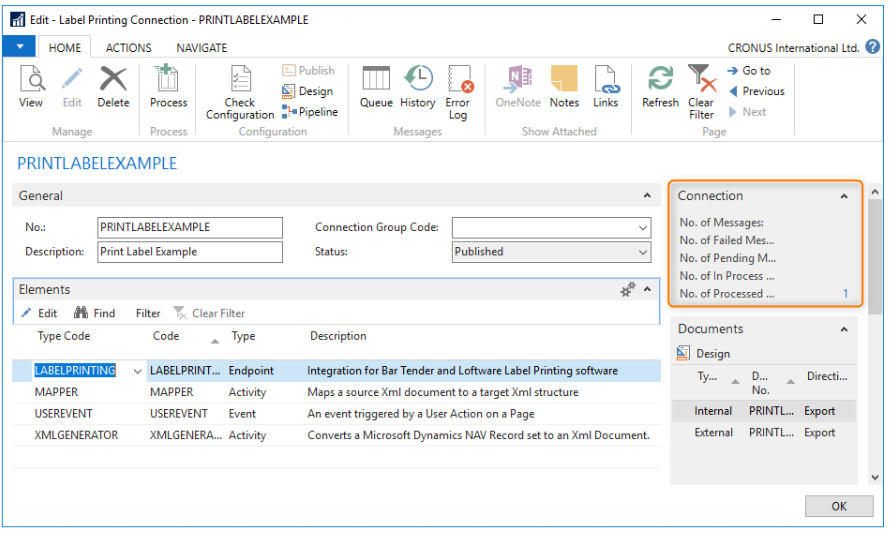
Access individual messages by selecting the number or the History button in the ribbon.