ANY Process Demo: Sales Shipment
The Sales Order Shipment process supports order-based shipment of goods, without the use of bins and warehouse documents.
Overall process flow
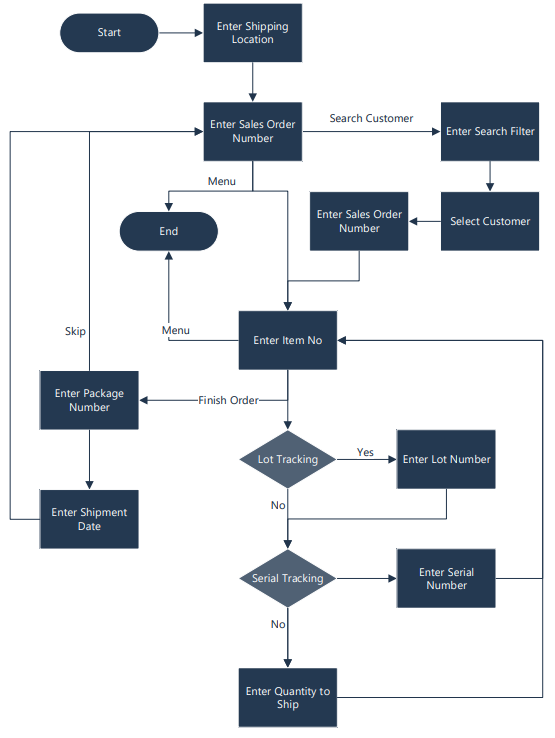
Steps
Make sure you have already set up the prerequisites for this process.
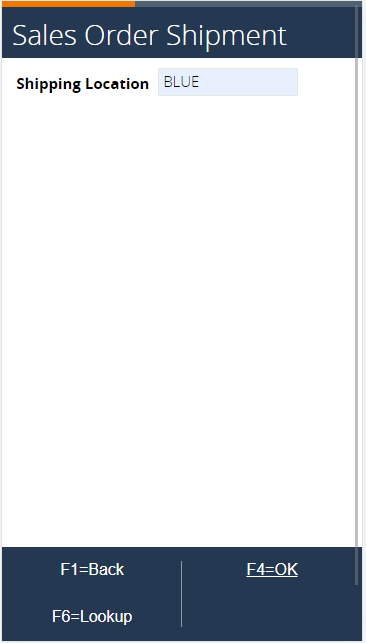
Select Sales Order Shipment in the main menu.
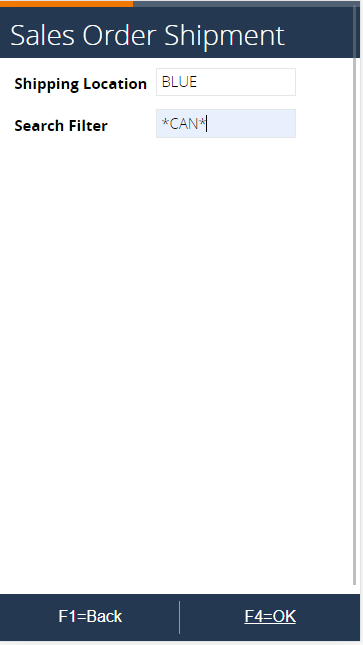
Enter BLUE in the shipping location or select it from the lookup menu. Then press F4=OK.
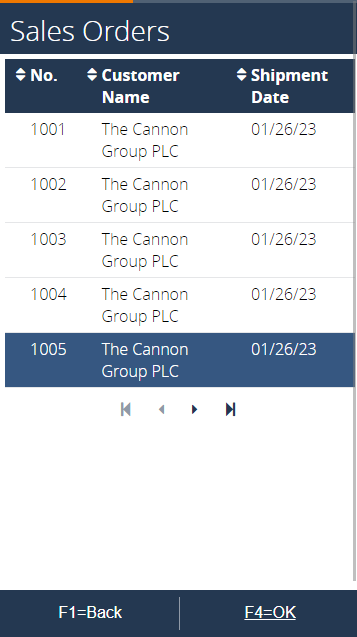
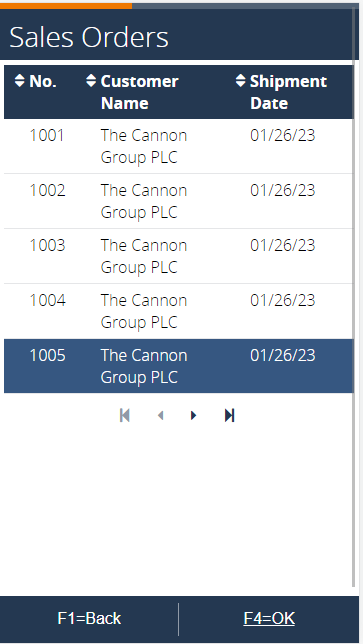
Enter the Sales Order number to process the shipment for, or use F6=Lookup to show a list of sales orders not yet shipped. Select or enter the sales order created for this script.
If the Sales Order number to ship is not known at step 3, search for the customer first. In the previous page, press F8=Search Customer to open the following page. Enter a search filter to find the customer by name (for example, CAN) and search with F4=OK.
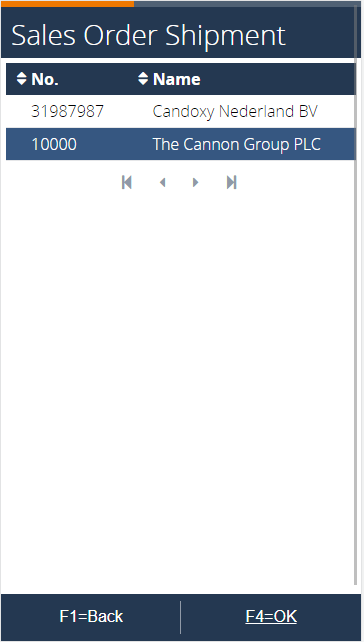
The list shows only customers matching the search filter that have sales orders not completely shipped or invoiced yet. Select customer The Cannon Group PLC and continue with F4=OK.
Enter a sales order number or use F6=Lookup to view a list of all open orders from The Cannon Group PLC. Select the order created for this demo.
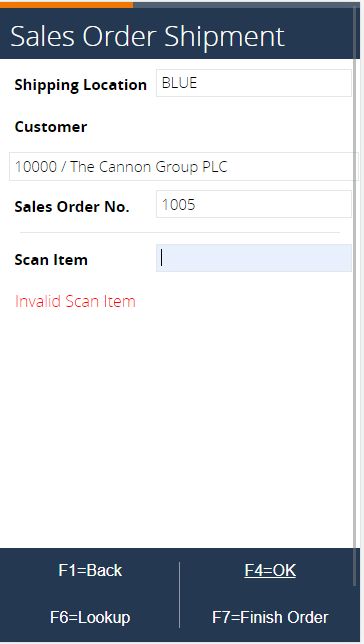
In the next step, enter the item code to be shipped. Enter code 70001 and press F4=OK.
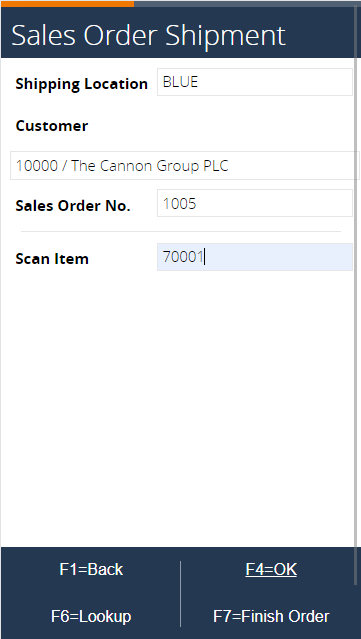
The system returns an error showing the item is not part of the order and should not be shipped. Enter a valid item (for example, FF-100) or use F6=Lookup to show the order lines.
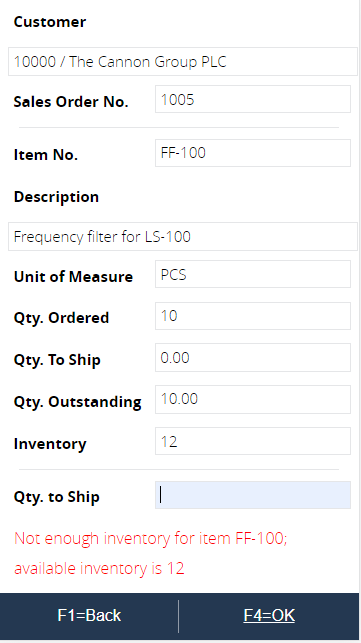
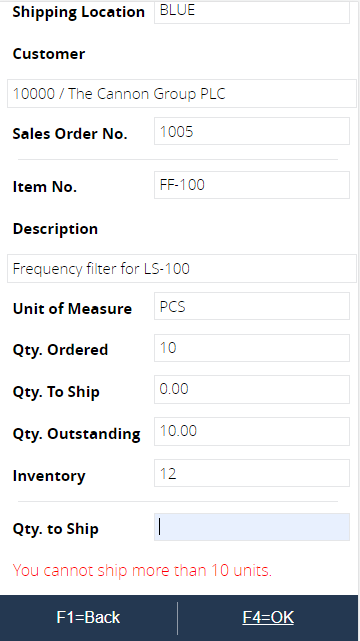
In the next page, specify the quantity to ship. Enter a quantity that exceeds the inventory and confirm with F4=OK (for example, 20).
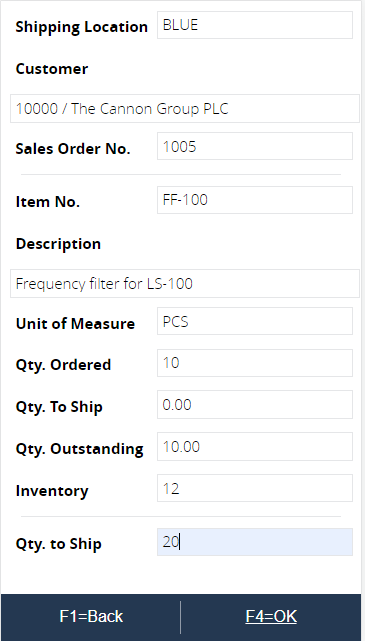
An error message appears, the system performs an inventory availability check for the item. Enter a quantity that exceeds the shipment quantity but not the inventory, and confirm with F4=OK (for example, 11).
Another error message appears. This confirms that no excess quantity can be shipped. Enter a partial quantity to ship (for example, three) and continue with F4=OK.
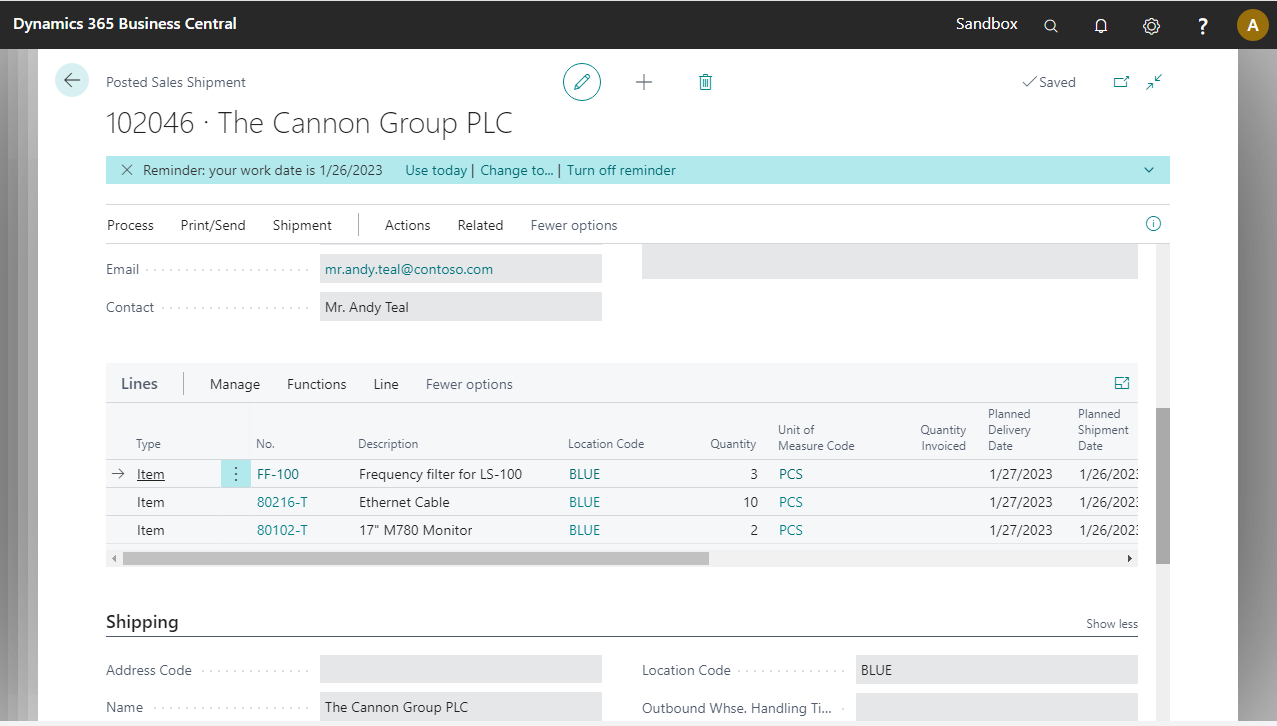
 To see the result in BC, find the sales order in Business Central. The line with item FF-100 has Qty. to Ship and Qty. to Invoice set to three.
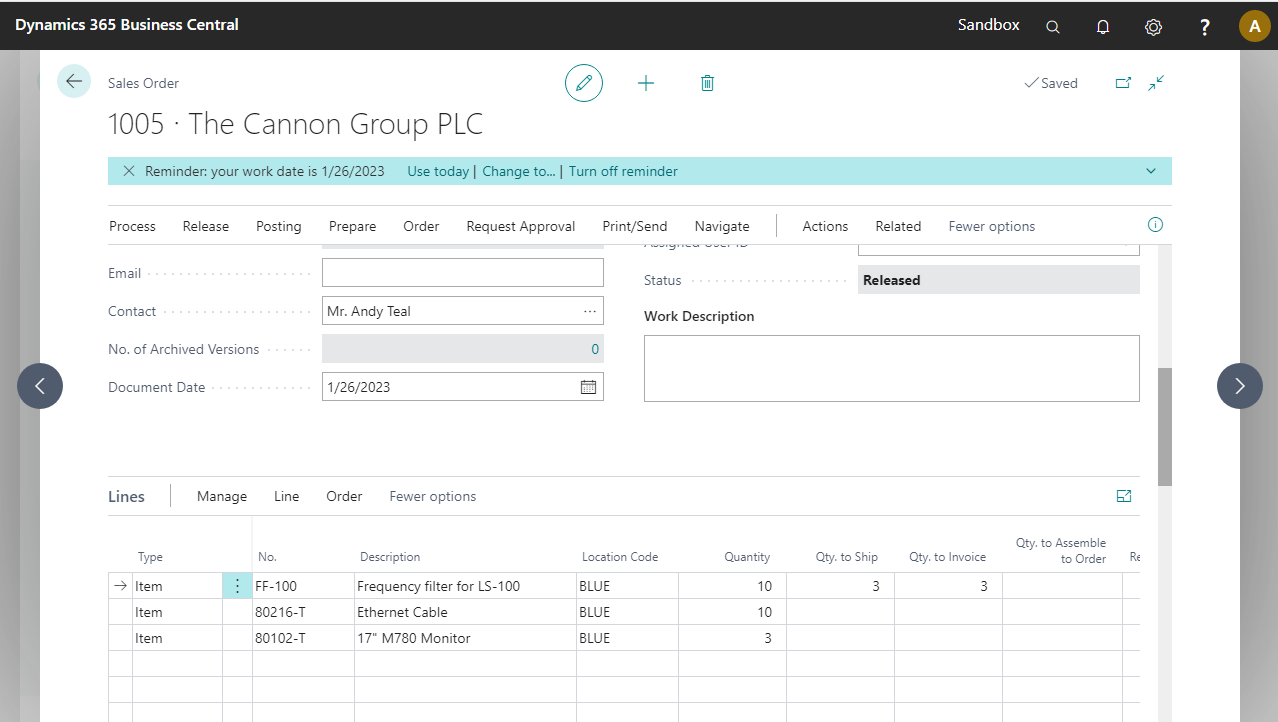
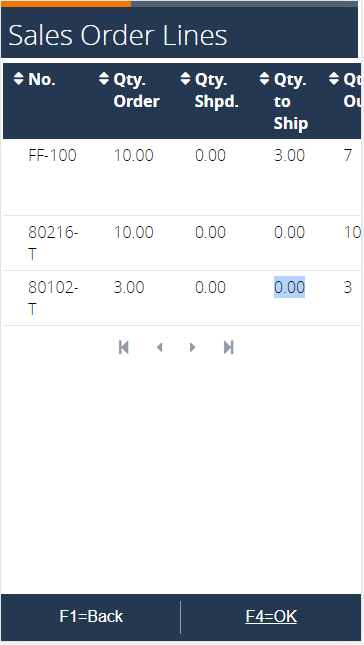
The process returns to the enter item step. Enter or select the second order line. Confirm with F4=OK. Notice that the quantity to ship is updated in the lookup list.
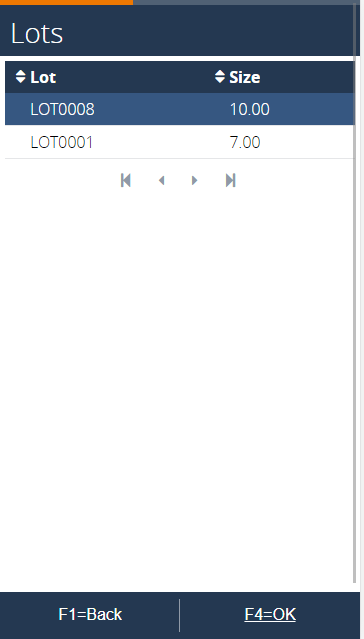
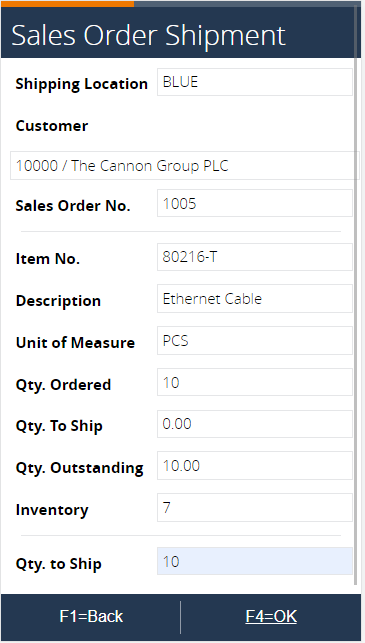
The item on the second line has lot tracking. The process first asks for the lot number. Enter an existing lot number, or use F6=Lookup to select from a list.
Enter the ordered quantity as Qty. to Ship (for example, 10). After confirming the quantity, the sales line is updated, including the tracking details. The process returns to the scan item activity.
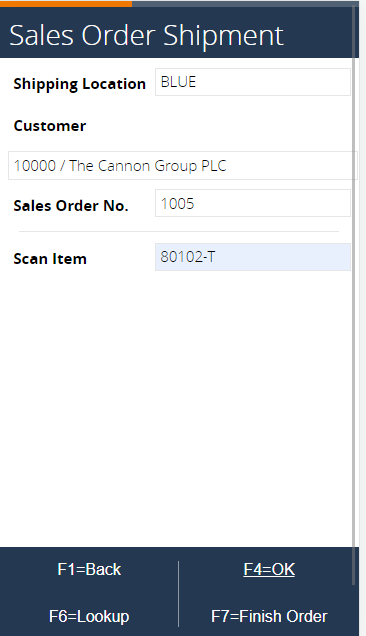
Enter the item number of the last line (80102-T) and press F4=OK.
Because the item is serial tracked, the process arrives at the serial number activity. Enter or select an available serial number from the lookup list. Confirm with F4=OK.
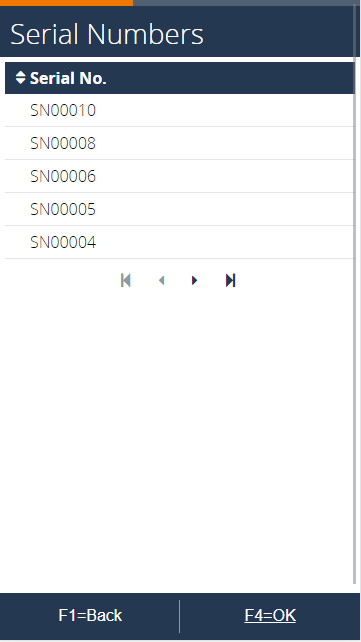
After confirming the serial number, the sales line is updated with tracking data, and the Quantity to Receive and Quantity to Invoice fields are incremented by one. The process returns to the scan item activity.
Repeat steps 15 and 16 to add another serial number.
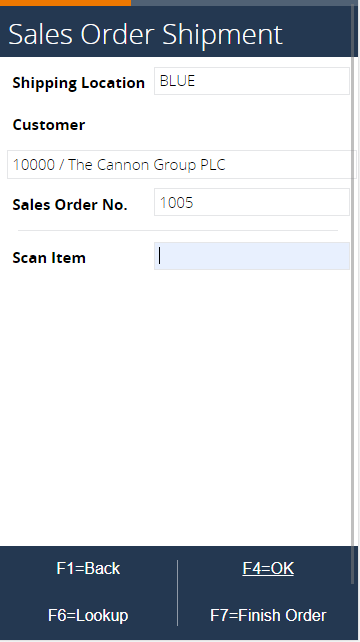
The process returns to the scan item activity. Press F7=Finish Order.
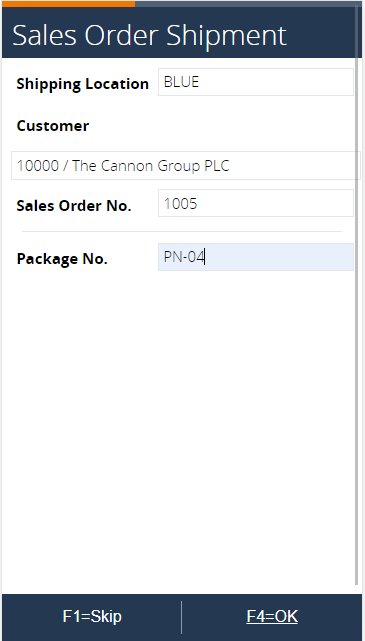
A package number can be defined in the next step. Enter one and confirm.
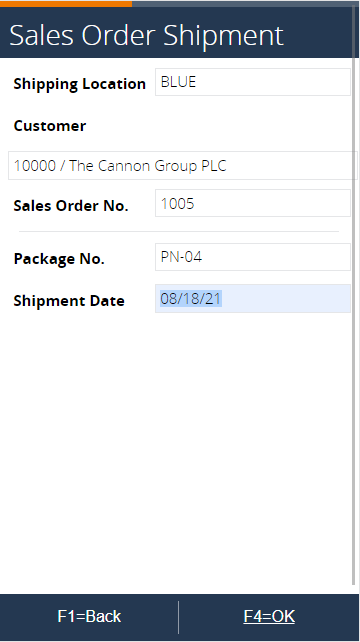
Enter the actual shipment date.
 To see the result in BC, find the sales order. The sales order header is updated and is scheduled to be posted via the Job Queue. The Posting Date and Document Date are populated with the entered shipment date. The quantity shipped is populated for each line with the entered quantities.
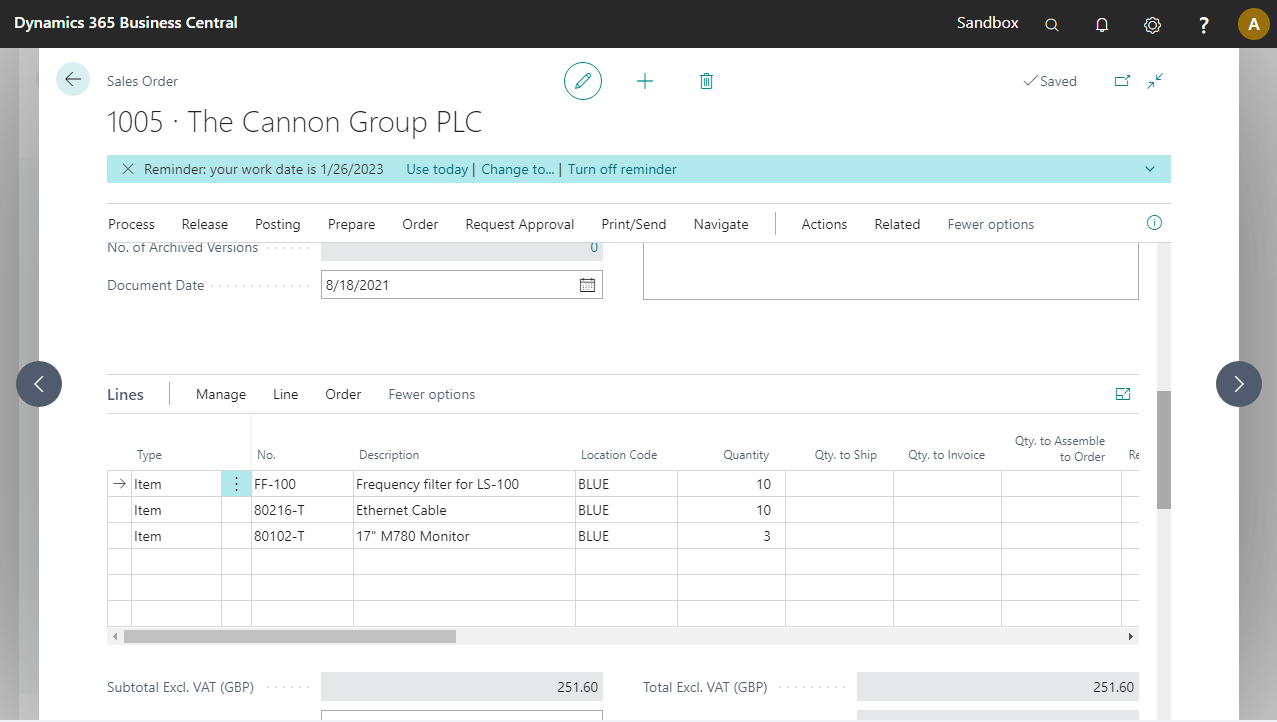
Go to Navigate > Shipments and select the shipment to see the shipment generated.