ANY Process Demo: Move Inventory
Overall process flow
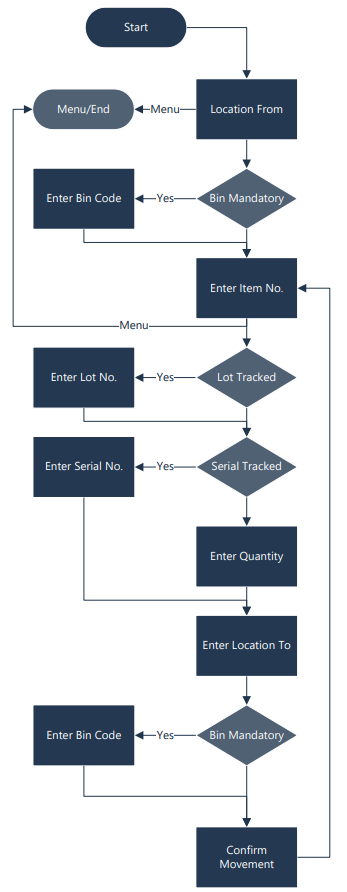
Steps
Make sure you have already set up the prerequisites for this process.
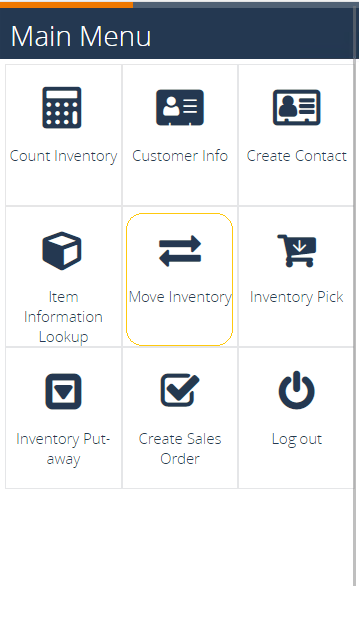
Select the Move Inventory button in the menu.
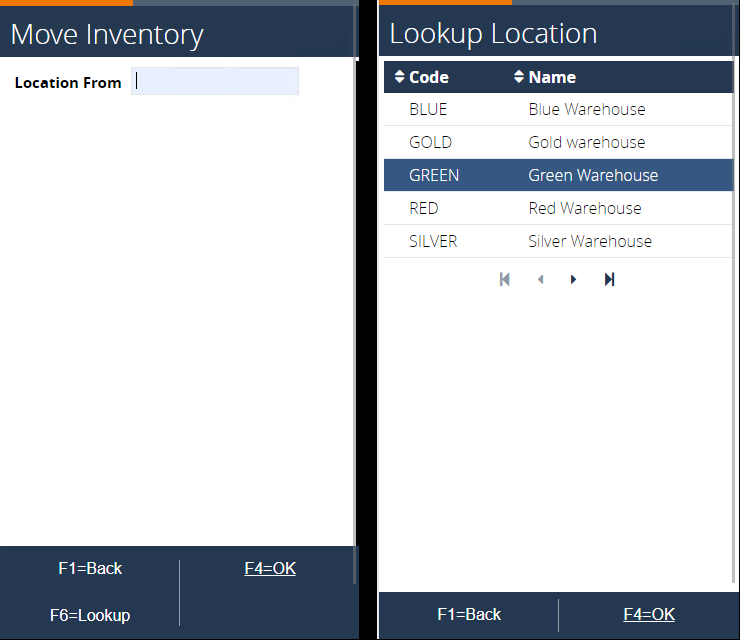
The following page appears. Enter location GREEN or select it via F6=Lookup. Confirm with F4=OK.
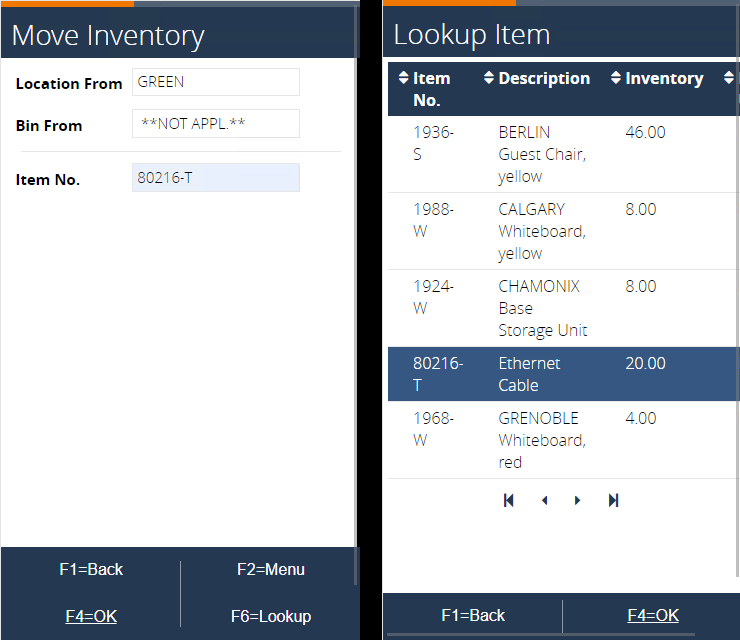
Enter the item number to be moved (for example, 1964-W), or use F6=Lookup to show a list of items available on the selected location. Confirm with F4=OK.

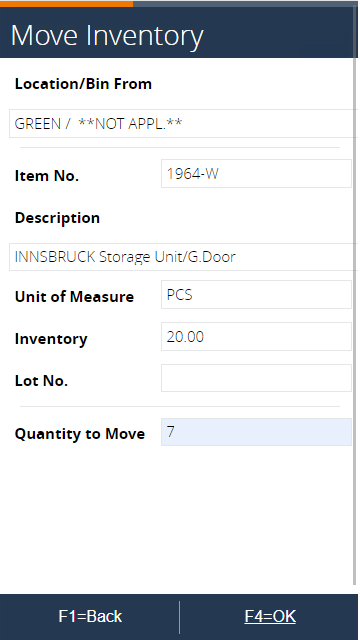
In the next page, enter the quantity to move (for example, seven). Confirm with F4=OK. Any input that exceeds the current inventory or is illogical generates an error.
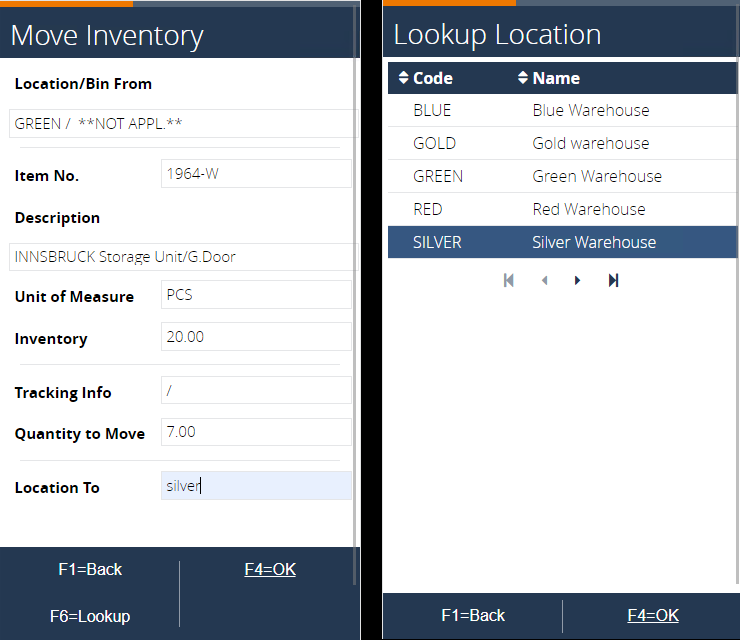
In the next page, enter the destination location. Enter or select location SILVER. Confirm again with F4=OK. The list shows only locations with Directed Put-Away and Pick, or In-Transit.
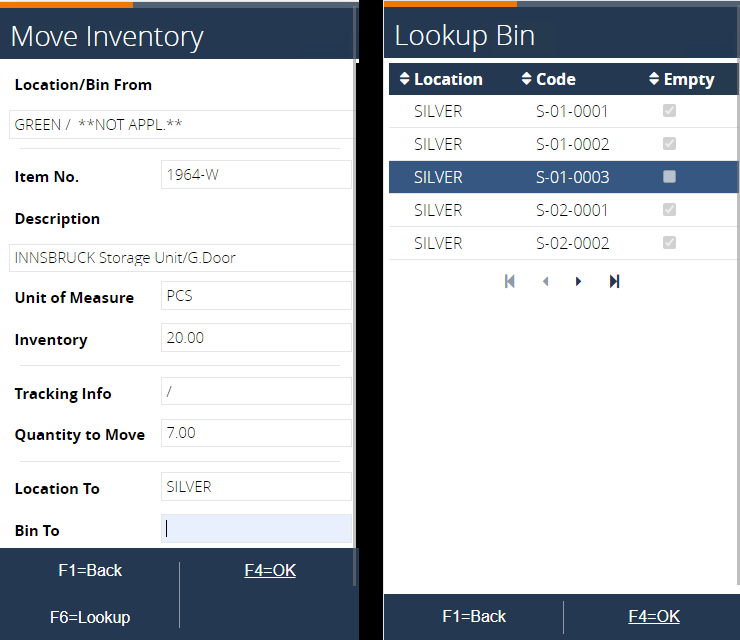
In the following step, a bin code is requested because location SILVER has Bin Mandatory set to true. Enter or select a bin code for the destination. Confirm with F4=OK.
Before the actual move takes place, the following page is shown where all data can be reviewed. If anything is wrong, go back to modify the incorrect data. Press F4=Confirm to post the movement.

After confirmation, a new line in the Item Reclass. Journal is created and subsequently posted.
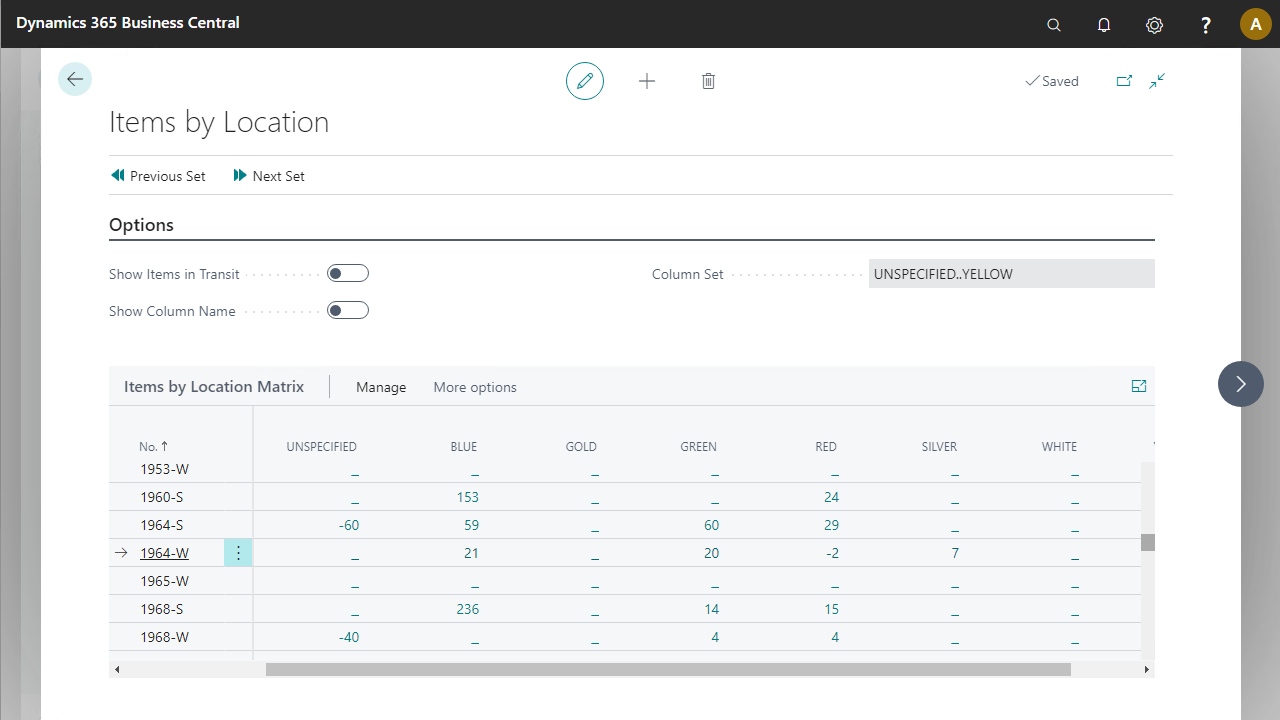
 To see the result in BC, go to Warehouse > Planning & Operations > Items. Search for item 1964-W. Select Related > Availability in the ribbon, then press the Items by Location button.
Note that the inventory dropped from 27 to 20 on location GREEN, and increased to seven on location SILVER.
Item tracking
The process returns to step 3. Enter item number 80216-T or select it from the list via F6=Lookup. Press F4=OK to continue.
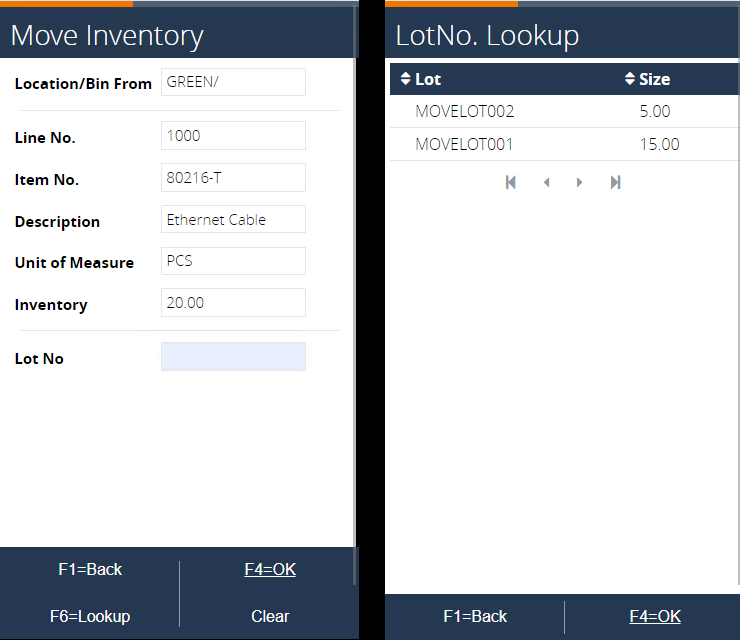
In the next page, a lot number is requested. Press F6=Lookup to select one of the lots on location. Then confirm by pressing F4=OK.
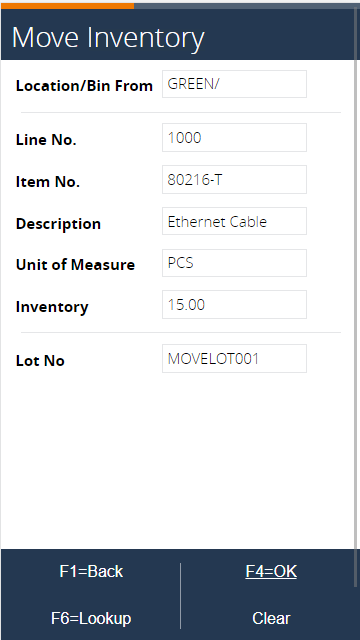
You return to the enter lot number page, now with the selected lot. Note the inventory changed from 20 to 15. Press F4=OK to continue, or press Clear to clear the lot number and select a new one.
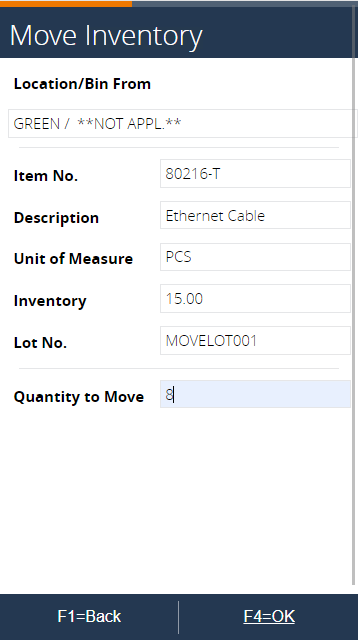
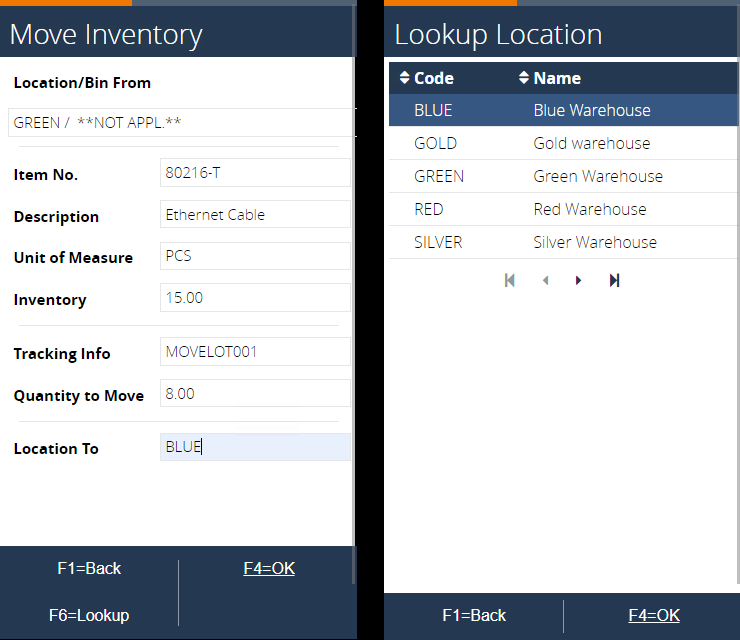
In the next page, enter the quantity to move. Enter an amount (for example, eight) and confirm with F4=OK.
Enter the destination location in the next page. Enter location BLUE or select it from the list via F6=Lookup.
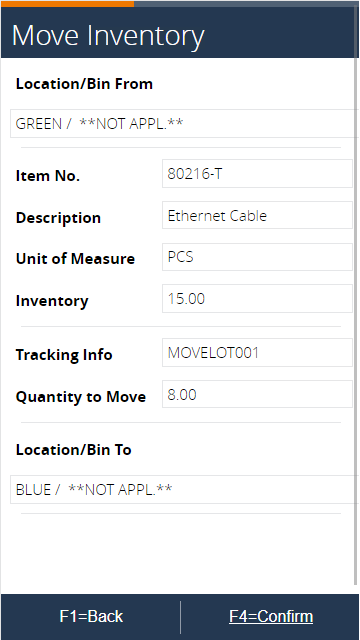
Because BLUE has Bin Mandatory set to false, the confirmation window appears next. Press F4=Confirm to post the movement.
After confirmation, a new line in the Item Reclass. Journal is created and subsequently posted.
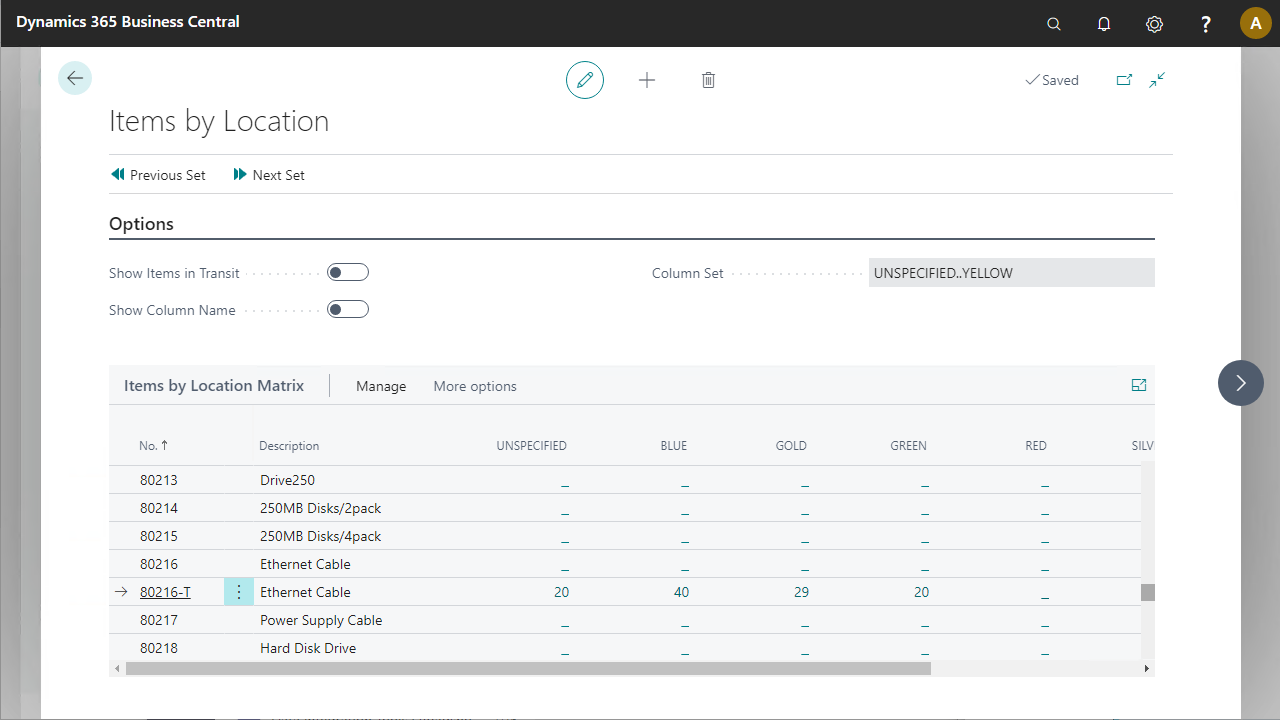
To see the result in BC, go to Warehouse > Planning & Operations > Items. Search for item 80216-T. Select Related > Availability in the ribbon, then press the Items by Location button.Note that the inventory for item 80216-T dropped by eight on location GREEN and location BLUE now has inventory increased by eight.
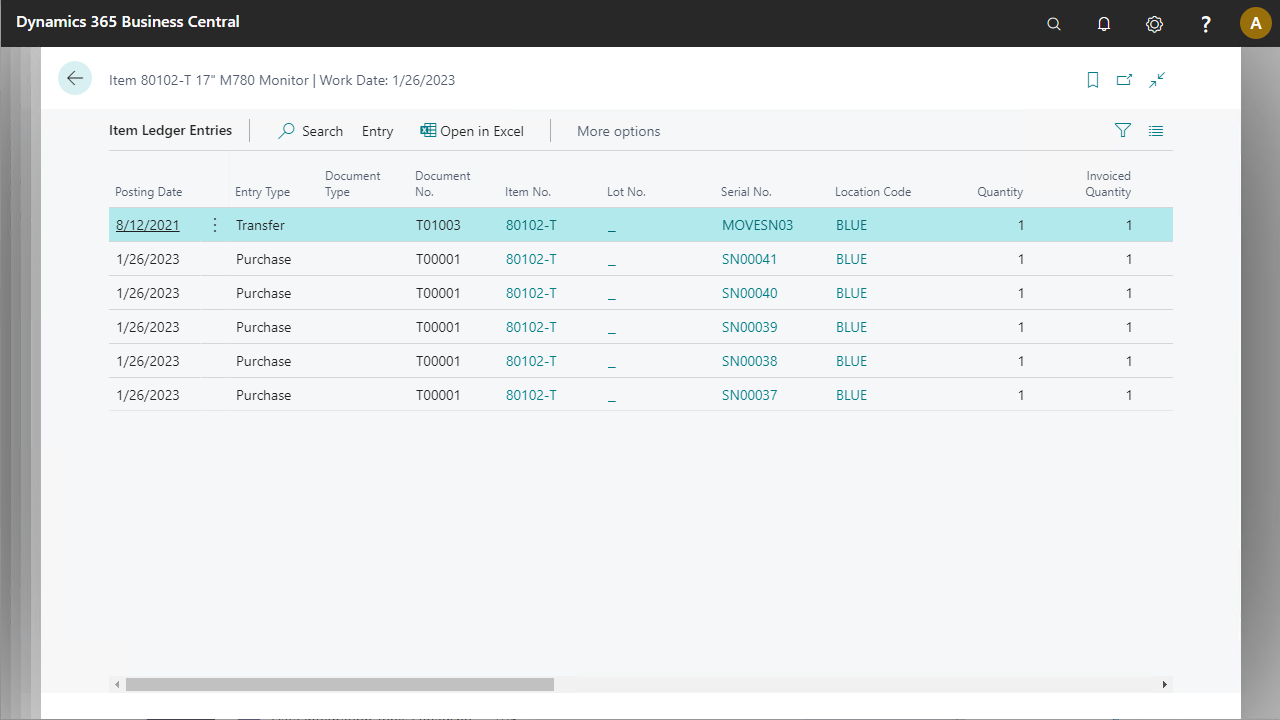
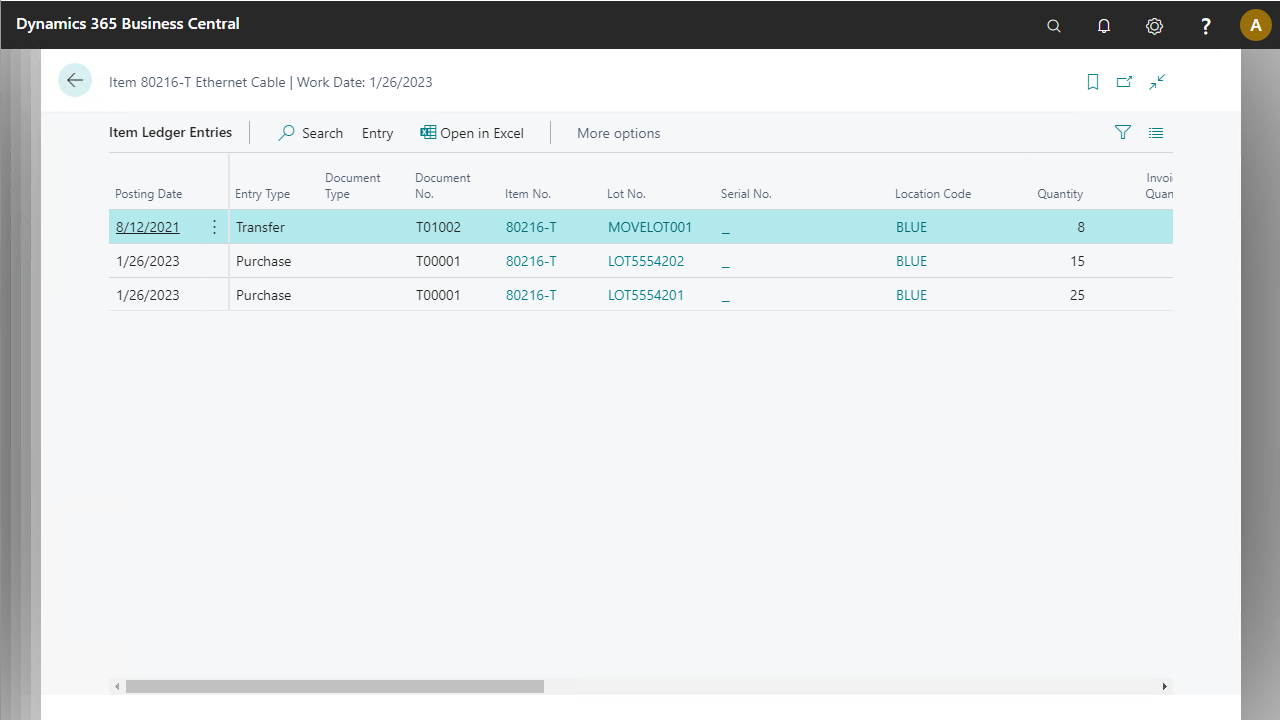
Double-click the quantity on location BLUE to see all item ledger entries for item 80216-T filtered on location BLUE.
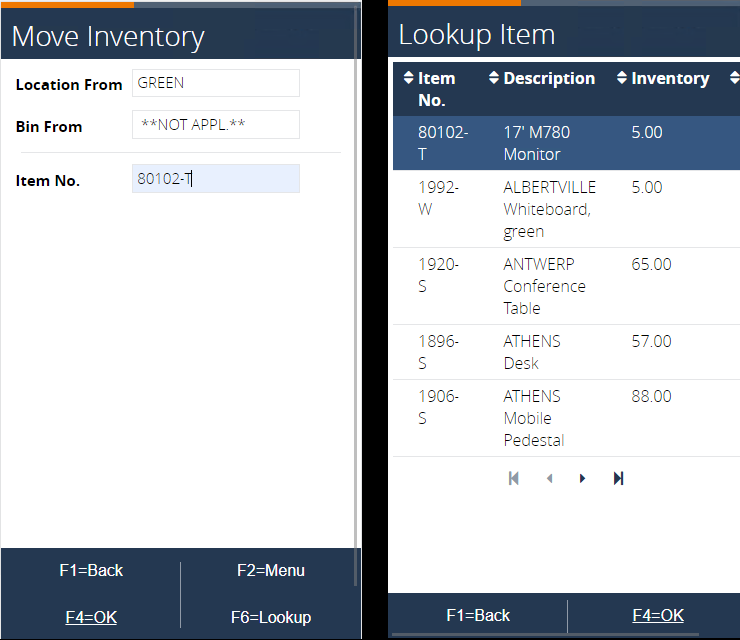
The process returns to step 3. Enter item number 80102-T or select it from the list via F6=Lookup. Press F4=OK to proceed.
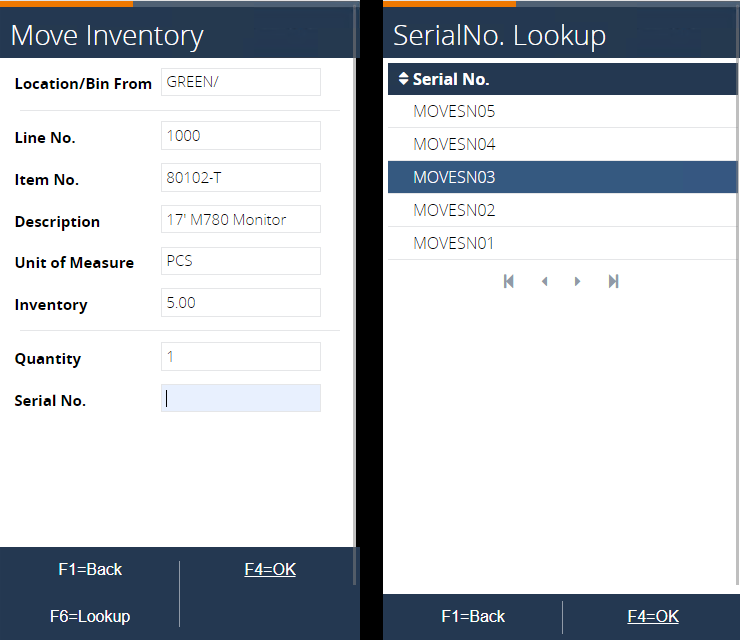
In the following page, the serial number is requested. Use F6=Lookup to select a serial number. Press F4=OK to confirm.
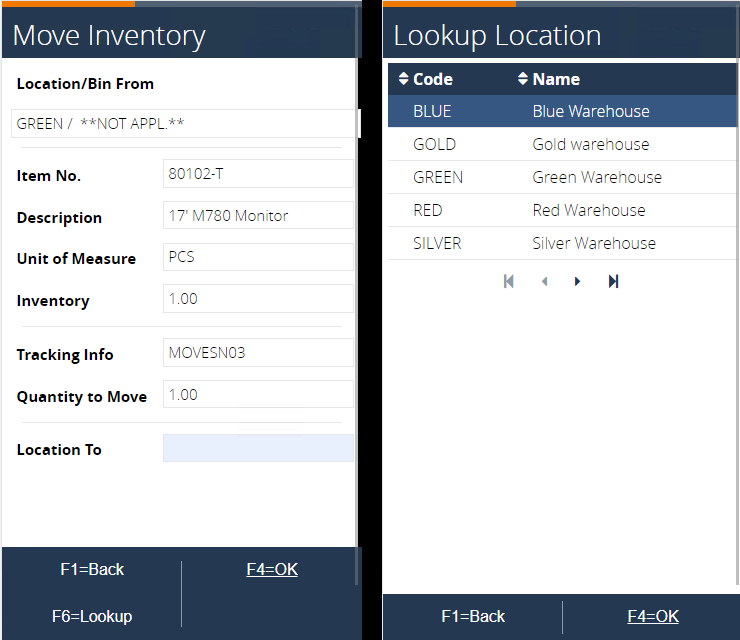
Because the quantity is fixed at one with serial tracking, the next page requests the location. Enter BLUE or select it from the list via F6=Lookup. Continue with F4=OK.
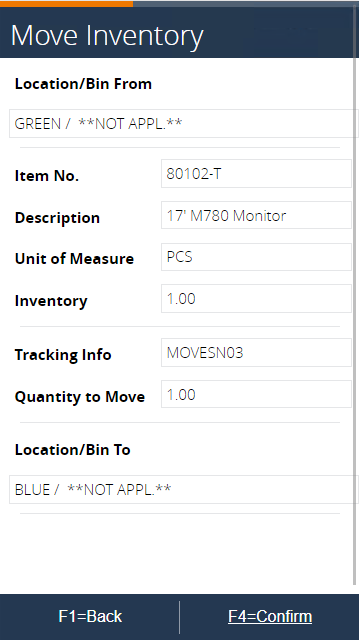
The confirmation activity is shown. Review the data, then press F4=Confirm to post the movement.
After confirmation, a new line in the Item Reclass. Journal is created and subsequently posted.
To see the result in BC, go to Warehouse > Planning & Operations > Items. Search for item 80102-T. Select Related > Availability in the ribbon, then press the Items by Location button.Note that the inventory for item 80102-T dropped by one on location GREEN and location BLUE now has inventory increased by one.
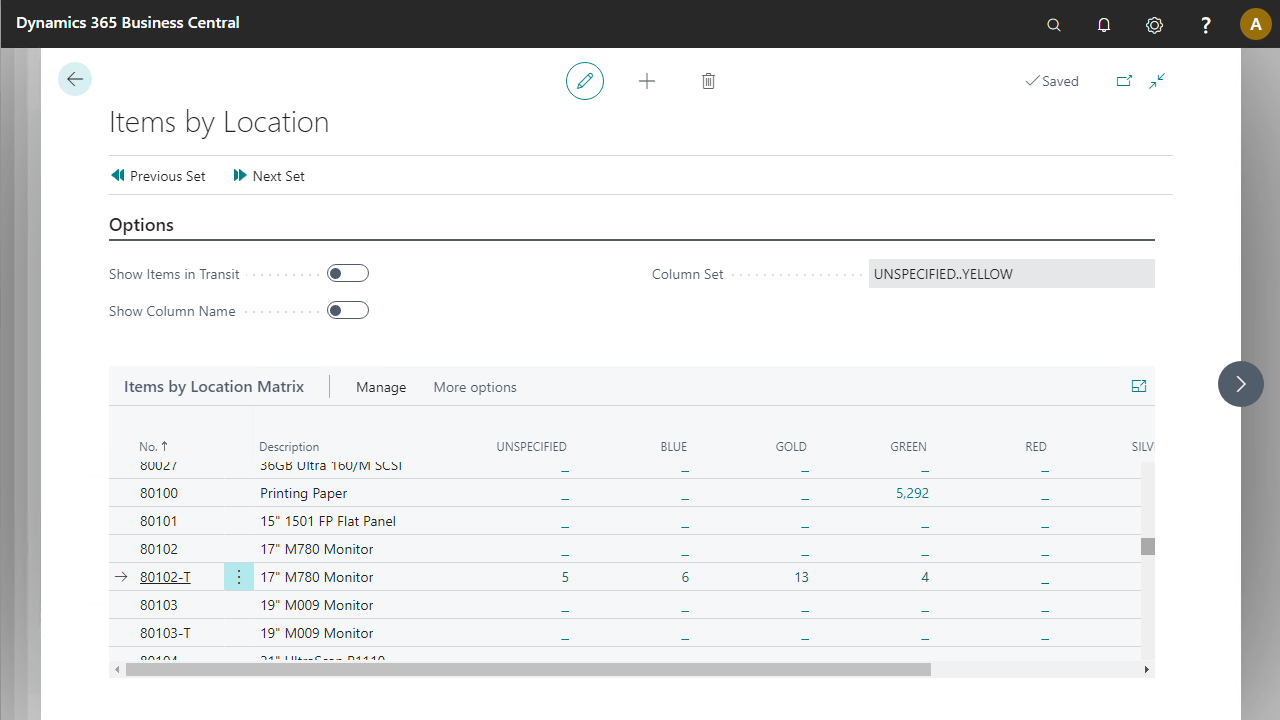
Double-click the quantity on location BLUE to see the item ledger entries, besides the quantity, item number, and location, the serial number is also shown.