ANY Process Demo: Inventory Pick
Overall process flow
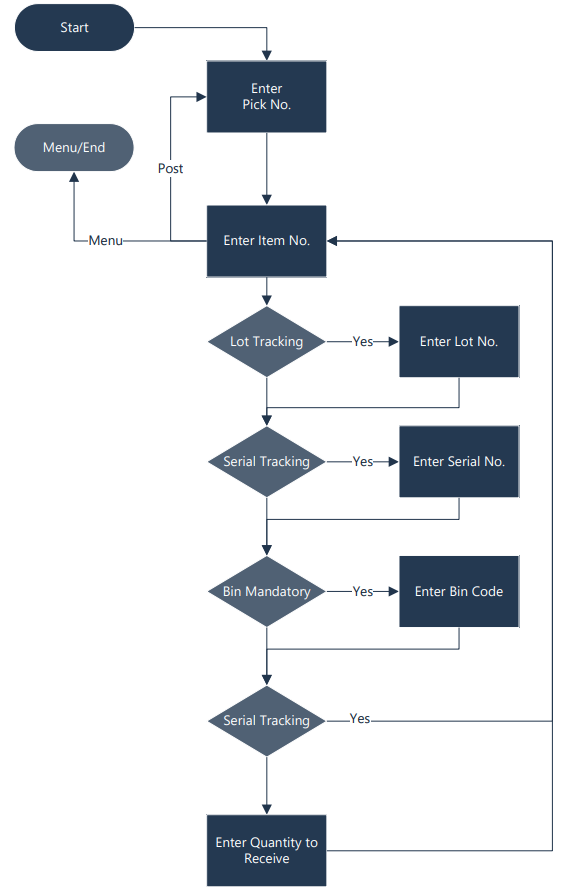
The Inventory Pick process supports the pick and shipment process in the warehouse based on an inventory pick document generated in advance in Microsoft Dynamics BC. After selecting an Inventory Pick document, enter the item code for each line in the document. Next, if the item is tracked, enter the Lot and/or serial number. Optionally, depending on the location setup, enter a bin.
Lastly, enter the quantity to handle. If the quantity to handle is less than the expected quantity to pick, the line is split, creating a new line with the quantity equal to the original outstanding quantity minus the quantity to pick.
Finally, the pick document is posted, which is reflected on the source document.
Steps
Make sure you have already set up the prerequisites for this process.
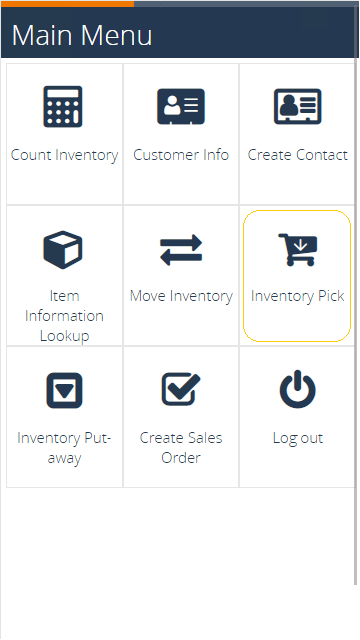
Select the Inventory Pick menu button.
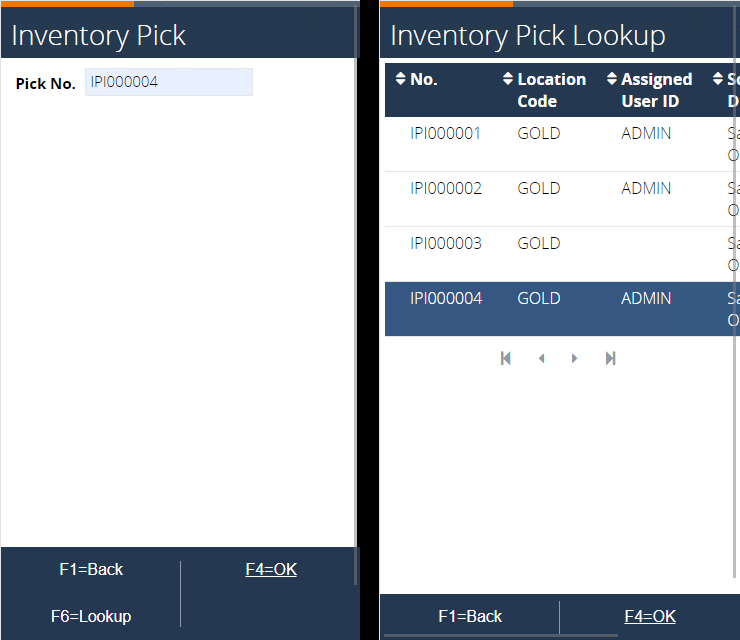
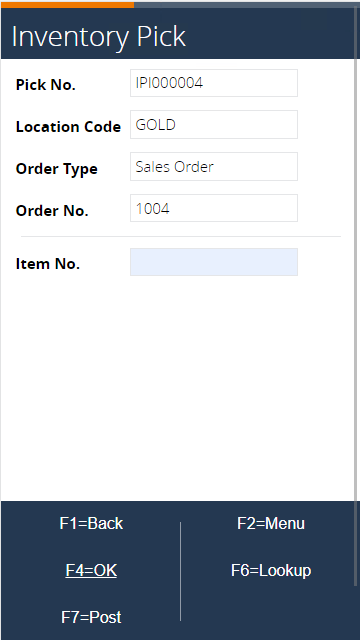
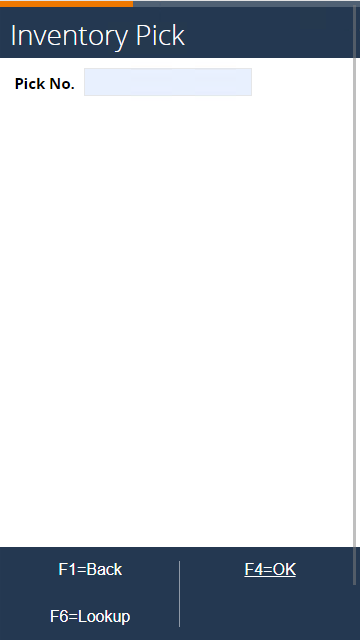
The next page appears. Enter the Inventory Pick number that was created, or use F6=Lookup to select it from a list. Press F4=OK to confirm.
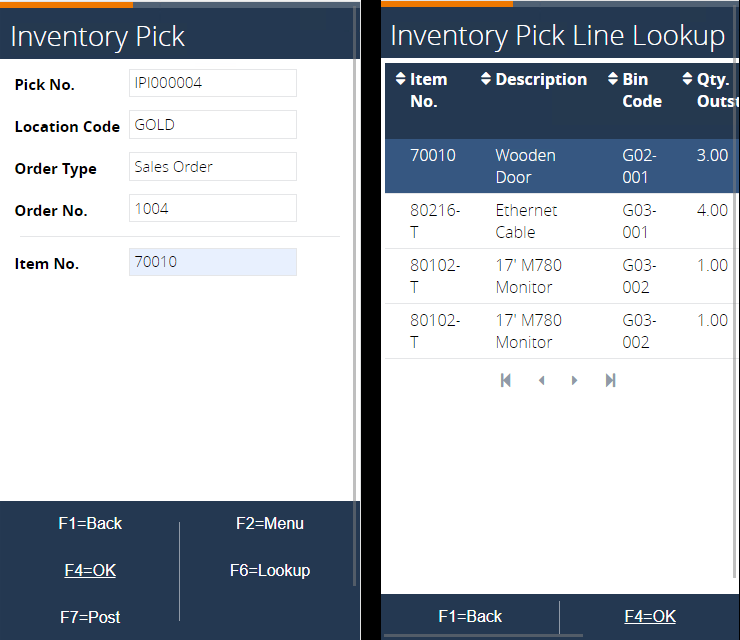
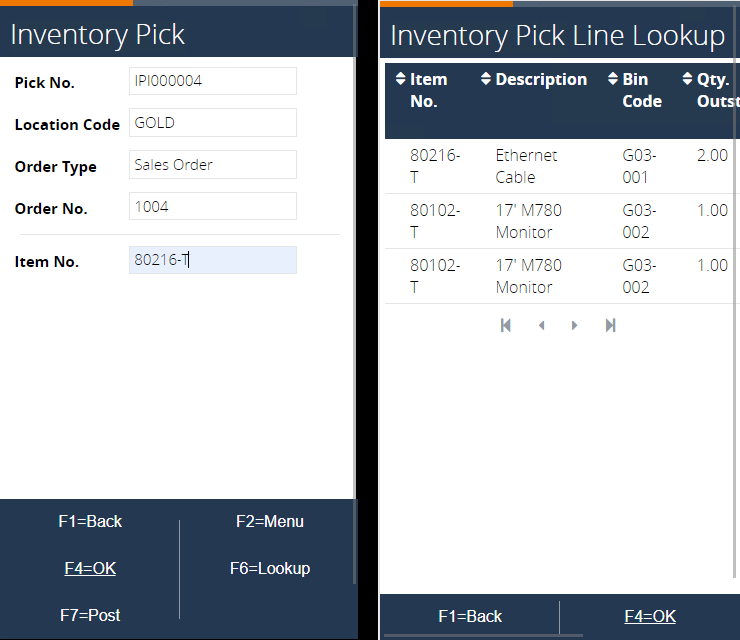
Scan items in this step. Enter an item number or use F6=Lookup to select items from a list. Confirm again with F4=OK.
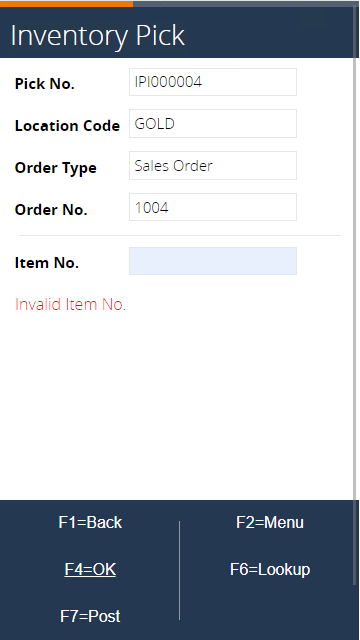
If an item is scanned that is not related to the pick, an error message appears.
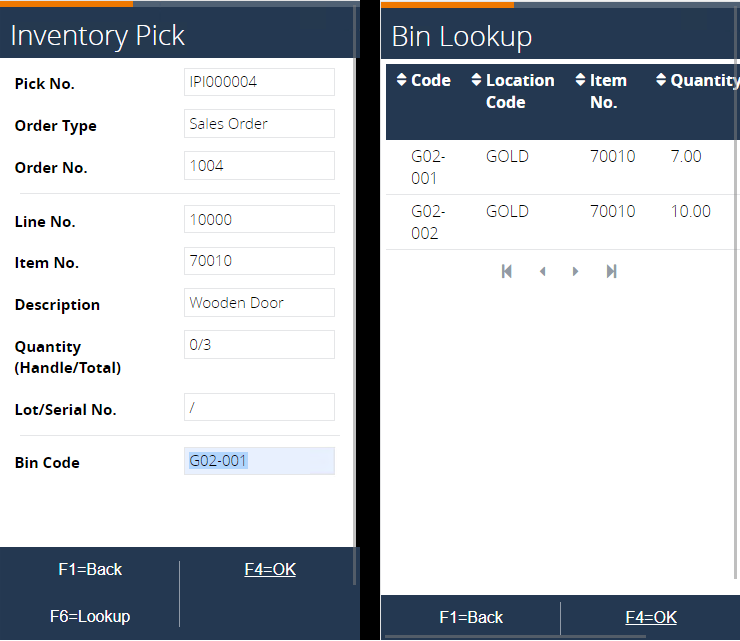
Enter a bin code where the items will be stored. The suggested bin comes from the pick line. Use F6=Lookup to view a list of bins. Continue by pressing F4=OK. Only bins with the scanned item are displayed.
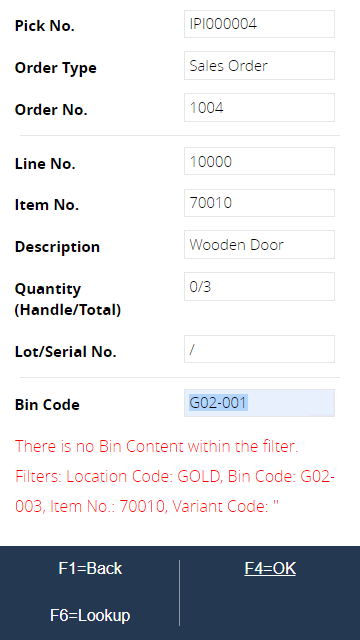
If a bin without stock is scanned, an error message is displayed.
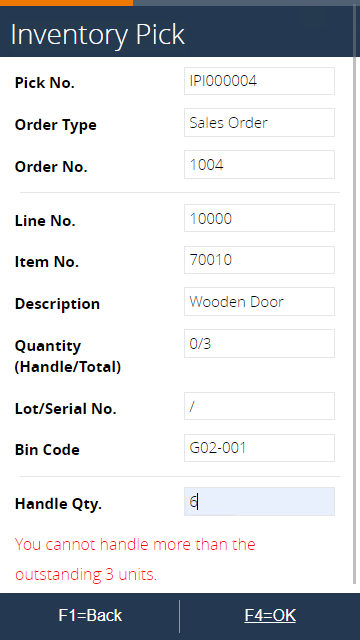
Enter the quantity to handle (for example, six, make sure it is more than the total quantity) and press F4=OK.
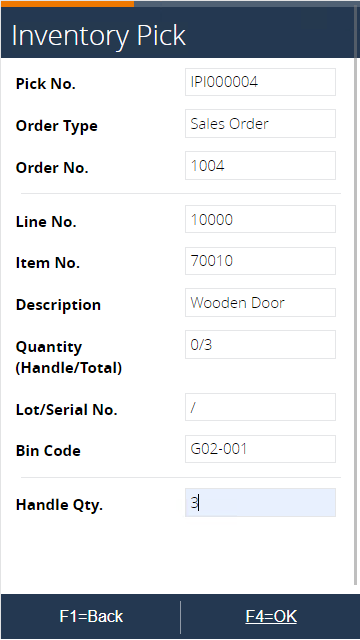
Enter the total quantity (for example, three) and press F4=OK to confirm.
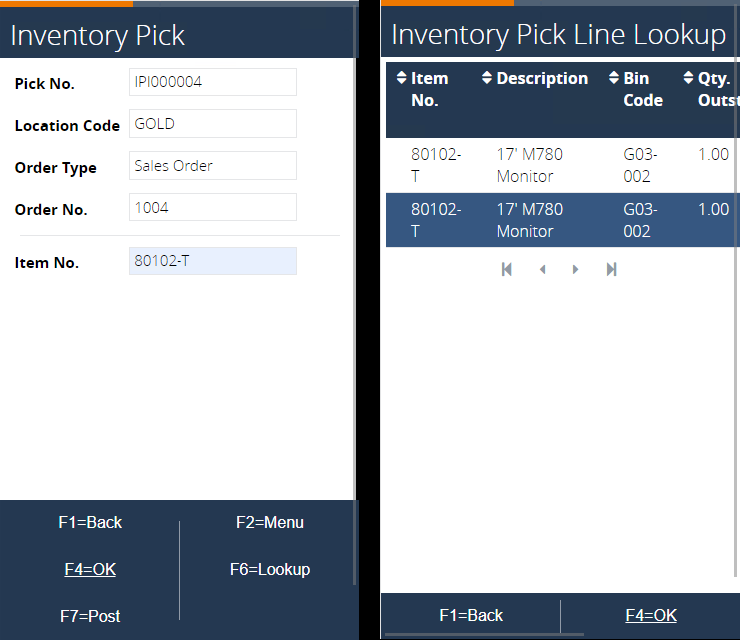
The process returns to the Item No. step. Press F6=Lookup to view the lines. Notice the first handled line is not visible, fully handled lines are hidden. Select the second line with the Lot-tracked item. Confirm with F4=OK.
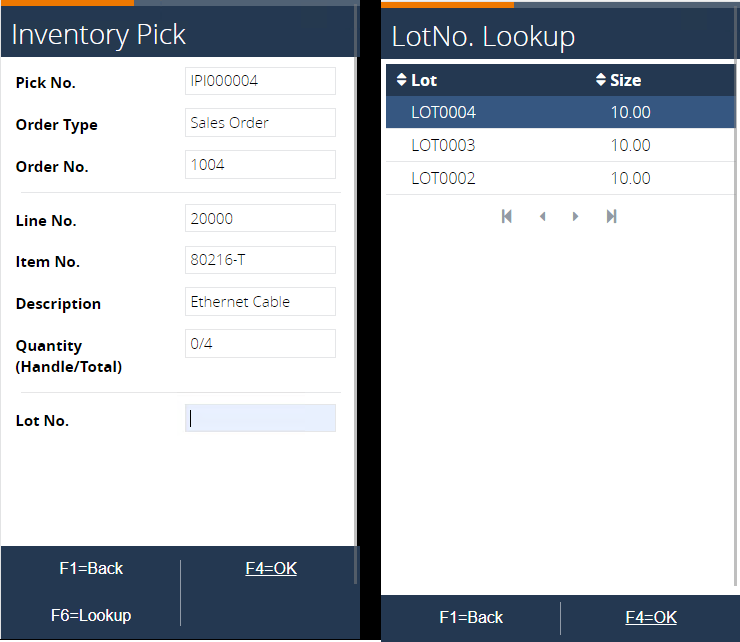
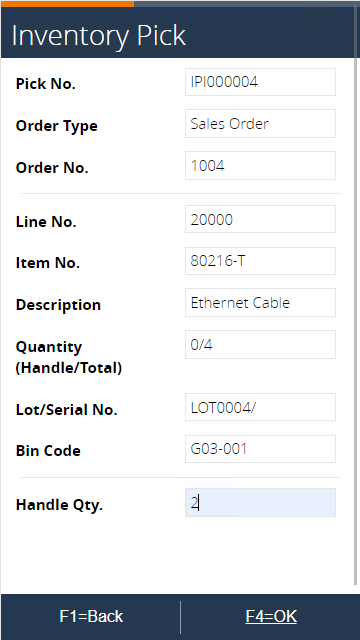
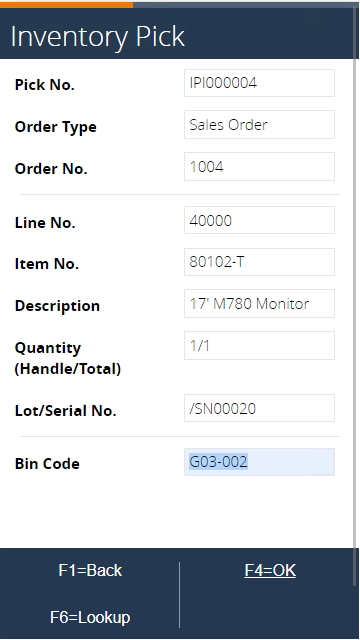
The next step asks for a Lot Number. Use F6=Lookup to select an available lot, then confirm with F4=OK.
Confirm the suggested bin code with F4=OK to go to the next step, or select a bin code from the list with F6=Lookup.

Enter the quantity to handle in this step. Enter a quantity that is less than the Quantity outstanding (for example, two). Confirm with F4=OK. By pressing OK, the system updates the Inventory Pick line in Microsoft Dynamics BC.
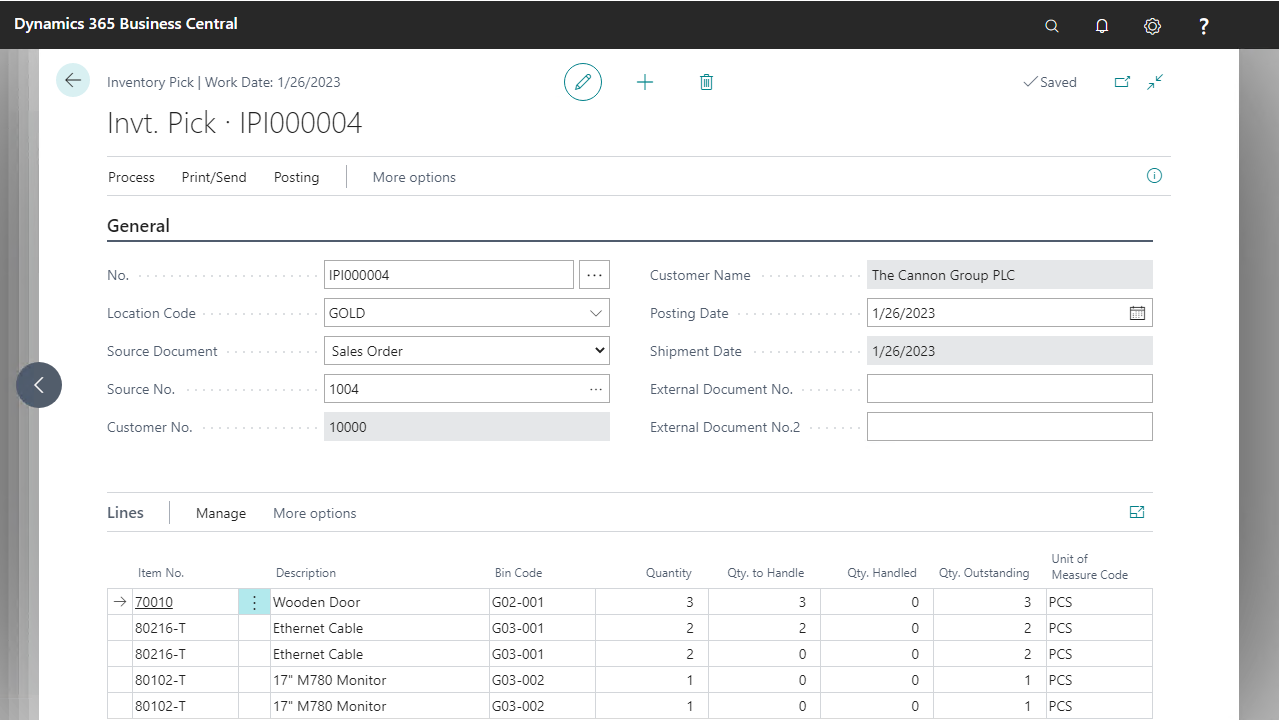
 To see the result in BC, open your inventory pick. There are now two lines with item 80216-T.
The first line: the Bin Code, Lot No., and Qty. To Handle are populated. The Quantity changed from four to two.
The second line: all data is copied from the first line, but the Qty. To Handle is reset to 0 and the Quantity is filled with the original quantity minus the Qty. to Handle of the first line.
Repeat steps 9–12 to handle the remainder for the second item.
What actually happens is the execution of the Split Line function in the mobile process while updating the Qty. to Handle on the Pick document line.After confirmation, the process returns to the Scan Item activity. Enter or select the third item.
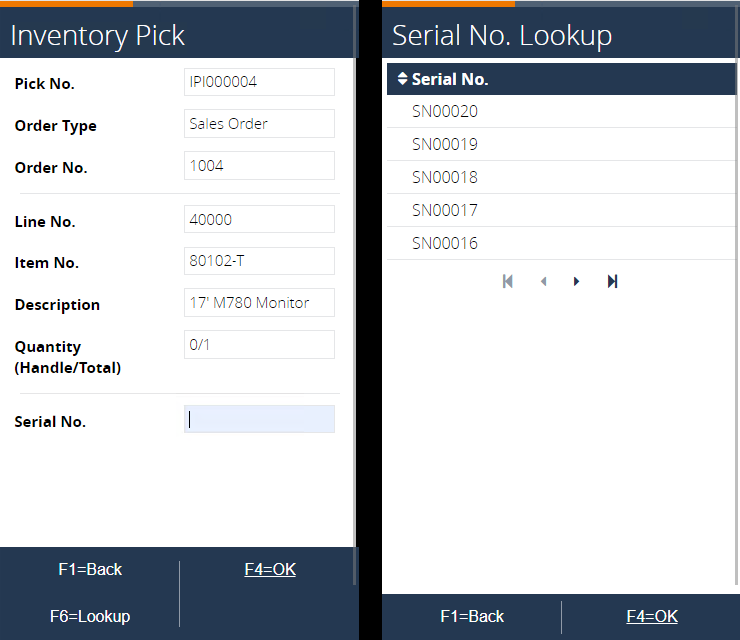
The last item is serial number tracked, so a separate line exists for each item. Enter an available serial number or select one with F6=Lookup and continue with F4=OK.
Enter the bin code in the following step and confirm again with F4=OK.
Repeat steps 14–16 to update the last line.
No quantity to handle is requested because it is fixed at one for serial tracked items. The system updates the pick in Microsoft Dynamics BC.
To see the result in BC, open your inventory pick and observe the changes.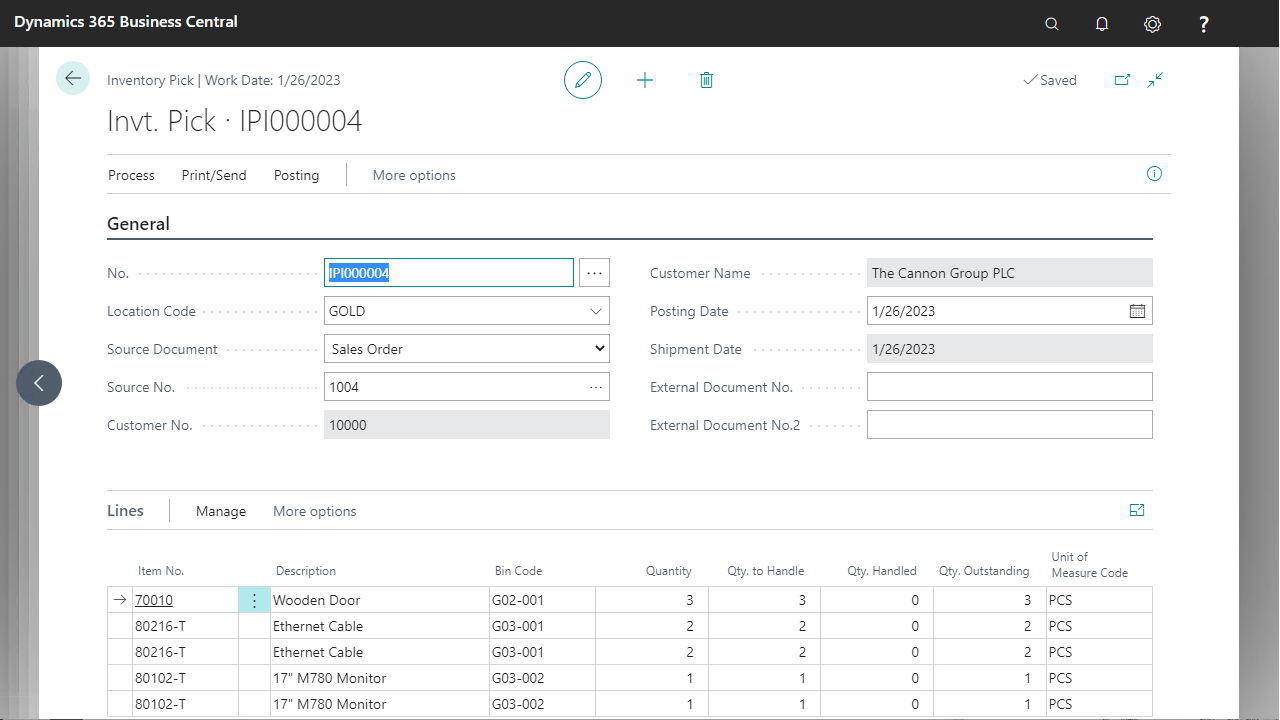
The process returns to the Enter Item activity. Press F7=Post to schedule the inventory pick to be posted via the job queue.
The process returns to the first step, while in the background the inventory pick is being posted.
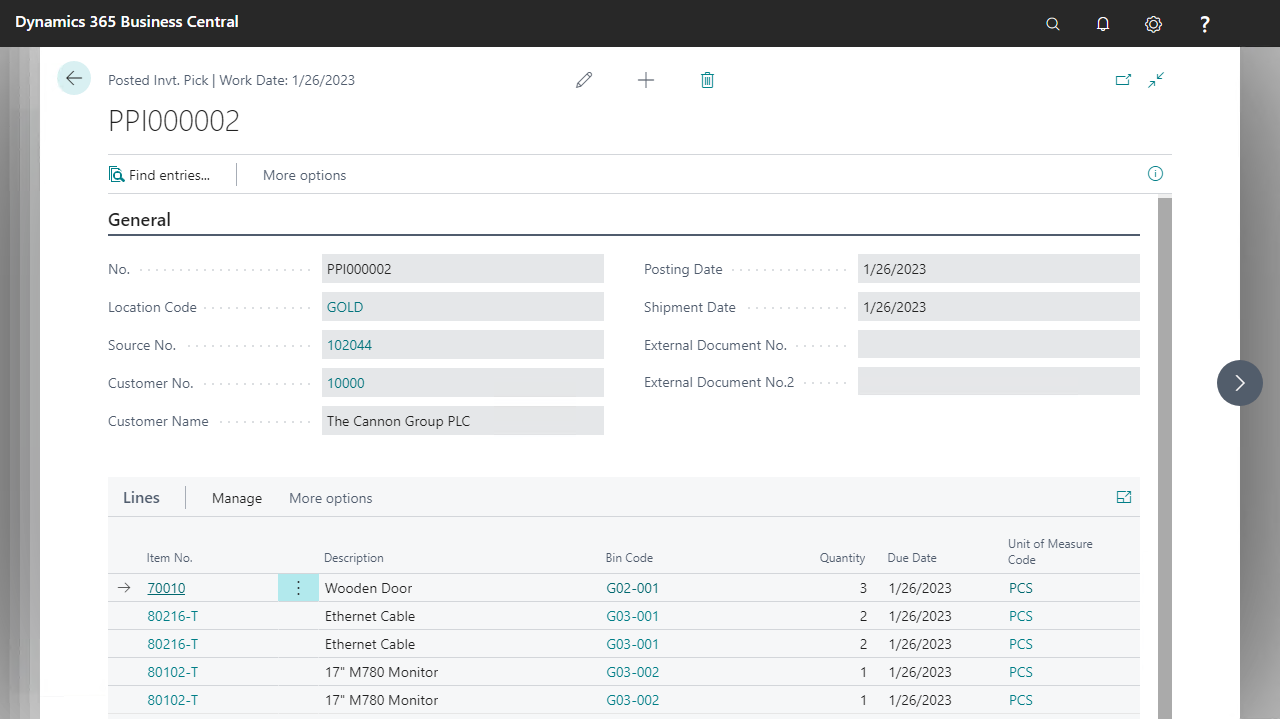
 *To see the result in BC, go to Warehouse > Planning & Operations > Posted Documents > Posted Invt. Pick.