Azure Storage Account Setup
This page details how to setup a connection to Azure File Storage for BC BIS end users.
Step 1
Setup an azure storage account.
https://docs.microsoft.com/en-us/azure/storage/files/storage-how-to-create-premium-fileshare?tabs=azure-portal (if gone, use archive.org)
Choose an appropriate storage account name. After you have completed setting up the storage account head over to the settings page of your storage account and write down one of the access keys you want to use to connect with.
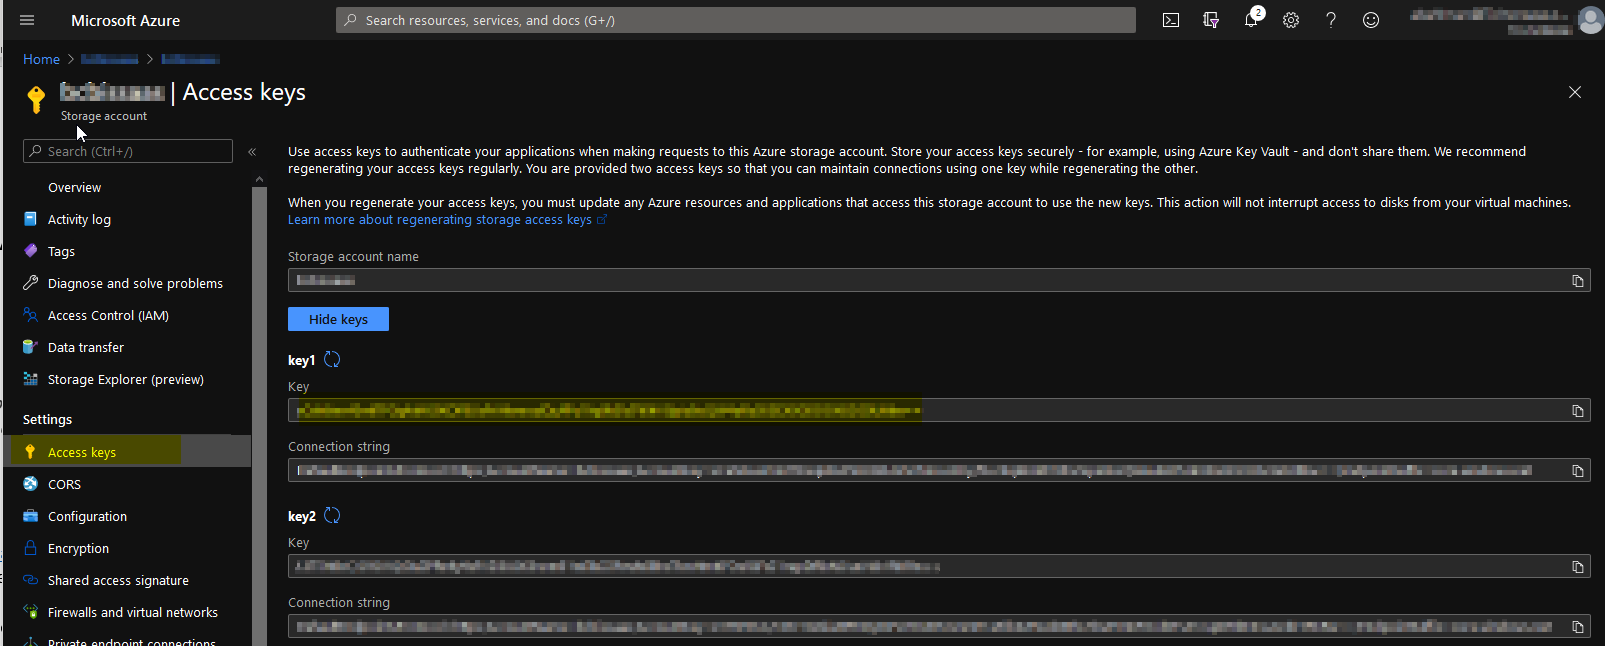 Both the storage account name and one of the access keys are needed to connect to the azure storage.
Step 2
Download Azure Storage Explorer from the Microsoft website (https://azure.microsoft.com/en-us/features/storage-explorer/). After you have installed and launched the storage explorer, right-click storage accounts and choose connect to Azure storage.

Step 3
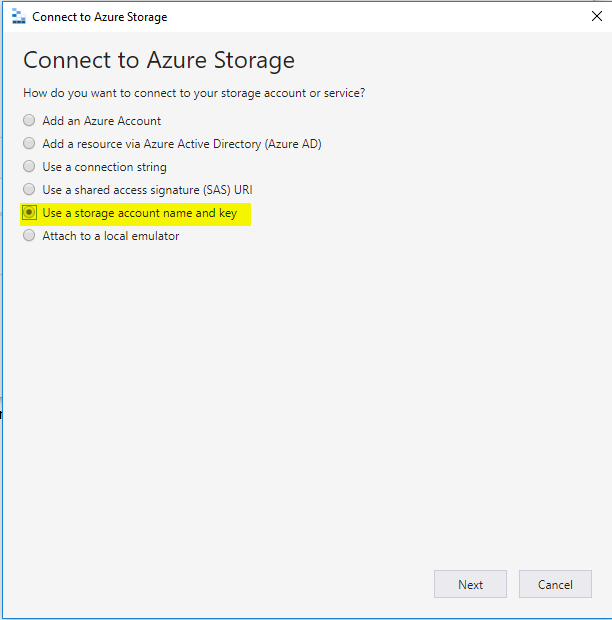
Make sure we connect via account name/key combination.
Step 4
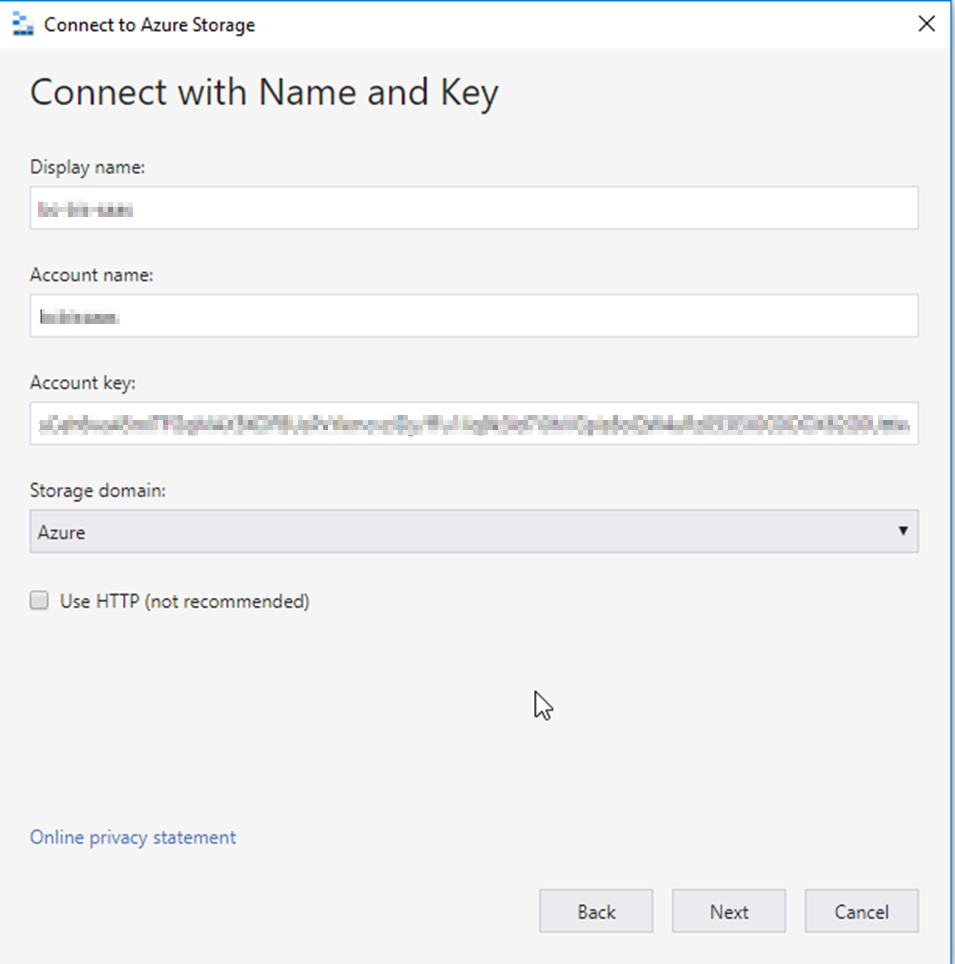
Use the following details:
Display name
<choose a name of your liking, you can change this later>
Account name
<fill in the storage account name from Step 1>
Account Key
<fill in the complete access key from Step 1, including the trailing == signs>
Storage domain
In most cases the default will be good but open the dropdown to see if you need to choose a particular jurisdiction.
Step 5
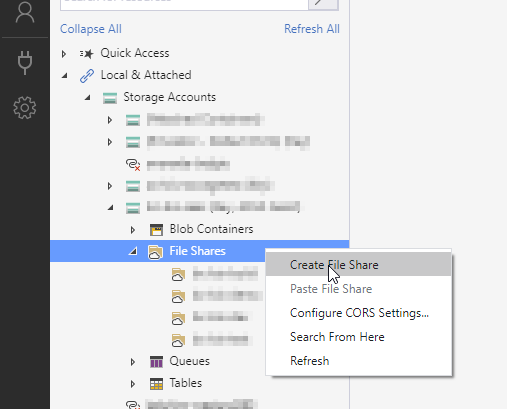
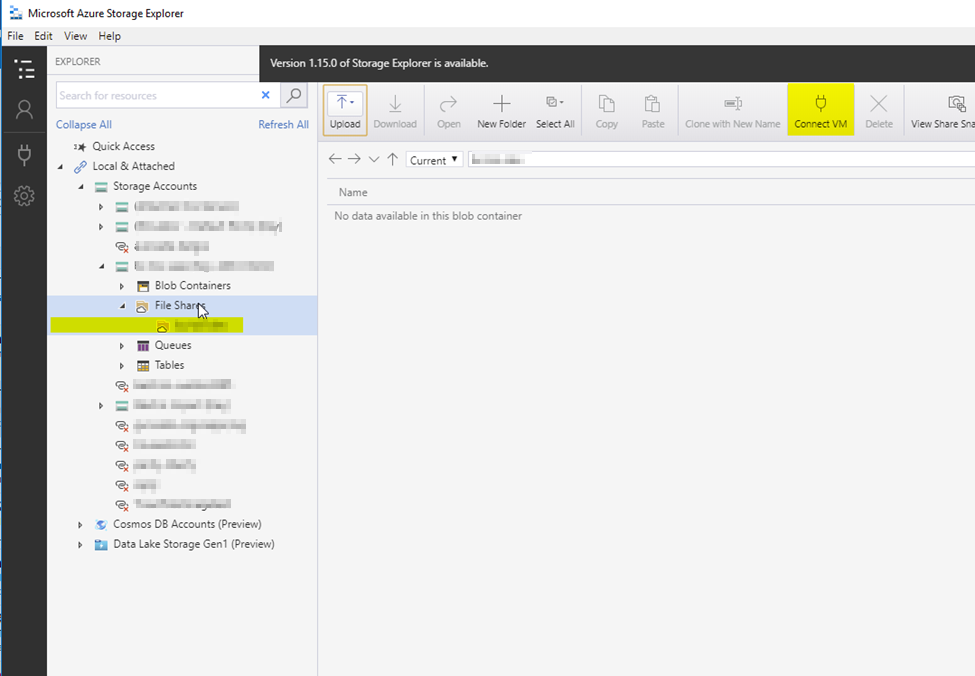
Create a file share. An Azure File Storage account can contain multiple file shares. In Windows parlance, a file share is best considered as a storage volume. Each of those file shares are accessed by the same access keys, as access keys are defined on the storage account level. To create a file share, head over to your storage account in the left pane, select the node File shares directly below it, and right click to open the context menu that allows you to create a file share.
Step 6
Make folders as you wish within your newly created file share.
Step 7
Configure the Azure file reader in Business Central.
Folder Name The folder path you wish to read from (see Step 6). Note: make sure the folder(s) exist on the file share. The file share name itself is not part of the folder path.
File filter The file name. You can use a simple pattern with a wild card, like foo*.xml to find any xml files starting with foo.
Use Regex in File Filter If enabled, you can now use regular expressions in the File Filter input field. Note that the * character has a different meaning in the context of regular expressions. This is a powerful option for advanced users only.
File share Fill in the file share name as you created in Step 5.
Storage key Fill in the access key, see Step 1.
Storage account Fill in the storage account name, see Step 1.
The same steps must also be applied on the AzFileWriter Endpoint.
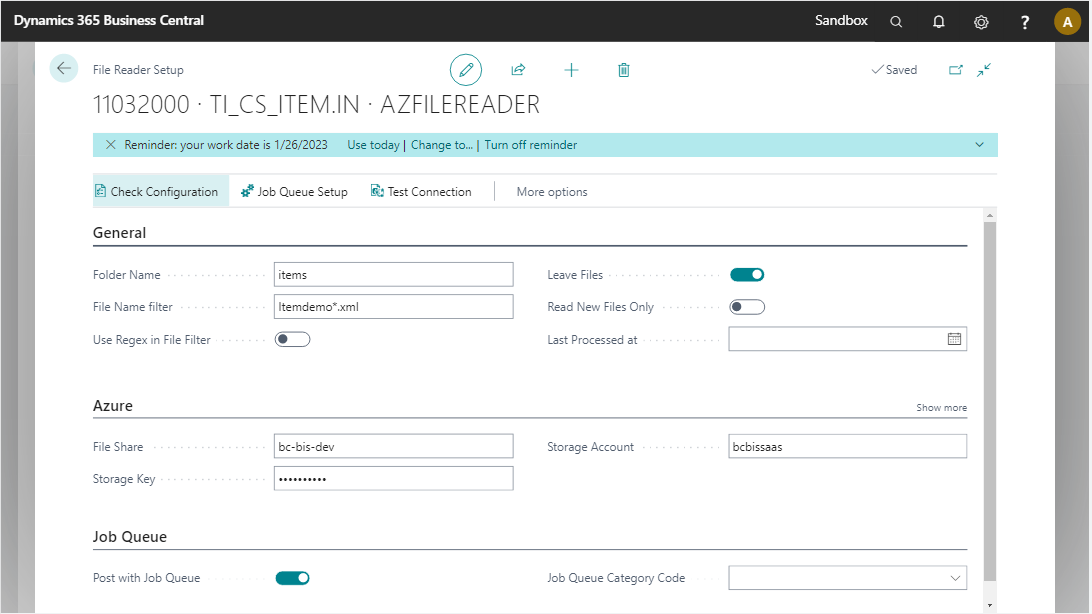
The menu button Check Configuration allows you to check whether the system is able to connect to your Azure Storage Account.
Additional Information
For the more technical users If you click on Connect VM, you will get the command to mount this storage as a local folder in windows. This screen also shows you the key, which is useful to copy over to the Azure File Connector configuration page.
Job Queue
The Az File Reader can run with a seperate job queue entry instead of being picked up the by the product job queue. This gives the flexibility of setting a different interval of when files need to be picked up.
| Field | Description |
|---|---|
| Process with Job Queue | Select this field if you want to process Az File Reader endpoint using a separate Job Queue. |
| Job Queue Category Code | Specifies the code of the job queue category to which the job queue entry belongs. Choose the field to select a code from the list.When a job queue category code is defined messages for this connection will be run in a serial manner. |
